
Oh, Italian desserts! Is there anything quite as magical? Whenever I think of them, my mind just drifts to cozy cafés and elegant dinner parties. And when it comes to iconic Italian treats, nothing, and I mean NOTHING, beats a classic Tiramisu. It’s just this dreamy combination of espresso-soaked ladyfingers and creamy, dreamy mascarpone that basically melts in your mouth. It’s my go-to when I want something a little fancy but also totally fuss-free because, guess what? No baking required! It feels like a little bit of heaven in every bite.
Why You’ll Love This Classic Tiramisu
Seriously, this Tiramisu is a winner and here’s why:
- Incredibly Rich Flavor: That coffee and mascarpone combo? Pure bliss.
- Dreamy Creamy Texture: It’s so smooth and velvety, it’s unreal.
- No Baking Required!: Yep, you heard me right. Stress-free dessert heaven.
- Impresses Everyone: Perfect for dinner parties or just a special treat for yourself.
- Can Be Made Ahead: Saves you time when you’re entertaining.
- Pure Italian Delight: Tastes just like the real deal you’d get in Italy!
Ingredients for Authentic Tiramisu
Okay, so for this dreamy Tiramisu, you’ll want to grab these goodies. Don’t skimp on the quality here, because it really makes a difference!
- 6 large egg yolks (make sure they’re fresh!)
- 3/4 cup granulated sugar
- 16 ounces mascarpone cheese, softened (this is key for smoothness!)
- 1 1/2 cups strong brewed coffee, cooled (espresso works wonders too!)
- 1/4 cup coffee liqueur (like Kahlúa or Tia Maria, but this is totally optional)
- 24 regular ladyfingers (the crisp kind, not the soft ones)
- Unsweetened cocoa powder, for dusting (gotta have that authentic finish!)
Essential Equipment for Making Tiramisu
Alright, to whip up this amazing Tiramisu, you won’t need a whole professional kitchen, but a few key items make all the difference. You’ll definitely want a good heatproof bowl and a medium saucepan for that lovely zabaglione. A sturdy whisk is a must for getting everything smooth, and of course, you’ll need a nice 9×13 inch baking dish to assemble your masterpiece. Oh, and don’t forget a sifter or fine-mesh sieve for that perfect cocoa dusting!
Step-by-Step Guide to Perfect Tiramisu
Alright, let’s get down to making this Tiramisu magic happen! It really is a pretty straightforward process, but every little bit counts for that perfect bite. Trust me, the slight effort is SO worth it. You’ll be amazed at how impressive this looks for something you basically just ‘assemble’! For more tips and ideas, check out my guide to classic Tiramisu.
Preparing the Mascarpone Cream
First things first, let’s make that dreamy, creamy filling. Grab a heatproof bowl and whisk together your egg yolks with the sugar. Now, here’s the crucial part: set that bowl over a saucepan filled with simmering water. Make sure the bottom of the bowl isn’t actually touching the water – we’re gently warming and cooking those yolks. Keep whisking! It’ll take about 5 to 7 minutes for the mixture to get nice and thick, looking pale and almost ribbon-like. Once it’s ready, take it off the heat and let it cool down a bit. Gently fold in your softened mascarpone cheese. You want to do this super gently, just until everything is combined. Overmixing is the enemy here; we want it to stay light and airy!
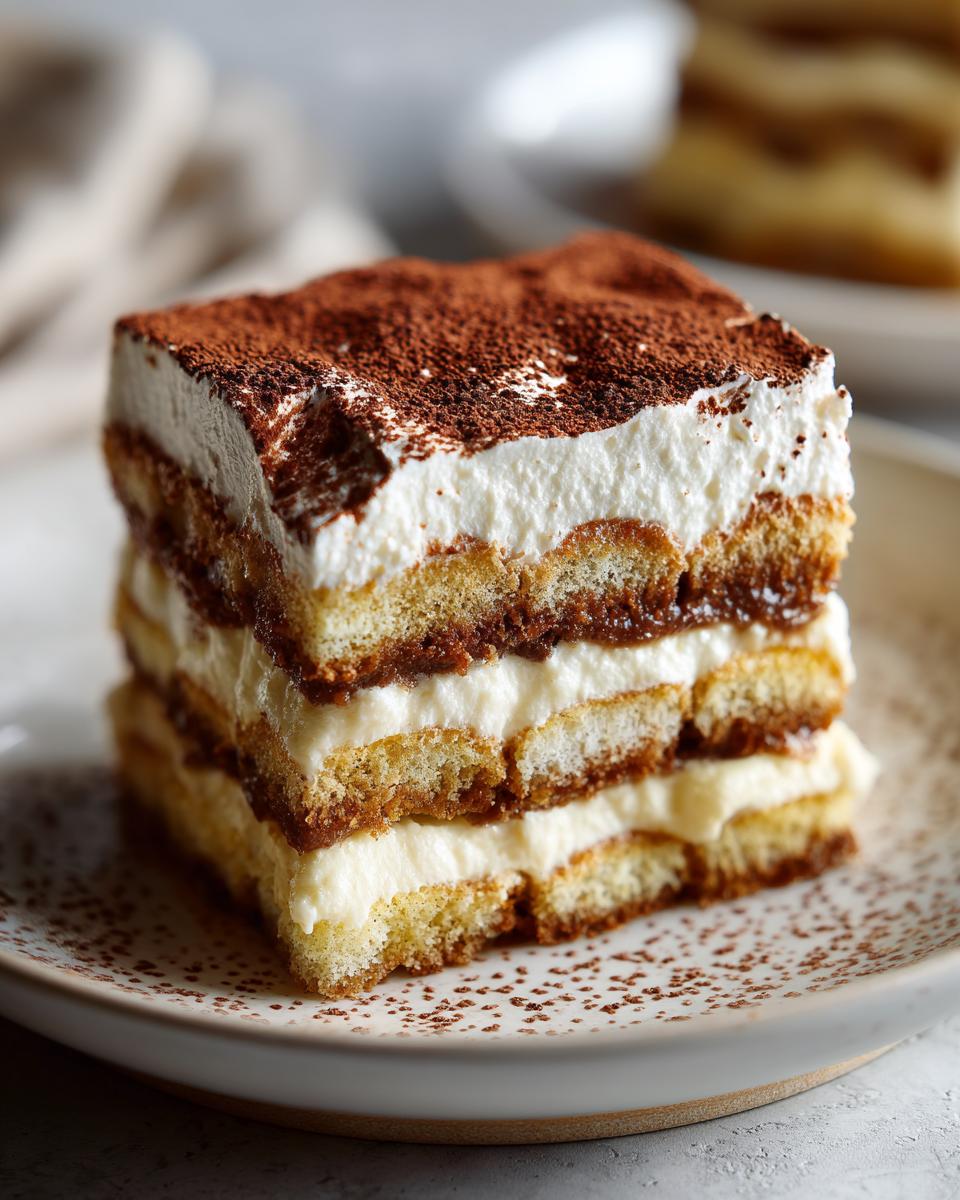
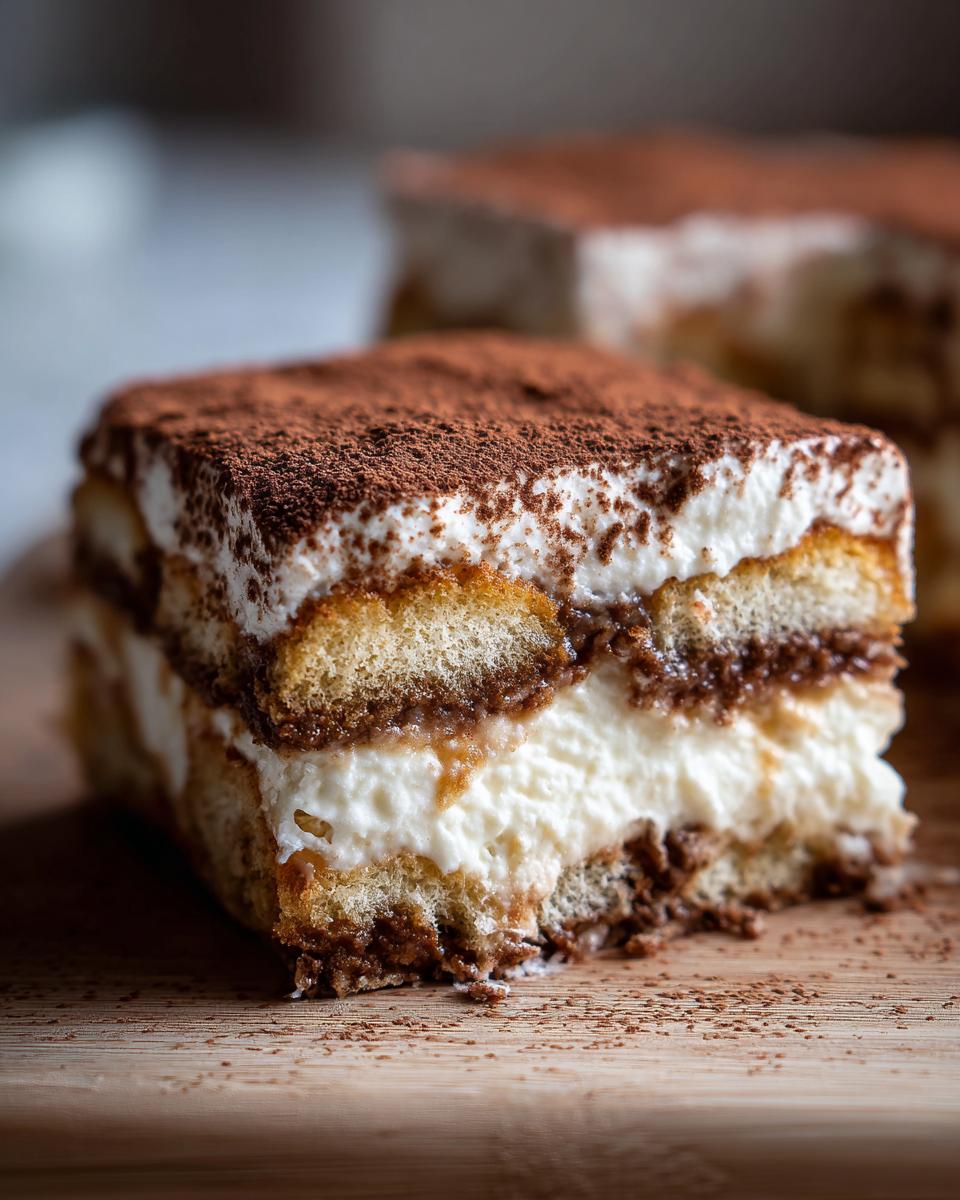
Assembling Your Tiramisu Layers
Now for the fun part – building this beauty! Get your cooled coffee (and liqueur, if you’re using it) into a shallow dish. This is where the ladyfingers come in. You want to dip each one *really quickly*, just a quick dunk on both sides. Don’t let them soak too long, or they’ll get mushy and fall apart. Arranges your dipped ladyfingers in a single layer right at the bottom of your 9×13 inch baking dish. Once that’s covered, spread half of that glorious mascarpone cream evenly over the top. Then, repeat the process: another layer of coffee-dipped ladyfingers, followed by the rest of that luscious mascarpone mixture. Make sure it’s all nice and even!
Chilling and Finishing Your Tiramisu
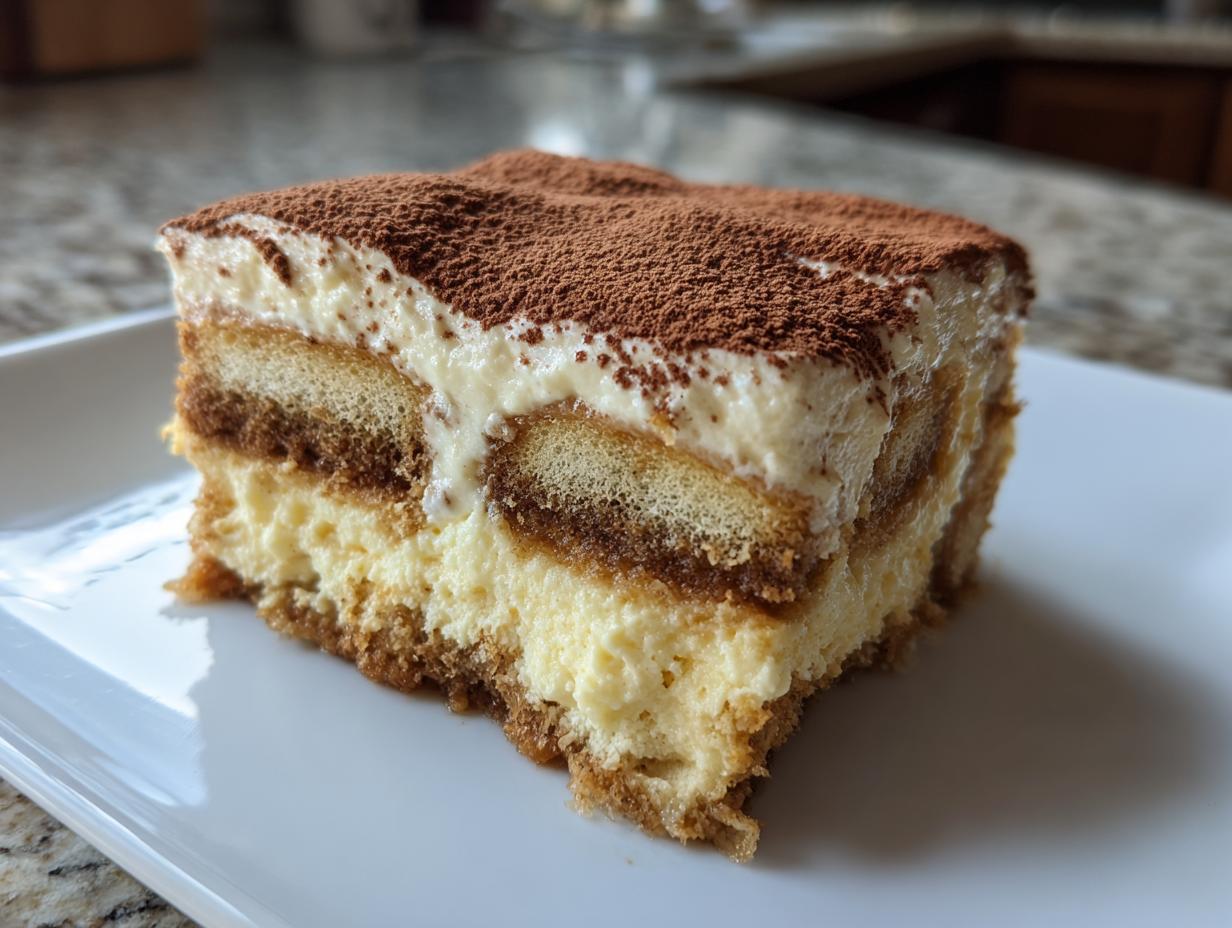
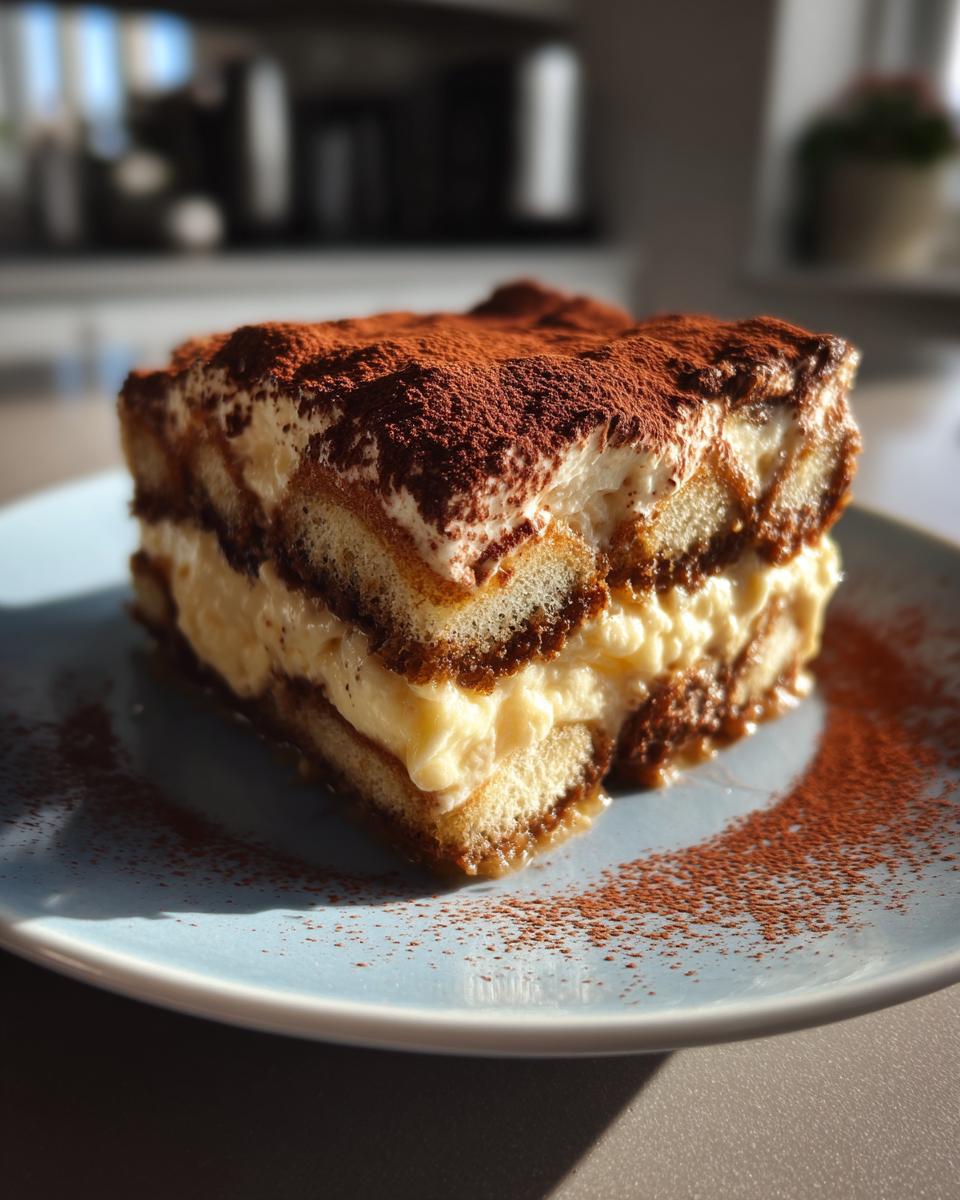
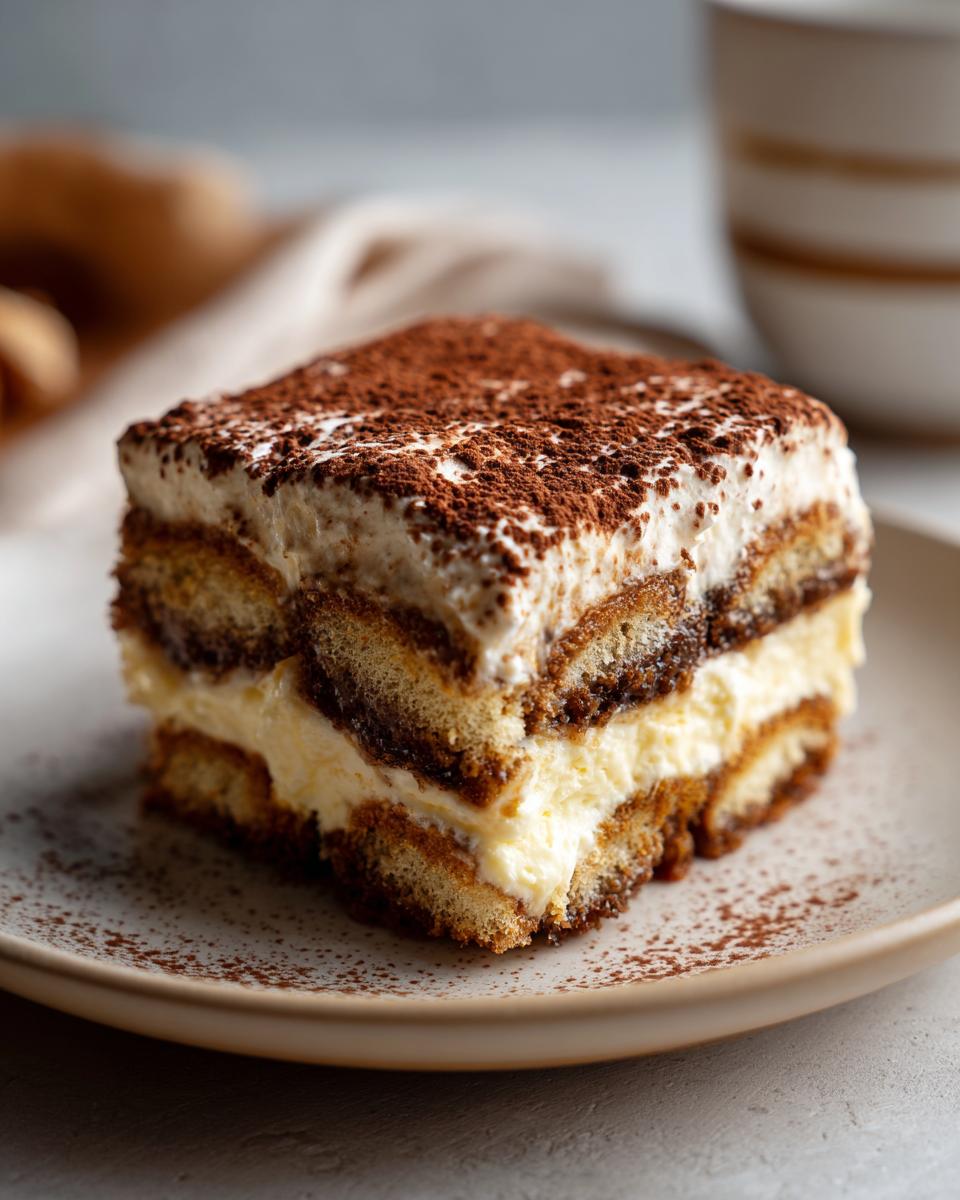
This is probably the hardest part – waiting! Cover your dish tightly with plastic wrap and pop it into the fridge. You need to let it chill for at least 4 hours, but honestly, overnight is where the real magic happens. This resting time is super important because it lets all those amazing coffee and mascarpone flavors meld together, and it gives the Tiramisu a chance to set up perfectly. Before you serve it, grab some unsweetened cocoa powder and dust the top generously. A fine-mesh sieve or a sifter works best for an even, pretty coating. It really makes it look extra special, like you just bought it from a fancy Italian bakery!
Tips for the Best Tiramisu
Alright, let’s talk about making this Tiramisu truly spectacular! I’ve learned a few tricks along the way that can really elevate your game, and honestly, it’s mostly about respecting the ingredients and being a little patient. First off, use the best quality mascarpone you can find – seriously, it makes a world of difference. And for the coffee? Don’t go weak! Strong espresso or very strong brewed coffee is key; it cuts through the richness and gives that signature flavor. Also, I find that for the zabaglione (that’s the whisked egg yolk and sugar mixture), a double boiler really is your best friend. It helps cook the eggs gently without scrambling them, giving you that smooth, luxurious base. And please, don’t over-dip those ladyfingers! A quick dip is all they need. Finally, resist the urge to dig in too soon! That chilling time is crucial for the flavors to *really* get to know each other. You can find more amazing tips on my Italian Tiramisu page!
Ingredient Notes and Substitutions for Tiramisu
Let’s chat about a couple of the stars of our Tiramisu show: mascarpone and ladyfingers. You really want that good quality mascarpone cheese – it’s super creamy and a little tangy, which is exactly what we need. If you absolutely can’t find it, some people have had luck with a blend of cream cheese and heavy cream, but trust me, nothing beats real mascarpone for that authentic taste and silky texture. For the ladyfingers, make sure you’re getting the crisp, Italian-style ones. They soak up the coffee beautifully without turning to mush. If you can’t find those, some folks use pound cake or sponge cake cut into strips, but it changes the texture a bit. It’s all about finding what works for you!
Serving and Storing Your Tiramisu
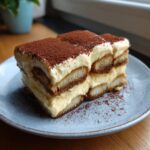
Serving this Tiramisu is a breeze! It’s best served chilled, straight from the fridge. That cold temperature really enhances the creamy texture and the coffee flavor. Just slice it up like you would a cake, and remember that generous dusting of cocoa powder right before serving makes it look absolutely stunning. If you happen to have any leftovers (which is rare!), just cover the dish tightly with plastic wrap and pop it back in the refrigerator. It stays wonderfully fresh for about 2-3 days, though honestly, it’s usually gone way before that!
Frequently Asked Questions About Tiramisu
Got tiramisu questions? I’ve got answers! It’s a pretty common thing to wonder about, especially when you’re making something so iconic for the first time. Let’s clear up some of those little head-scratchers!
Can I make Tiramisu without raw eggs?
Oh, absolutely! If the thought of raw eggs makes you a bit squeamish, you’ve got options. You can use pasteurized egg yolks, which have been treated to eliminate any risks. Or, you can do what I sometimes do for a super safe base: gently cook your egg yolks and sugar over a double boiler until they’re thick and pale – that’s called a zabaglione, and it works beautifully! It gives you that lovely creamy texture without any worries.
What kind of coffee is best for Tiramisu?
This is where the magic happens! You really want a strong coffee flavor to balance out the rich mascarpone. Strong brewed coffee works great, but if you can swing it, freshly brewed espresso is the absolute best. It’s intense and gives the ladyfingers that deep, wonderful coffee essence that’s so signature in tiramisu. Just make sure it’s cooled completely before you start dipping!
How long does Tiramisu need to chill?
This is the most important step, trust me! You need to let your tiramisu chill for at least 4 hours for the flavors to really get acquainted and for it to set up nicely. But, if you can resist the temptation (I know, it’s hard!), letting it chill overnight is truly the secret to the perfect texture and the most incredible, melded flavors. It makes all the difference!
Nutritional Information (Estimated)
Just a little heads-up! The numbers below are estimates for one serving (about 1/8th of the dish), and they can totally change depending on the exact ingredients you use, like the brand of mascarpone or coffee liqueur. But it gives you a good general idea!
Serving Size: 1/8th of dish
Calories: 350
Fat: 22g
Saturated Fat: 14g
Carbohydrates: 30g
Sugar: 25g
Protein: 7g
Cholesterol: 150mg
Sodium: 50mg
Classic Tiramisu
- Total Time: 250 min
- Yield: 8 servings 1x
- Diet: Vegetarian
Description
A traditional Italian dessert with layers of coffee-soaked ladyfingers and a rich mascarpone cream.
Ingredients
- 6 large egg yolks
- 3/4 cup granulated sugar
- 16 ounces mascarpone cheese, softened
- 1 1/2 cups strong brewed coffee, cooled
- 1/4 cup coffee liqueur (optional)
- 24 ladyfingers
- Unsweetened cocoa powder, for dusting
Instructions
- In a heatproof bowl, whisk together egg yolks and sugar. Place the bowl over a saucepan of simmering water, ensuring the bottom of the bowl does not touch the water. Whisk constantly until the mixture is thick and pale, about 5-7 minutes. Remove from heat and let cool slightly.
- Gently fold the softened mascarpone cheese into the cooled egg yolk mixture until just combined. Do not overmix.
- In a shallow dish, combine the cooled coffee and coffee liqueur (if using).
- Quickly dip each ladyfinger into the coffee mixture, one at a time. Arrange a single layer of dipped ladyfingers in the bottom of a 9×13 inch baking dish.
- Spread half of the mascarpone mixture evenly over the ladyfingers.
- Repeat with another layer of dipped ladyfingers and the remaining mascarpone mixture.
- Cover the dish with plastic wrap and refrigerate for at least 4 hours, or preferably overnight, to allow the flavors to meld and the dessert to set.
- Before serving, dust the top generously with unsweetened cocoa powder.
Notes
- For a richer flavor, use espresso instead of brewed coffee.
- Ensure your mascarpone cheese is at room temperature for easier mixing.
- If you prefer not to use raw eggs, you can use a pasteurized egg product or a cooked zabaglione base.
- Prep Time: 25 min
- Cook Time: 10 min
- Category: Dessert
- Method: No-Bake
- Cuisine: Italian
Nutrition
- Serving Size: 1/8th of dish
- Calories: 350
- Sugar: 25g
- Sodium: 50mg
- Fat: 22g
- Saturated Fat: 14g
- Unsaturated Fat: 8g
- Trans Fat: 0g
- Carbohydrates: 30g
- Fiber: 1g
- Protein: 7g
- Cholesterol: 150mg
Keywords: Tiramisu, Italian dessert, coffee, mascarpone, ladyfingers, no-bake dessert, classic recipe