
Hey there, fellow dessert lovers! If you’ve ever stared into your pantry, felt a sudden craving for something sweet, and then panicked because you thought baking was too complicated, I’ve got just the thing for you. Seriously, this amazing dessert recipe is genuinely impossible to mess up. I’m talking simple ingredients, minimal steps, and a result that always tastes like you spent hours in the kitchen. I remember one time, I had unexpected guests pop over – like, *minutes* notice! – and I whipped this up. Everyone raved about it, and I just smiled, knowing my secret was safe (until now, obviously!). My passion is taking those ‘scary’ recipes and making them super accessible, and this one is the crown jewel of my easy-baking collection.
Why This Dessert Is Impossible to Mess Up
Honestly, there are a few main reasons this recipe is a lifesaver for anyone who thinks they can’t bake. It’s all about keeping things super straightforward:
- It starts with a box mix: No measuring out flour, sugar, and cocoa powder perfectly. You just follow the brownie box directions! This immediately cuts down on the chances of error.
- Minimal, common ingredients: Besides the brownie box, you probably have everything else in your pantry. We’re talking milks, vanilla – things that are hard to mess up. You don’t need fancy extracts or specialty flours.
- The structure is forgiving: You literally pour one mixture on top of another. There’s no delicate folding or tempering. Even if your layers mix a tiny bit, it just makes it more fudgy! It’s designed to be a bit rustic, which is perfect for beginners.
Gather Your Ingredients for This Dessert Is Impossible to Mess Up
Okay, let’s get our ingredients together! The best part is, you probably have most of this hiding in your kitchen already. You’ll need:
- 1 box (14.1 ounces) brownie mix: Seriously, any brand will do! I love using the regular kind, but fudgy or chewy works too.
- Eggs (as called for on brownie mix box): Just check your brownie box; it’ll tell you how many eggs you need.
- Oil (as called for on brownie mix box): Again, the box is your guide here. Vegetable or canola oil is usually fine.
- Water (as called for on brownie mix box): Simple enough, right? Just grab your measuring cup.
- 1 can (12 ounces) evaporated milk: This is key for that creamy layer we’re pouring on top.
- 1 can (14 ounces) sweetened condensed milk: This is what makes everything super rich and decadent.
- 1 cup milk: Just regular old milk – whole, 2%, whatever you have on hand.
- 1 teaspoon vanilla extract: This little splash adds a wonderful depth of flavor.
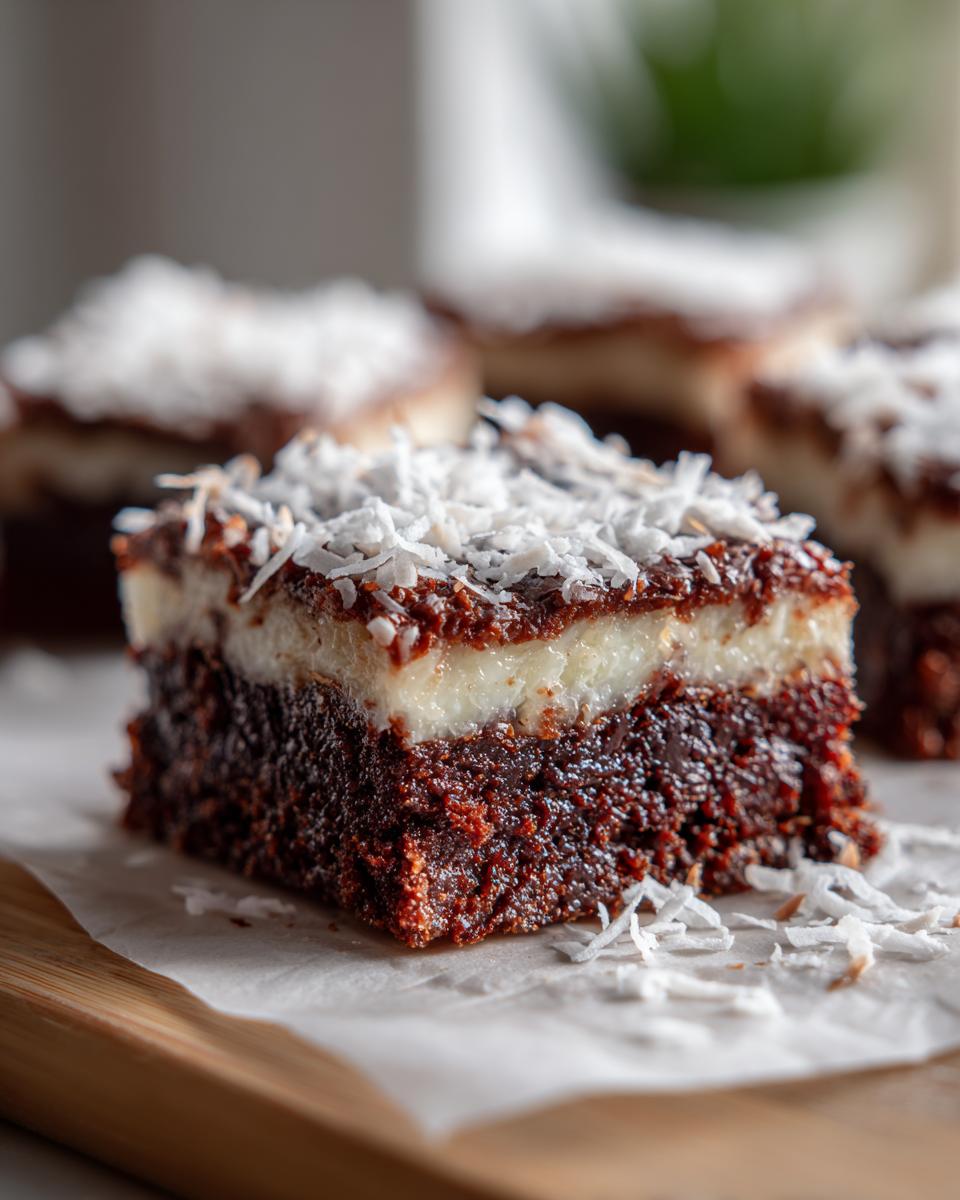
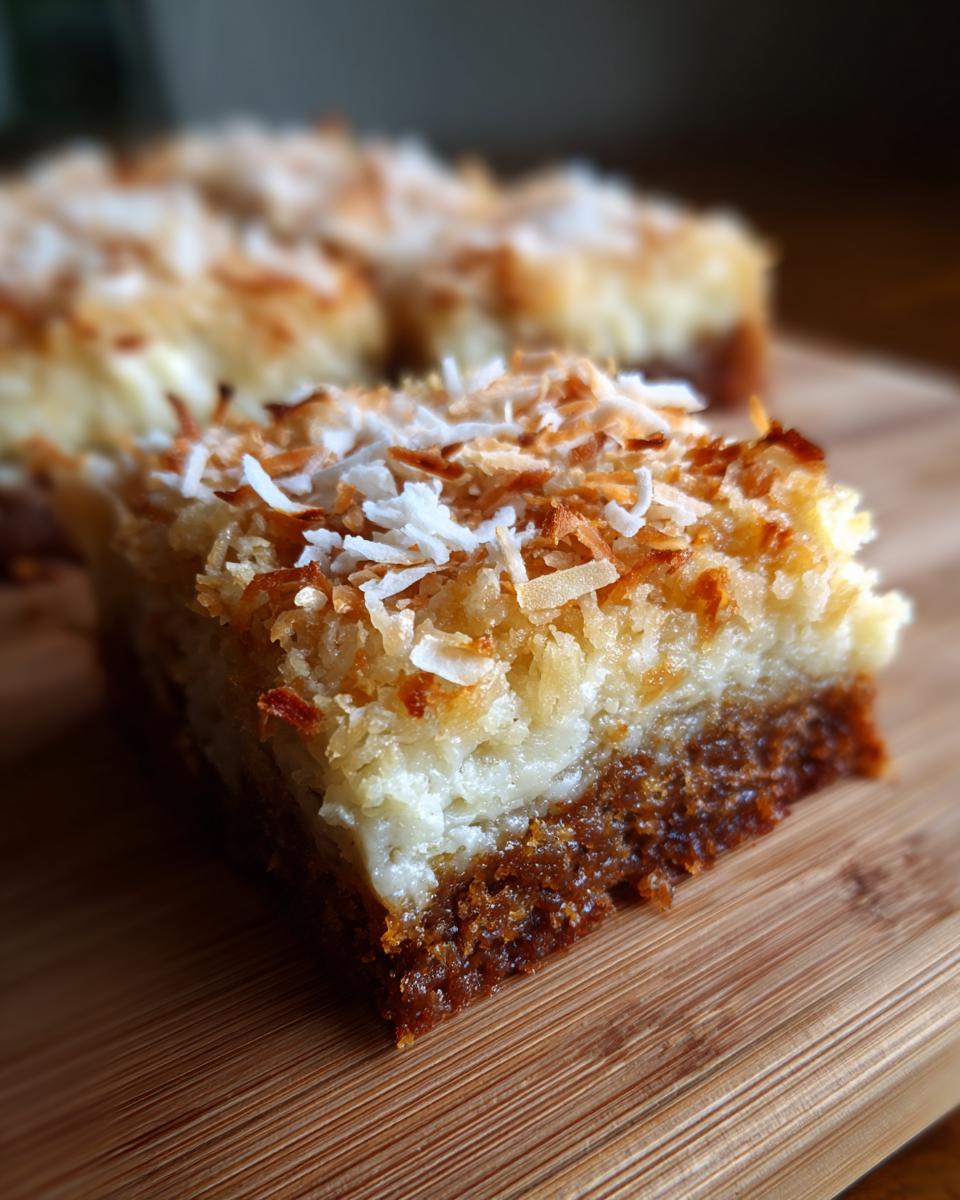
- 1 cup shredded coconut (optional): If you’re a coconut fan, this is a lovely little finishing touch that adds a bit of texture.
See? Nothing too wild! These are all pantry staples or super easy to find. Having everything ready to go makes the whole process a breeze.
Step-by-Step Guide to This Dessert Is Impossible to Mess Up
Alright, let’s get down to business! This is where the magic *really* happens, and I promise, it’s so easy you’ll wonder why you ever stressed about dessert before. Just follow these steps, and you’ll have a winner. For a little extra chocolatey goodness, check out these gooey chocolate recipes for inspiration!
Preheating and Preparing the Pan
First things first, let’s get that oven fired up to 350°F (175°C). This is super important so your dessert bakes evenly. While it’s heating, grab a 9×13 inch baking dish and give it a good greasing. You can use cooking spray, butter, or oil – just make sure the whole inside is covered so nothing sticks.
Mixing the Brownie Base
Now, grab your brownie mix. Follow the directions printed right on the box for the eggs, oil, and water. Mix it all up until it’s just combined – don’t overmix! Once your batter is ready, pour it right into that greased pan. Spread it out evenly so it covers the bottom.
Creating the Creamy Milk Layer
This is where it gets interesting! In a separate bowl, whisk together the evaporated milk, sweetened condensed milk, plain milk, and that teaspoon of vanilla extract. Just give it a good stir until it’s all blended together. It’s going to look thick and creamy, and that’s exactly what we want!
Combining the Layers
Okay, here comes the super simple part that makes this dessert so unique. Slowly and gently pour that milky mixture all over the top of the brownie batter in the pan. Don’t worry if it looks a little weird at first; it’s meant to be this way. It might even soak in a bit, which is totally fine!
Baking to Perfection
Pop that pan into your preheated oven. Bake it for about 45 to 50 minutes. You’ll know it’s ready when a toothpick you stick into the center comes out clean. That means the brownie part is cooked through and the milky layer has set up nicely. If it still has wet batter on it, give it another 5-10 minutes and check again. Make sure your oven temp is accurate for best results!
Optional Coconut Topping
If you’re using the shredded coconut (and I totally recommend it if you like that flavor!), sprinkle it evenly over the top during the last 5-10 minutes of baking. It just toasts up a little and adds a lovely chewiness.
Cooling for Best Results
This is really important – you need to let it cool COMPLETELY, like, for a few hours. I usually put mine in the fridge to speed things up. This lets that creamy layer set up perfectly. If you try to cut it while it’s warm, it’ll just be a mess. Patience is key here!
Tips for Making This Dessert Is Impossible to Mess Up Even Easier
You know, even though this dessert is already a rockstar for being so easy, there are always little things you can do to make it even better or just plain simpler. Trust me, I’ve tinkered with it a little over the years! Here are a few of my favorite tricks that really help:
First off, don’t skimp on the brownie mix quality if you can help it. While any box works, a really good fudgy brownie mix will give you an even richer base, and who doesn’t want that? Also, make sure your evaporated milk and sweetened condensed milk are at room temperature before you mix them – it helps them combine more smoothly with the other milk. For an extra flavor kick, consider adding a tiny pinch of salt to that milk mixture. It really makes the sweetness pop! And if you’re feeling adventurous, you could totally swap out some of the plain milk for coffee or even a bit of chocolate syrup for a mocha twist. I also find that letting it chill in the fridge for at least a couple of hours after baking makes it *so* much easier to cut clean slices. For more easy brownie ideas, you might like these easy peanut butter brownies!
Ingredient Notes and Substitutions
So, let’s chat about the ingredients to make sure you’re set up for success! The beauty of this recipe is how forgiving it is. For the brownie mix, honestly, any brand you grab from the store will work beautifully. Whether it’s a fudgy, chewy, or regular kind, it’s going to be delicious. If you want to get a little fancy, you *could* use a homemade brownie mix, but why complicate things when the box is so easy?
When it comes to the milks, the evaporated and sweetened condensed milks are pretty essential for that dreamy, creamy topping, so try not to skip those. Using regular whole milk is best for richness, but 2% or even skim will work in a pinch. For the optional coconut, unsweetened works great if you prefer something not quite as sweet, or sweetened if you want to amp up the dessert factor!
Serving and Storage
Okay, the hardest part is waiting for it to cool completely! Once it’s set, grab a sharp knife. You can serve it right out of the pan. It’s delicious on its own, or you could add a dollop of whipped cream or a scoop of vanilla ice cream if you’re feeling fancy. For leftovers, just cover the pan tightly with plastic wrap or portion them into airtight containers. It keeps wonderfully in the refrigerator for about 4-5 days. Honestly, it tastes even better the next day!
Frequently Asked Questions About This Dessert
Got questions about this ridiculously easy dessert? I’ve got you covered! Since this recipe is my go-to for when I need something guaranteed delicious without any fuss, I’ve heard a few things people wonder about. Here are some common ones:
Can I use a different type of brownie mix?
Absolutely! That’s the beauty of this recipe. Whether you grab a fudgy, chewy, or regular brownie mix, it’s going to work perfectly. The creamy milk layer on top is so rich that it complements any brownie base you choose. Seriously, just pick your favorite!
How long does this dessert last?
This amazing dessert lasts for about 4 to 5 days when stored properly in the refrigerator. I usually just cover the baking dish with plastic wrap or pop the slices into an airtight container. Honestly, I find it tastes even better on the second day as the flavors really meld together!
What’s the point of the evaporated milk and sweetened condensed milk?
Ah, these are the magic makers for that incredible topping! The evaporated milk makes the topping rich and creamy without being too heavy, while the sweetened condensed milk adds that luxurious sweetness and helps create a lovely, slightly gooey texture once it cools. Together, they create a dreamy layer that perfectly balances the chocolatey brownie base.
Can I add anything else to this dessert?
You sure can! While it’s fantastic as is, you can get creative. Some people like to add chocolate chips to the brownie batter before baking. If you’re into nuts, a handful of chopped pecans or walnuts sprinkled over the top before baking (along with or instead of coconut!) is delicious. For a little extra punch, try a splash of espresso powder in the milk mixture. For more super simple dessert ideas, check out these easy dessert recipes!
Estimated Nutritional Information
Now, let’s talk numbers! Keep in mind these are just estimates, because, you know, different brownie mixes and milk brands can tweak things a bit. But generally, a serving of this wonderfully easy dessert comes in at around:
Serving Size: 1 slice
Calories: 350
Fat: 18g
Carbohydrates: 45g
Protein: 5g
Sugar: 35g
Sodium: 150mg
It’s a pretty satisfying slice of heaven, right? Enjoy!
Print
Instant Pot Chicken Enchilada Soup
- Total Time: 40 min
- Yield: 6 servings 1x
- Diet: Vegetarian
Description
A quick and flavorful chicken enchilada soup made in the Instant Pot.
Ingredients
- 1 tablespoon olive oil
- 1 pound boneless, skinless chicken breasts
- 1 medium onion, chopped
- 2 cloves garlic, minced
- 1 (15 ounce) can black beans, rinsed and drained
- 1 (10 ounce) can Rotel diced tomatoes and green chilies, undrained
- 1 (4 ounce) can diced green chilies
- 4 cups chicken broth
- 1 teaspoon chili powder
- 1 teaspoon cumin
- 1/2 teaspoon dried oregano
- Salt and pepper to taste
- Optional toppings: shredded cheese, sour cream, cilantro, tortilla chips
Instructions
- Set your Instant Pot to ‘Sauté’ and add olive oil.
- Add chicken breasts and cook until browned on both sides. Remove chicken and set aside.
- Add chopped onion to the Instant Pot and cook until softened, about 5 minutes.
- Add minced garlic and cook for 1 minute more until fragrant.
- Stir in rinsed black beans, Rotel tomatoes, diced green chilies, chicken broth, chili powder, cumin, and oregano.
- Return the browned chicken breasts to the Instant Pot.
- Secure the lid and set the valve to ‘Sealing’.
- Select ‘Manual’ or ‘Pressure Cook’ on high pressure for 10 minutes.
- Once the cooking cycle is complete, perform a quick release of the pressure.
- Remove the chicken breasts and shred them using two forks.
- Return the shredded chicken to the pot and stir.
- Season with salt and pepper to taste.
- Serve hot with your favorite toppings.
Notes
- For a spicier soup, use a can of hot Rotel or add a pinch of cayenne pepper.
- If you don’t have an Instant Pot, you can adapt this recipe for a slow cooker or stovetop.
- Prep Time: 15 min
- Cook Time: 25 min
- Category: Soup
- Method: Pressure Cooking
- Cuisine: Mexican-inspired
Nutrition
- Serving Size: 1.5 cups
- Calories: 350
- Sugar: 5g
- Sodium: 800mg
- Fat: 10g
- Saturated Fat: 2g
- Unsaturated Fat: 8g
- Trans Fat: 0g
- Carbohydrates: 30g
- Fiber: 8g
- Protein: 35g
- Cholesterol: 90mg
Keywords: Instant Pot, chicken soup, enchilada soup, quick soup, easy recipe, Mexican soup, weeknight dinner