
Okay, confession time! When people ask me for “The One Dessert I Always Make for Guests,” my mind immediately goes to these incredible Chocolate Lava Cakes. Seriously, they might look super fancy with that gooey, molten center oozing out, and you’d think they took hours, but trust me, they are shockingly easy to whip up! They’ve been my secret weapon for years, always a showstopper whether it’s a casual dinner party or a more formal get-together. Everyone raves about them, and the best part? I can pull them off even when I’m feeling a bit rushed. I’ve made them countless times, and they’ve never, ever disappointed. If you want to wow your friends without stressing yourself out, you’ve found your winner right here. You can see even more delicious ideas if you need extra inspiration!
Why Chocolate Lava Cakes Are The One Dessert I Always Make for Guests
Honestly, there are so many reasons these are my go-to for entertaining. It really boils down to hitting that sweet spot between effort and impact. Here’s why they’re my absolute favorite:
- Ridiculously Easy: I mean, you saw the ingredient list – simple stuff! And the steps? Even easier. You can mix the batter ahead of time, which is a lifesaver when you’re juggling appetizers and guests.
- Wow Factor: That oozing, molten chocolate center? It just screams fancy and decadent. Every single time I serve them, people gasp and say, “You *made* these?!” It feels so good to get that reaction!
- Crowd-Pleaser Guaranteed: Who doesn’t love warm, gooey chocolate? It’s hard to go wrong. I remember one time, we had a last-minute get-together, and I whipped these up in a flash. Everyone kept asking for the recipe!
- Quick Bake Time: They bake up super fast, so you’re not stuck in the kitchen for ages. Plus, the aroma filling your house while they bake? Pure magic.
Gather Your Ingredients for The One Dessert I Always Make for Guests
So, to make these glorious little chocolate bombs, you’ll need just a few things you probably already have in your pantry. Trust me, the magic is in their simplicity! Here’s what you need to grab:
- 6 ounces semi-sweet chocolate, chopped: Good quality chocolate makes a difference, so go for something you’d enjoy eating on its own.
- 1/2 cup (1 stick) unsalted butter: Make sure it’s unsalted so you can control the saltiness!
- 2 large eggs
- 2 large egg yolks: These extra yolks are key for that super rich, gooey texture. Don’t skip them!
- 1/4 cup granulated sugar: Just enough to sweeten things up without making it cloying.
- 2 tablespoons all-purpose flour: This is the binder that holds everything together. Really just a touch!
- A tiny pinch of salt: It really makes the chocolate flavor pop!
- Powdered sugar: For dusting, if you’re feeling fancy. This is totally optional, but it looks so pretty!
- Fresh berries: Again, optional! But a few raspberries or strawberries add a lovely pop of color and freshness.
Having these ready makes the whole process a breeze. If you’re looking for even simpler options, check out these Nutella lava cakes – they’re crazy easy too!
Step-by-Step Guide to Making The One Dessert I Always Make for Guests
Alright, let’s get down to business and make these amazing lava cakes! It’s honestly so straightforward, you’ll be amazed at how quickly you get from ingredients to pure chocolate bliss. I’ve perfected this timing over years of making them, so trust me on this! For more ideas on quick and impressive desserts, check out this easy chocolate lava cake recipe.
Preparing the Ramekins and Oven
First things first, preheat your oven to a nice hot 425°F (220°C). This high heat is crucial for getting that perfect contrast between cooked edges and a molten center. Grab two ramekins – about 6-ounce size works best. Give them a really good grease and then a light dusting of flour. Seriously, don’t skimp here! You want these cakes to slide out like a dream, not get stuck. Make sure every nook and cranny is covered.
Melting the Chocolate and Butter
Now for the heart of the cake: the chocolate! You can do this a couple of ways. My favorite is to set a heatproof bowl over a saucepan with gently simmering water – just make sure the bottom of the bowl isn’t touching the water. Toss in your chopped semi-sweet chocolate and the butter. Stir it around until it’s all gloriously smooth and glossy. Alternatively, you can do this in the microwave in 30-second bursts, stirring in between, until melted and smooth. Be careful not to scorch the chocolate!
Creating the Cake Batter
In a separate bowl, grab your whisk and beat together the two whole eggs, the two extra egg yolks, and that granulated sugar. We’re not making meringue here, just whisk until it’s a lovely pale yellow color and looks a bit thickened. Then, pour in that luscious melted chocolate and butter mixture and give it a gentle whisk until everything is just combined. Next, it’s time for the flour and that tiny pinch of salt. Fold it in ever so gently with a spatula. Seriously, just until you don’t see streaks of flour anymore. Overmixing is the enemy of a tender cake, especially this one!
Baking to Molten Perfection
Carefully divide the batter between your prepared ramekins. Now, here’s where the magic happens, and timing is everything! Pop them into that preheated oven. You’re looking at baking them for about 12 to 15 minutes. The edges should look set and firm, like a normal cake, but the very center should still look a little soft and wobbly. It’s a delicate balance! Overbake them, and you’ll lose that precious lava. I usually check mine right around the 13-minute mark. You can also give the side a gentle poke; it should feel firmed up but still yield slightly.
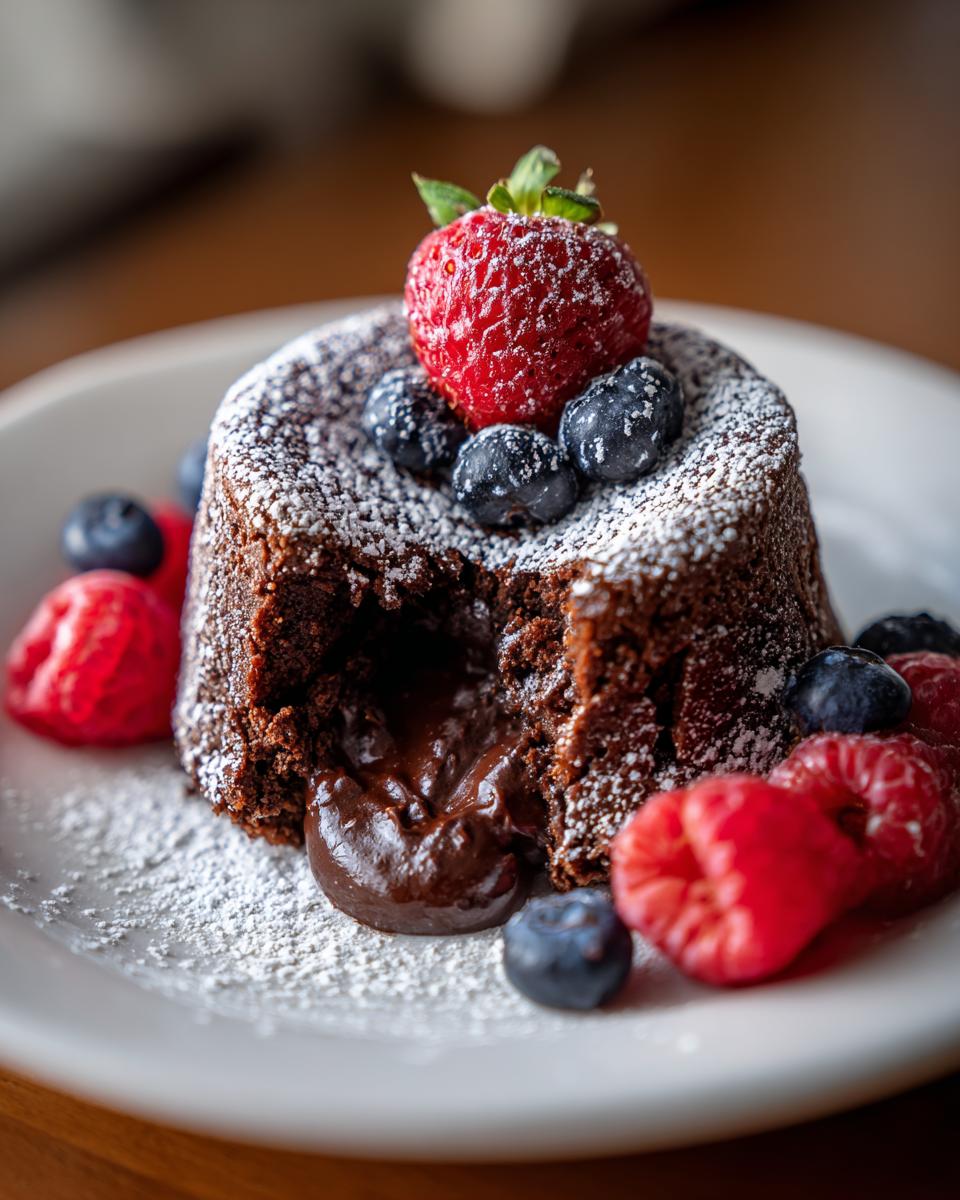
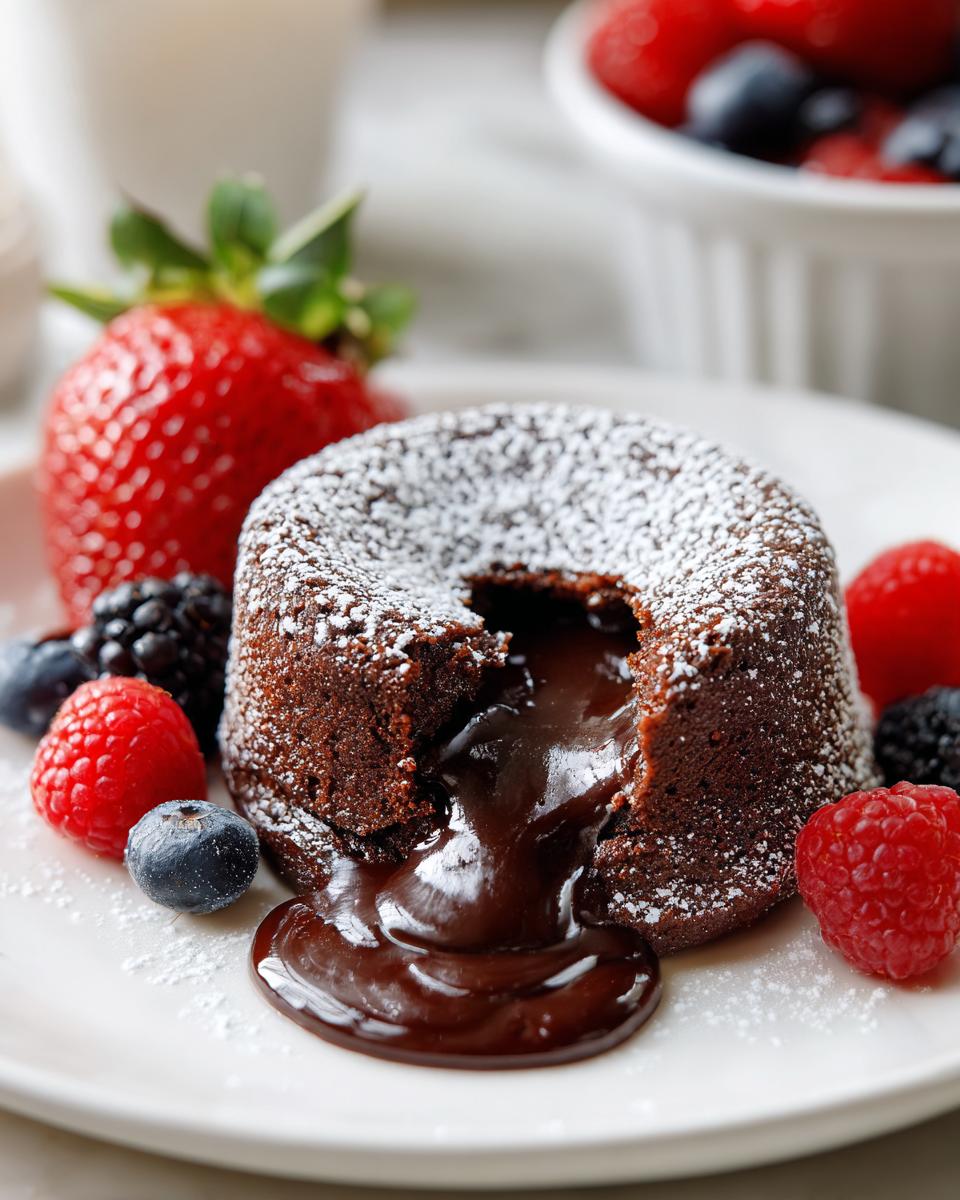
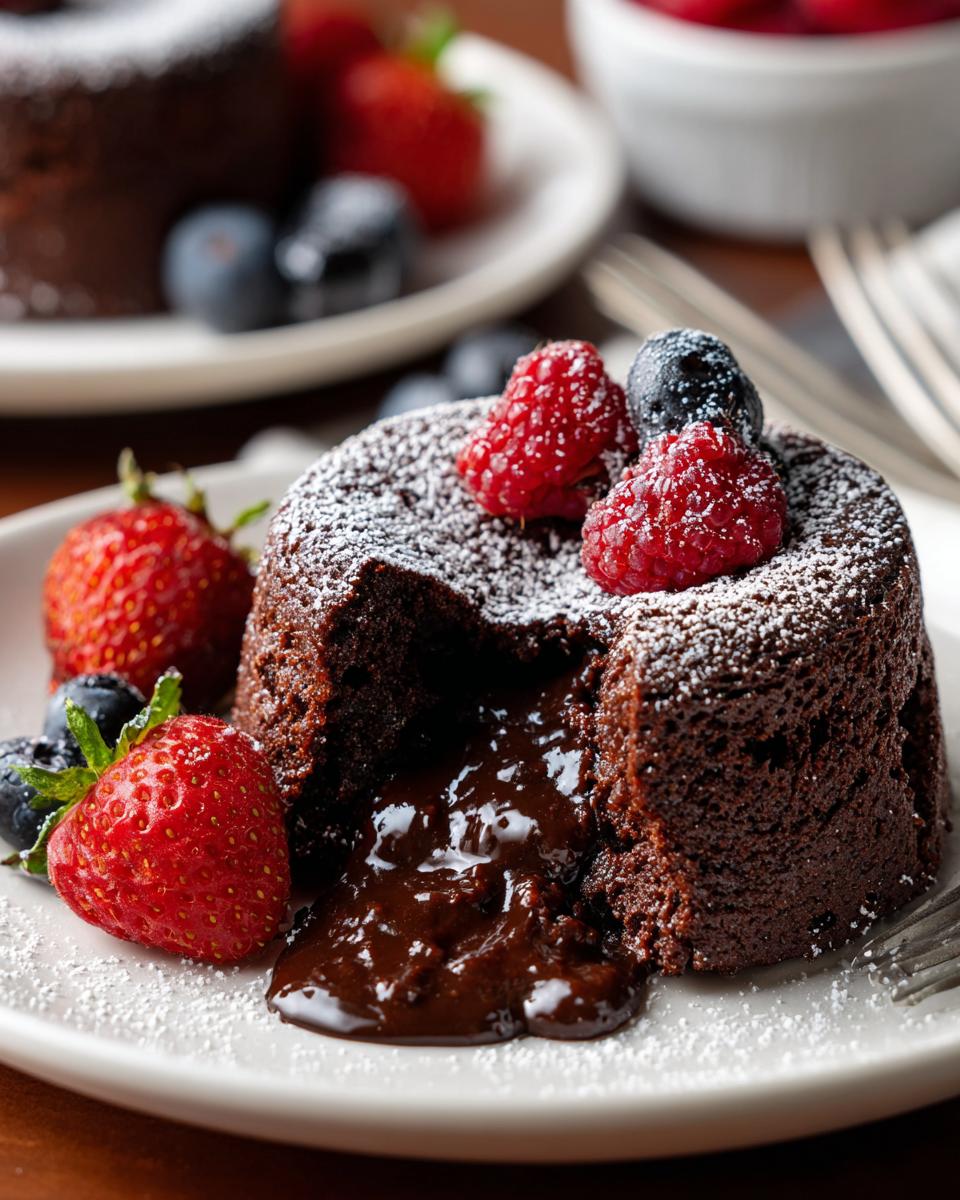
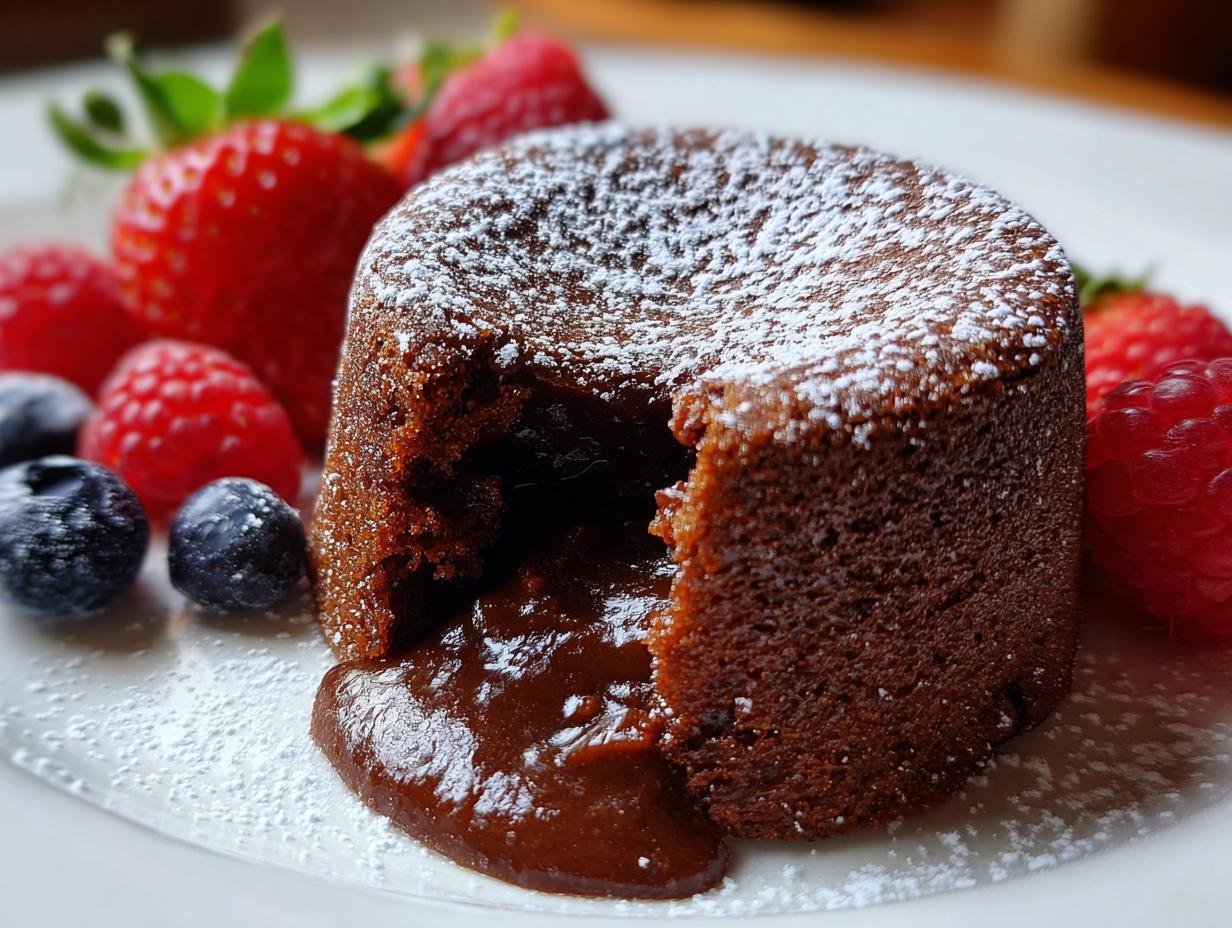
Serving Your Impressive Dessert
Once they’re out of the oven, let them sit in the ramekins for just a minute or two. This gives them a chance to firm up just enough. Then, carefully run a thin knife around the edge if you need to, and invert them onto your serving plates. Voila! If you’re feeling extra, a light dusting of powdered sugar looks beautiful, almost like a snow-capped mountain. A few fresh berries on the side add a lovely pop of color and brightness. Serve these IMMEDIATELY – that molten center waits for no one! For a similar delightful dessert idea, consider this caramel apple fudge.
Tips for Making The One Dessert I Always Make for Guests Flawless
Okay, so while these lava cakes are pretty foolproof, over the years I’ve picked up a few little tricks that really make them shine every single time. It’s all about paying attention to the details! If you want to make absolutely sure you nail that perfect molten center and avoid any “oops” moments, listen up!
First off, the chocolate is key. While semi-sweet is my go-to for that classic balance, you can experiment! Using a bittersweet chocolate (like 70% cacao) will give you a deeper, richer flavor, but you might want to add just a whisper more sugar. On the flip side, if you use milk chocolate, it might get too sweet, so be mindful. I’ve also found that using good quality chocolate really does make a difference – it melts smoother and tastes infinitely better. If you’re looking for more gooey chocolate goodness, check out these gooey chocolate recipes!
Ramekin size matters too. The recipe calls for about 6-ounce ramekins, and that timing is pretty spot-on for those. If you use bigger ones, they’ll need more time in the oven, and you risk losing that lava. Smaller ones will bake too fast. And about that “molten” test? It’s more art than science sometimes! Edges set, center *soft*. Don’t be afraid to carefully peek after 12 minutes. A tiny bit of jiggle in the very center is exactly what you want. If it’s completely liquid, no worries, just give it another minute! I promise, practice makes perfect, and even a slightly overbaked one is still incredibly delicious. It’s all chocolate, after all! For another fantastic chocolate treat, this chocolate delight dessert is amazing too.
Frequently Asked Questions About The One Dessert I Always Make for Guests
Got questions about these irresistible chocolate lava cakes? I totally get it! They’re simple, but like any good recipe, a little extra info can go a long way. Here are some things people often ask me:
Can I make the batter for these lava cakes ahead of time?
Yes, absolutely! This is one of my favorite make-ahead tricks. You can mix up the batter, pour it into your greased and floured ramekins, cover them tightly with plastic wrap, and pop them in the fridge for up to 24 hours. When you’re ready to bake, just add a few extra minutes to the baking time, since the batter will be cold. It’s perfect for when you know you’ll have a busy evening!
How do I store leftover lava cakes?
Honestly, these are best served immediately when they’re warm and gooey. But if you do have leftovers, let them cool completely, then cover them tightly and store them in the refrigerator for a day or two. To reheat, you can carefully warm them in the oven at around 300°F (150°C) for about 10-15 minutes, or until warmed through. Be careful not to overheat, or you’ll lose that molten center!
What if I don’t have ramekins? Can I use muffin tins?
Yes, you can totally use a standard muffin tin! Make sure you grease and flour the cups really well, or use paper liners. You might need to adjust the baking time slightly, as muffin tin cups are usually shallower, so they might bake a little faster. Keep a close eye on them, and use that same test of checking the edges versus the center.
My cakes didn’t have a molten center. What did I do wrong?
Don’t worry, it happens! Usually, this means they were just baked a few minutes too long. The key is that the edges should look set, but the center should still look soft and jiggly. Next time, try taking them out a minute or two earlier. Also, remember oven temperatures can vary, so rely on the visual cues more than the exact time. It’s a learning process, but so worth it!
Do I have to use semi-sweet chocolate?
Semi-sweet is my favorite because it gives you that perfect balance of rich chocolate flavor without being too bitter or too sweet. However, you *can* use bittersweet chocolate (around 60-70% cacao) for a more intense flavor, or even good quality milk chocolate for a sweeter cake. Just keep in mind that different chocolates can affect baking times slightly, and if you use milk chocolate, you might end up with a sweeter result overall. For more amazing chocolate creations, check out this triple chocolate mousse cake recipe!
Nutritional Information (Estimated)
Just a little heads-up, these numbers are pretty much ballpark figures, okay? They can totally change depending on the exact brands you use and how generous you are with that optional dusting of powdered sugar or berries. But roughly, one of these decadent lava cakes comes in around:
- Calories: 450
- Fat: 30g
- Saturated Fat: 18g
- Carbohydrates: 40g
- Sugar: 35g
- Protein: 7g
- Cholesterol: 150mg
So, while they’re a treat, they’re totally worth it! Enjoy every bite!