
Okay, confession time: when the craving hits and I want something *seriously* delicious but don’t want to turn on the oven? This is my go-to. Seriously, these No-Bake Chocolate Peanut Butter Bars are The No Bake Dessert Everyone Is Obsessed With, and for good reason! They’re ridiculously easy to whip up (like, under 15 minutes of actual work), and the combination of rich chocolate and creamy peanut butter is just pure magic. Every time I bring these to a potluck or a family gathering, they disappear so fast, I swear I’m lucky if I get one myself! It’s one of those recipes you’ll make once and then keep on repeat forever. Trust me!
Why You’ll Love The No Bake Dessert Everyone Is Obsessed With
Seriously, what’s not to adore about these bars? Let me break down why they’re my absolute favorite:
- Lightning Fast: We’re talking prep time that’s shorter than your favorite Netflix intro! You can have them ready for the fridge in minutes.
- Effortless Perfection: No oven, no fuss. Just mix, spread, and chill. It’s practically foolproof.
- Dreamy Flavor Combo: Chocolate and peanut butter are a match made in heaven, and this recipe nails that classic, craveable taste.
- Crowd-Pleaser Guaranteed: Whether it’s a party, a bake sale, or just a Tuesday night, these bars are always a huge hit with literally everyone.
- Minimal Cleanup: Because who has time for a mountain of dirty dishes? This recipe keeps things tidy.
- Totally Versatile: Need a quick dessert? Gotcha covered. Need to impress guests? Done. Craving something sweet? Sorted!
Gather Your Ingredients for The No Bake Dessert
Alright, let’s get our ducks in a row! To make these totally irresistible No-Bake Chocolate Peanut Butter Bars, you’ll need a few simple things from your pantry. Here’s what’s on my magic list:
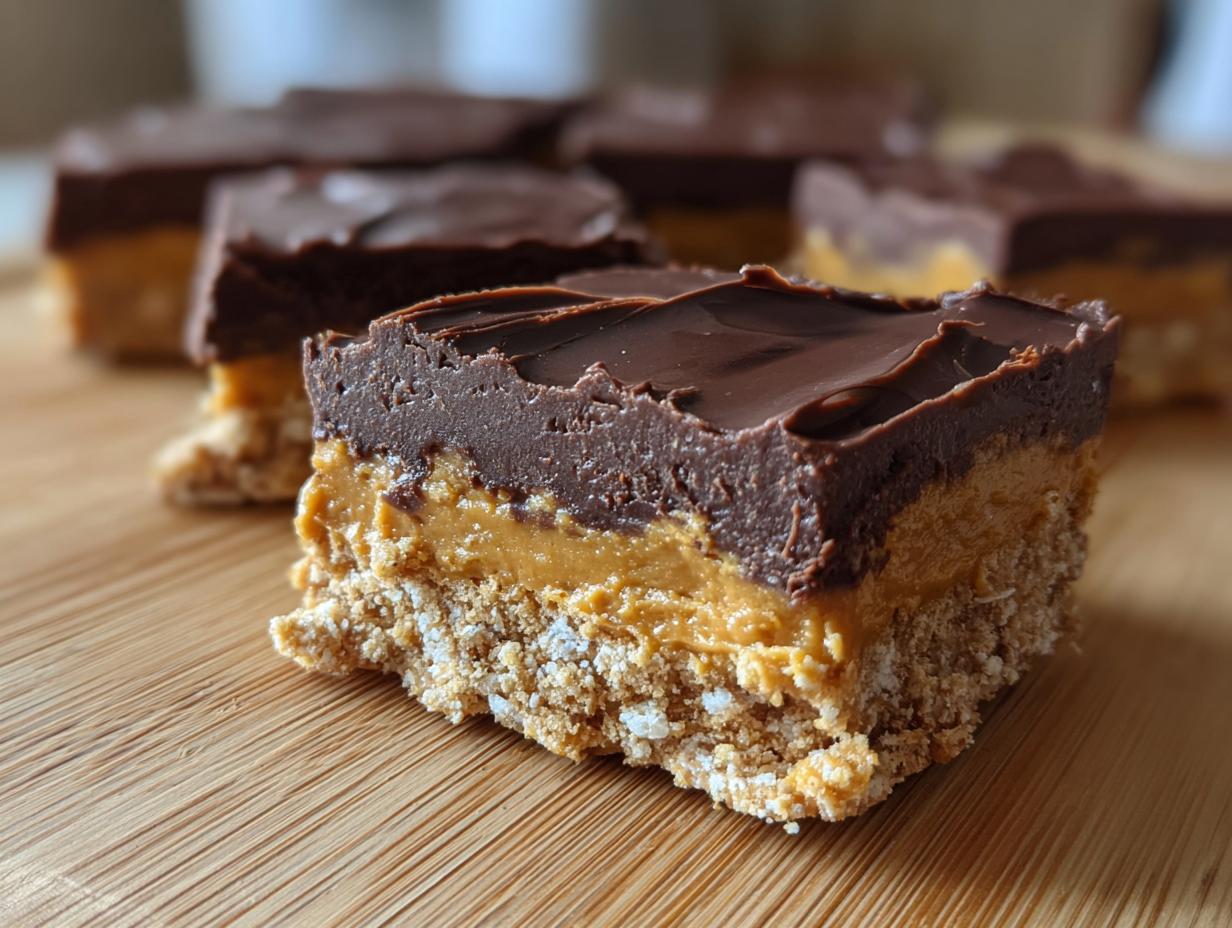
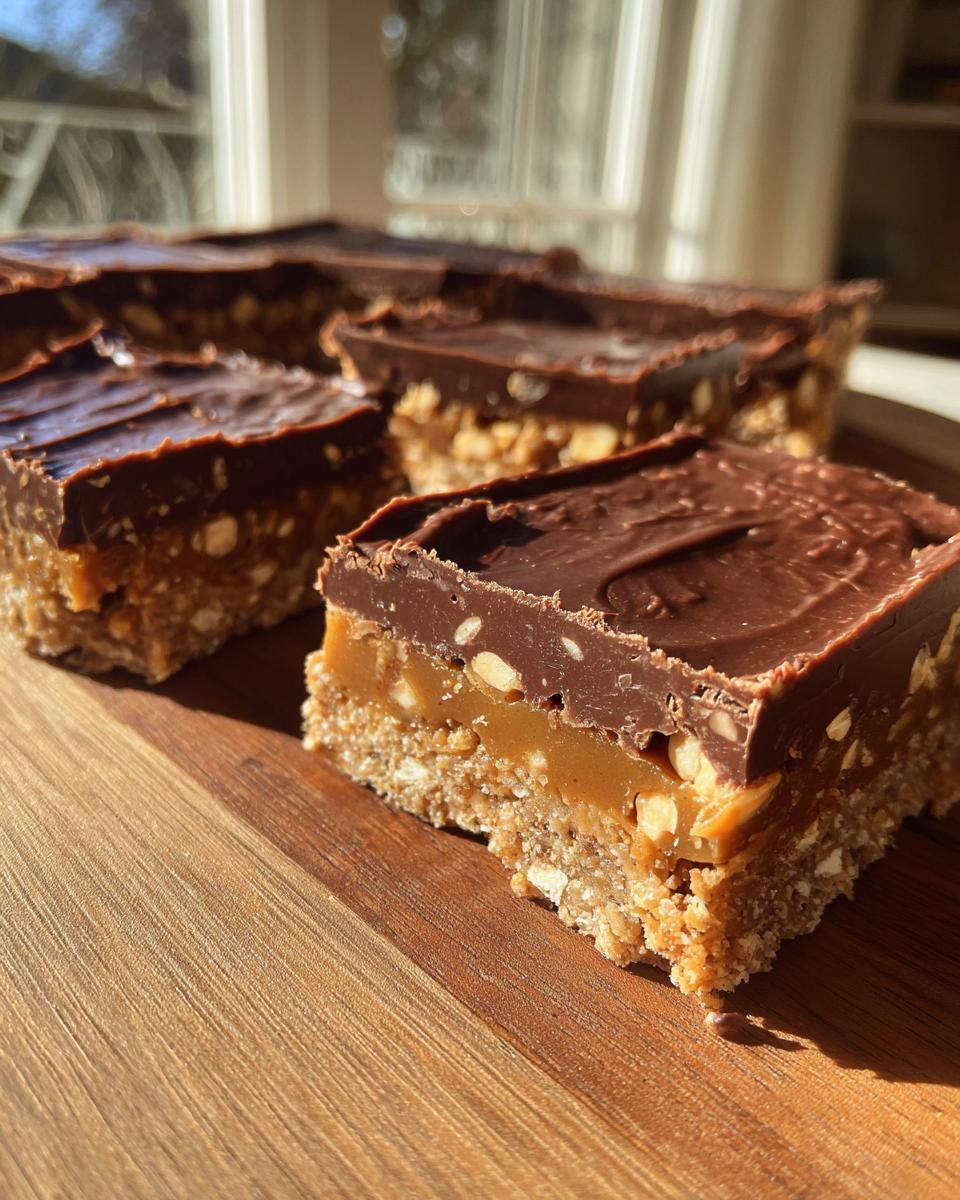
First up, you’ll need 1 1/2 cups of graham cracker crumbs. You can buy them already made or just crush up full graham crackers yourself – super easy! Then, we need 1/2 cup (that’s one stick, folks!) of unsalted butter, all nice and melted. For that creamy, dreamy center, grab 1 cup of peanut butter. I usually go for the regular creamy kind, but we’ll chat more about that later! And you can’t forget 3 cups of powdered sugar for sweetness. Finally, for that glossy chocolate topping, we’ll use 1 1/2 cups of chocolate chips (your favorite kind will do!) and just 1 tablespoon of vegetable oil to make it super smooth.
Step-by-Step Guide to Making The No Bake Dessert
Alright, so you’ve got your ingredients ready, right? Let’s get these amazing no-bake bars into existence! This part is honestly the most fun, and it’s where the magic really happens. It’s super straightforward, too. We’re aiming for that gooey chocolate and creamy peanut butter perfection. Just follow along, and you’ll have deliciousness ready in no time. The prep work itself is a breeze – probably around 15 minutes max. Trust me, it’s worth every second!
Creating the Graham Cracker Crust
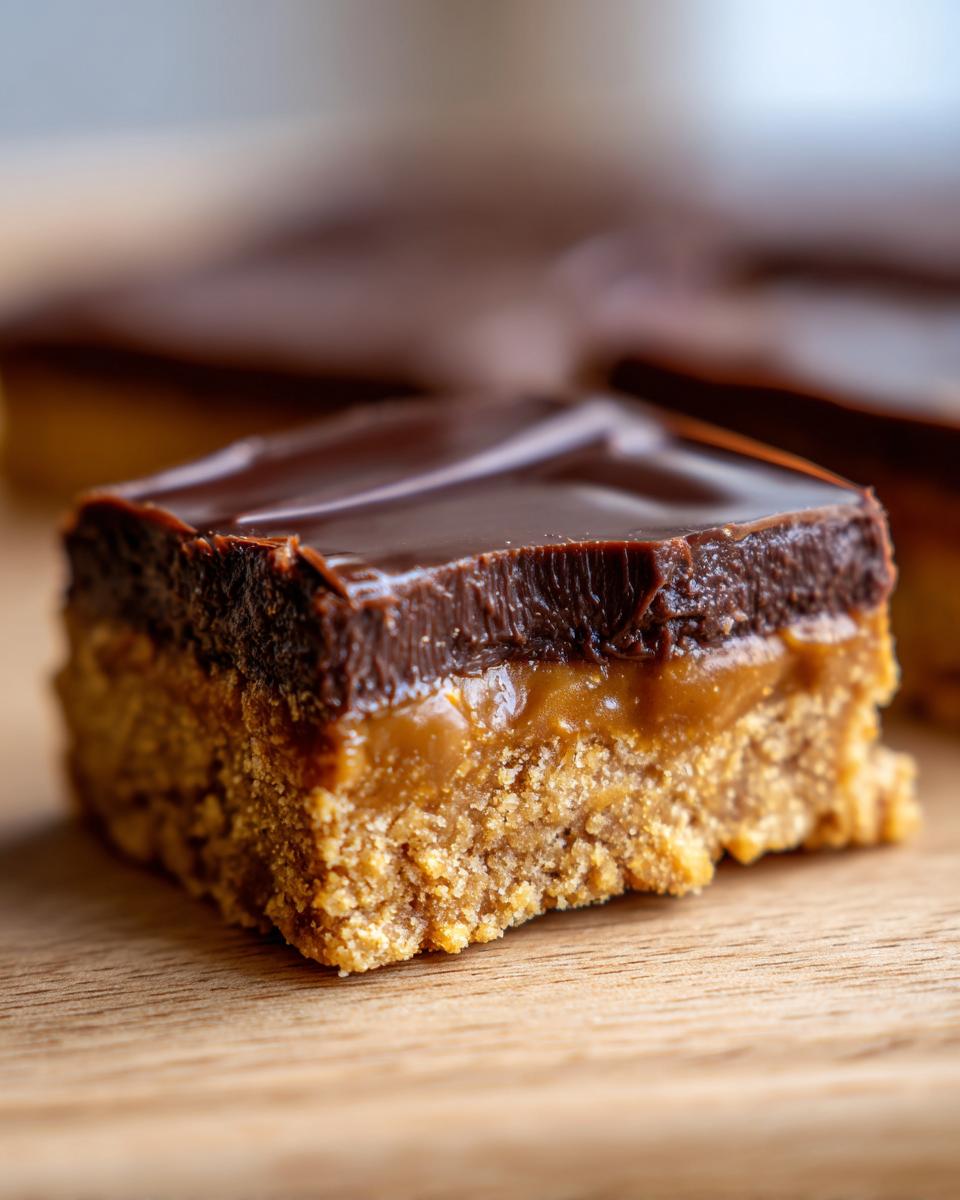
First things first, let’s get that base all set! Grab your 9×13 inch baking pan. You don’t necessarily have to grease it if you’re using parchment paper, but a little greasing never hurt anyone. In a medium bowl, dump in your graham cracker crumbs and pour over that lovely melted butter we set aside. Give it a good stir with a fork or a spatula until all those crumbs are nicely coated. You want it to look like damp sand. Now, pour this crumbly goodness into your pan. Use the bottom of a measuring cup or even just your clean hands to press it down firmly and evenly. Make sure you get it right to the edges! This is going to be the crunchy foundation for our amazing bars.
Preparing the Peanut Butter Filling
Okay, on to the star of the show: the peanut butter layer! In another bowl (or you can just dump it right on top of the crust if you’re feeling brave and want fewer dishes – I do it all the time!), combine your peanut butter and all that powdered sugar. Now, this is where you might need a little elbow grease. Mix it up really well. It can seem a little crumbly at first, but just keep mixing and mixing. Eventually, it’ll come together into a wonderfully smooth, thick paste. Once it’s looking good and lump-free, spread this glorious peanut butter mixture evenly over your graham cracker crust. Make sure it’s a nice, consistent layer from edge to edge. This creates that signature creamy texture that everyone raves about.
Melting and Pouring the Chocolate Topping
Ah, the chocolate! This is the grand finale before the chill. Take your chocolate chips and the tablespoon of vegetable oil and pop them into a microwave-safe bowl. Now, microwave them in 30-second intervals, stirring really well between each one. Keep going until it’s all melted and super smooth and glossy. That little bit of oil really helps make it pourable and super shiny. Once it’s melted and looks like pure liquid deliciousness, carefully pour it over the peanut butter layer. Grab an offset spatula, or even the back of a spoon, and gently spread that chocolate all the way to the edges. You want a nice, even coat so every bite has that perfect chocolatey goodness. We’re talking about turning this into a stunning chocolate delight!
Chilling and Cutting The No Bake Dessert
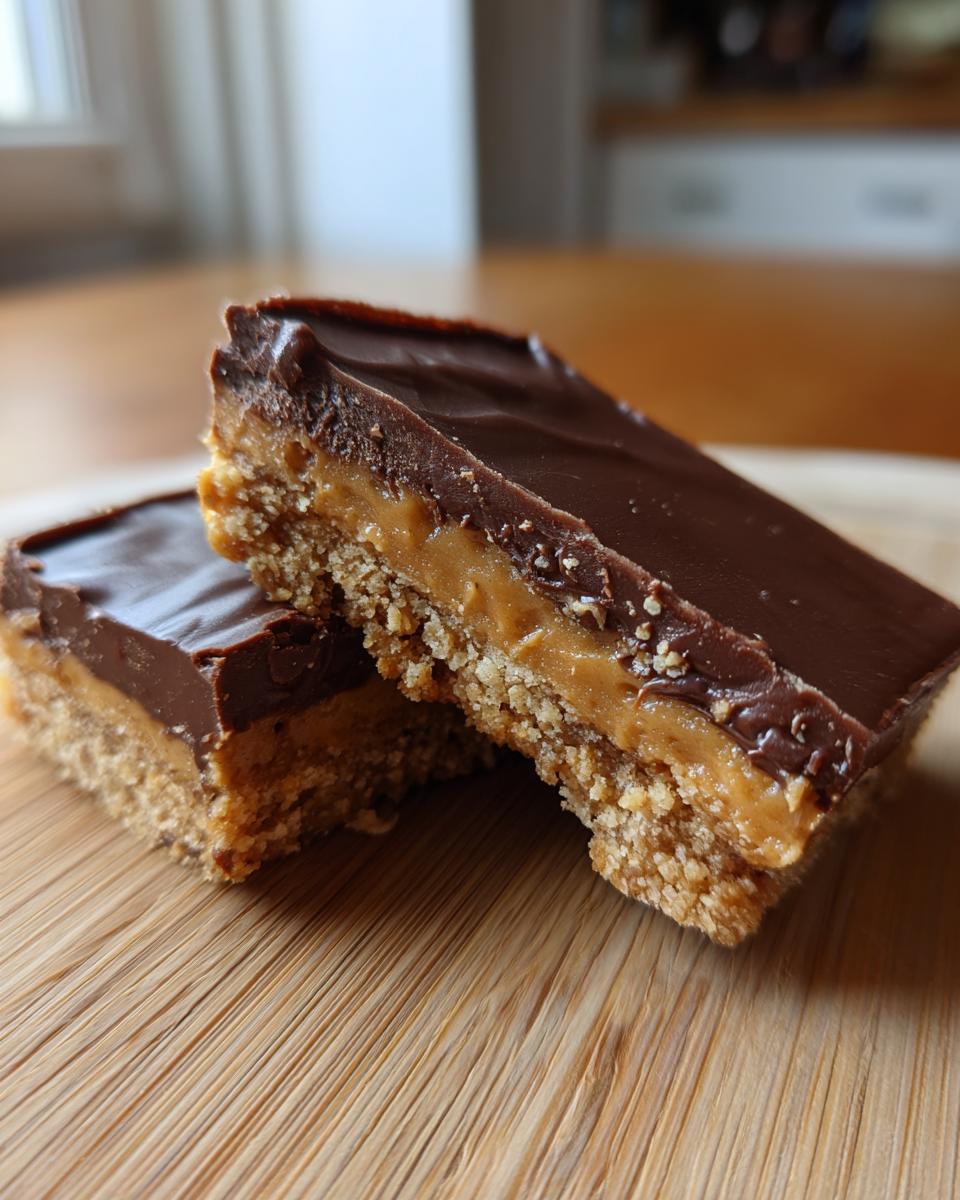
Alright, the hardest part is next: waiting! Pop that pan into the refrigerator. You’ll want to let these chill for at least 2 hours, maybe even a bit longer if your kitchen is super warm. This is crucial – it allows everything to set up properly so you can get nice, clean cuts. If you try to cut them too soon, you’ll just end up with a messy (though still delicious!) pile. Once they’re firm and set, take the pan out. For the cleanest cuts, sometimes I like to run a really sharp knife under hot water, wipe it dry, and then slice. It helps the knife glide through so much easier! Cut them into squares or rectangles – whatever size you fancy. I usually aim for about 24 bars, but you do you!

Tips for Making The No Bake Dessert Perfect Every Time
You know, I’ve made these Chocolate Peanut Butter Bars more times than I can count, and I’ve picked up a few tricks along the way to make sure they turn out just right, every single time. It’s all about the little things! First off, the peanut butter. While any creamy peanut butter works, I find that a standard brand like Jif or Skippy gives you the best consistency for the filling. Natural peanut butters can be a bit oily and might make your filling a little too soft, so if you do use natural, make sure you stir it super well before measuring!
When you’re melting the chocolate, don’t rush it! Microwaving in short bursts and stirring really well between each one is key to avoiding that burnt chocolate taste – yuck! Also, using that tiny bit of vegetable oil makes a HUGE difference in how smooth and pourable the chocolate topping becomes. It really helps it spread evenly without getting thick and clumpy. And for that extra-special touch, I sometimes like to chop up some dry roasted peanuts or even some extra chocolate chips and sprinkle them on top of the chocolate *before* it sets. It adds a nice little crunch! If you love peanut butter goodness in no-bake form, you’ve gotta check out these no-bake peanut butter oat cups or these fun peanut butter Oreo fudge cups too!
Ingredient Notes and Substitutions
So, you’ve got your ingredients, but maybe you’re wondering about a few specifics or if you can swap something out? Totally understand! Let’s chat about the stars of this show. For the peanut butter, I usually reach for regular creamy peanut butter – the kind you find in the middle aisle of the grocery store. Brands like Jif or Skippy work like a charm because they’re already super smooth and stable, making that filling layer silky. If you’re adventurous and want to try natural peanut butter, just be sure to stir it really, really well before measuring, as the oil tends to separate. It might make the filling a bit softer, so just keep that in mind!
And for the chocolate chips? Honestly, any kind you love will work beautifully! Semi-sweet is my personal favorite because it balances the sweetness of the peanut butter and sugar perfectly. But if you’re a fan of milk chocolate, go for it! Or maybe break out the dark chocolate for a richer flavor. Just make sure you’re using good quality chips; it really does make a difference in that yummy topping. And that tablespoon of oil? It’s a little secret weapon for a super smooth, easily spreadable chocolate layer. Don’t skip it!
Serving and Storage Instructions
Okay, so you’ve made these incredible bars, and now it’s time for the best part! I love serving these chilled, straight from the fridge. That’s when they’re perfectly firm and satisfying. Just cut them into squares with a sharp knife – hot water and a quick wipe-down always helps with clean cuts, by the way! If you have any leftovers (which is rare in my house!), just pop them into an airtight container. They’ll keep beautifully in the refrigerator for up to a week. Honestly, they taste even better after a day or two as the flavors meld together.
Frequently Asked Questions about The No Bake Dessert
Got questions about these amazing chocolate peanut butter bars? I’ve got answers! This recipe is pretty forgiving, but here are some things people often ask. If you’re looking for more super easy ideas, I’ve got a whole list of 9 super easy dessert recipes you might like too!
Can I use natural peanut butter?
You totally can, but with a little caveat! Natural peanut butter can be oilier and tends to separate more. If you use it, make sure you stir it *really* well before measuring. It might make the peanut butter layer a smidge softer than usual, but it’ll still be delicious. Just be prepared for that potential texture difference!
What kind of chocolate is best for the topping?
Oh, this is a fun one! I usually grab semi-sweet chocolate chips because they hit that perfect sweet-and-salty balance. But honestly, use what you love! Milk chocolate will give you a sweeter, creamier topping, and dark chocolate will give it a richer, more intense flavor. The key is just making sure it melts smoothly with that little bit of oil you add!
How long do these bars last in the refrigerator?
Good news! These bars keep really well. Store them in an airtight container in the fridge, and they’ll stay delicious for about a week. Sometimes, I think they even taste a little better after a day or two when all those yummy flavors have really melded together. So go ahead and make a batch to enjoy!
Can I make these dairy-free?
You sure can adapt them! For the butter, you can easily swap in a dairy-free butter substitute. For the chocolate chips, look for dairy-free or vegan chocolate chips – there are tons of great options out there now! Just double-check your graham cracker crumbs too, as some can contain dairy. With those simple swaps, you can enjoy these dairy-free delights!
Nutritional Information Estimate
Just a little heads-up, the nutritional info below is an estimate, okay? It can totally change depending on the specific brands of ingredients you use and, of course, how big you cut your bars. But generally, you’re looking at around 250 calories per bar, with about 15g of fat (7g saturated), 25g of carbs, and 4g of protein. It’s a sweet treat, so enjoy it!