
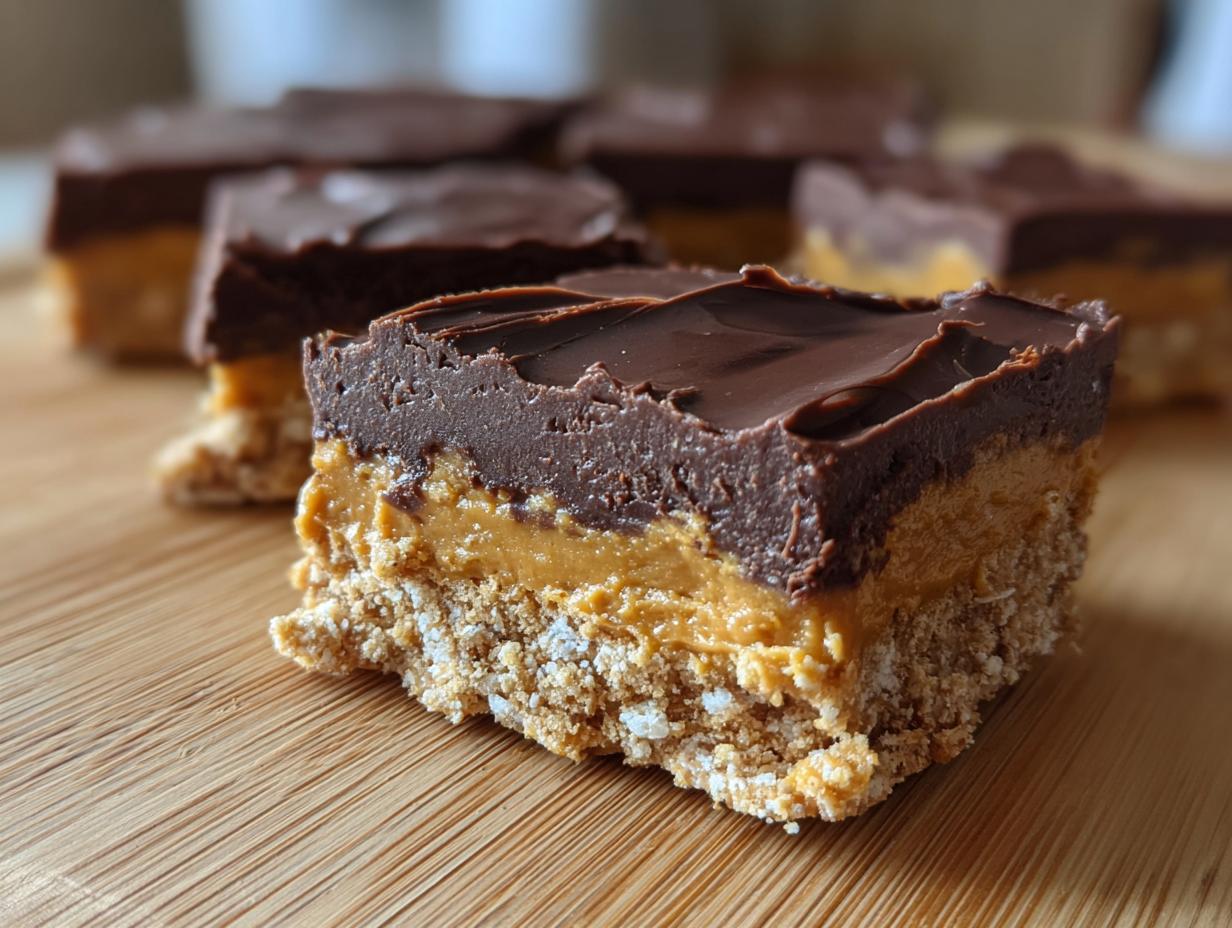
Okay, confession time! When I need a dessert that’s ridiculously easy AND tastes like pure magic, I always, *always* reach for these Chocolate Peanut Butter Bars. Seriously, they’re the no bake dessert everyone is obsessed with, and for good reason! No oven required? Check. Comes together in minutes? Check. Tastes like a dream? HUGE check! I remember first making these years ago for a potluck when I was totally swamped, and they were GONE in about five minutes. Now, they’re my absolute go-to when I need a crowd-pleaser that doesn’t stress me out. It’s just one of those recipes that feels like a secret weapon in your back pocket.
Why You’ll Love The No Bake Dessert Everyone Is Obsessed With
Trust me, there are so many reasons why this recipe is a total winner! It’s:
- Super duper easy to whip up – even if you’re a total beginner!
- Made with just a handful of pantry staples you probably already have.
- Crazy fast! You can be eating these in under 20 minutes of active prep.
- An absolute flavor explosion that’s guaranteed to make everyone happy.
- The perfect sweet treat to satisfy any chocolate and peanut butter craving!
Gather Your Ingredients for The No Bake Dessert Everyone Is Obsessed With
Alright, let’s get our supplies ready for this chocolate peanut butter magic! You’ll need:
1 1/2 cups graham cracker crumbs (about 9-10 full crackers, crushed up!)
1/2 cup (1 stick) unsalted butter, totally melted
1 cup creamy peanut butter (this is key for smoothness!)
3 cups powdered sugar, make sure it’s sifted if you want extra-smoothness
1 1/2 cups chocolate chips (milk or semi-sweet work great!)
1 tablespoon vegetable oil (this helps make the chocolate topping nice and pourable)
Step-by-Step Guide to Making The No Bake Dessert Everyone Is Obsessed With
Alright, let’s get these amazing bars made! It’s really as simple as 1-2-3-4. And trust me, the result will have everyone asking for the recipe for the no bake dessert everyone is obsessed with.
Creating the Chocolate Peanut Butter Crust
First things first, grab a 9×13 inch pan. In a medium bowl, mix those graham cracker crumbs with the melted butter until everything is nicely moistened. Don’t be afraid to really press this mixture down into the bottom of the pan nice and even. This is your foundation, so make it sturdy!
Assembling the Peanut Butter Layer
Now, for the creamy goodness! In a separate bowl, combine your peanut butter and the powdered sugar. Mix it up really well until it’s super smooth and fully combined. You want it to be like a thick, glorious paste. Spread this evenly over the graham cracker crust. Make sure to get it all the way to the edges!
Melting and Pouring the Chocolate Topping
Time for the best part – chocolate! In a microwave-safe bowl, combine the chocolate chips and that tablespoon of vegetable oil. Microwave in 30-second intervals, stirring in between, until it’s smooth and melty. This little bit of oil makes it totally pourable and glossy! Carefully pour this luscious chocolate over the peanut butter layer and spread it out gently to cover completely. You can even check out this super helpful guide on melting chocolate if you’re new to it!
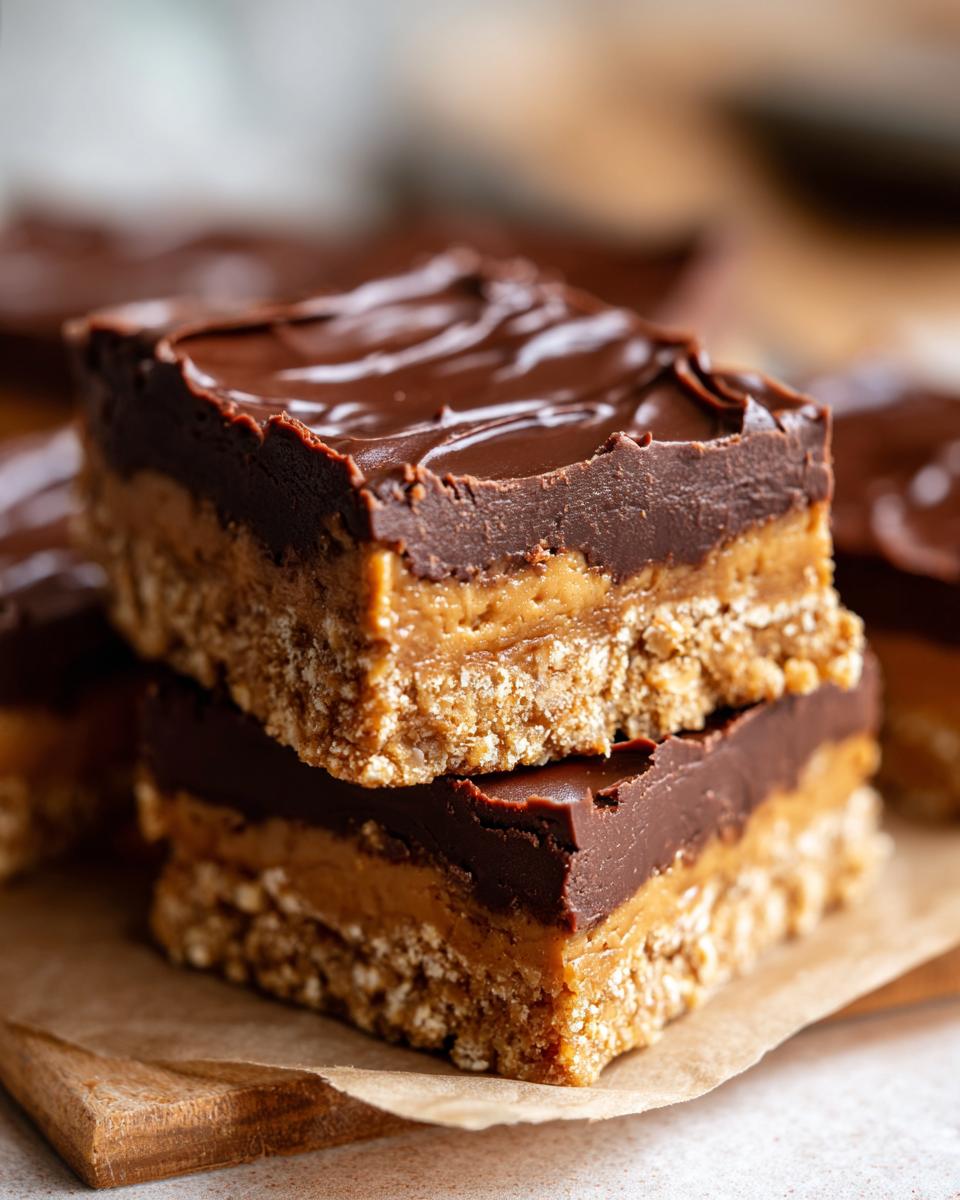
Chilling and Cutting Your No-Bake Dessert
Now for the hardest part: waiting! Pop that pan into the refrigerator for at least 2 hours. You want it to be totally set and firm. Once it’s chilled, take it out and cut it into squares. For the cleanest cuts, run a sharp knife under hot water, wipe it dry, and then slice. Repeat for each cut!

Tips for Perfect No-Bake Chocolate Peanut Butter Bars
Okay, so these bars are pretty forgiving, but a few little tricks can make them absolutely sensational. For starters, don’t skimp on the peanut butter quality! Using a good, creamy peanut butter makes a world of difference in that smooth middle layer. I’ve found that brands you don’t have to stir are usually the best here.
When you’re melting the chocolate, be super careful not to overheat it – burnt chocolate is no fun! That little bit of oil is your best friend for that shiny, pourable topping, and if you’re feeling fancy, a tiny pinch of sea salt in the chocolate can really make those flavors pop.
And seriously, give them enough time to chill! That 2-hour minimum in the fridge is crucial for them to set up properly so you get those beautiful clean cuts when you slice them. If you’re obsessed with peanut butter treats like I am, you might also want to check out these super easy peanut butter brownies or even these fun peanut butter Oreo fudge cups!
Ingredient Notes and Substitutions
Let’s talk ingredients for a sec! Creamy peanut butter is definitely my go-to here because it makes that middle layer so smooth and dreamy. But hey, if you’re a crunchy peanut butter fan, go for it! It’ll just add a little texture, which can be kinda nice too.
For the chocolate, I usually grab semi-sweet chips, but milk chocolate is totally fine if that’s your jam. If you’re looking to make these a bit more gourmet, you could even use some nice dark chocolate chips. And for the graham crackers, any plain graham crackers will do the trick!
Frequently Asked Questions About This No-Bake Dessert
Got questions about these amazing bars? I’ve got you covered!
Can I use crunchy peanut butter instead of creamy?
Absolutely! While creamy peanut butter gives you that super smooth middle layer, crunchy peanut butter will work just fine. You’ll end up with a bit more texture in your bars, which lots of people actually love! It’s all about personal preference.
How long do these bars last?
These Chocolate Peanut Butter Bars are pretty sturdy little things. If you store them in an airtight container in the refrigerator, they should stay delicious for about a week to 10 days. Just make sure they’re completely cooled before sealing them up!
Can I freeze these bars?
Yes, you totally can! If you want to make a big batch and save some for later, freezing is the way to go. Wrap the cut bars tightly in plastic wrap, then pop them into a freezer-safe container or bag. They’ll keep well in the freezer for up to 2-3 months. Just let them thaw in the fridge overnight before you want to enjoy them.
What if I don’t have graham crackers?
No graham crackers? No problem! You can totally use crushed-up vanilla wafers, digestive biscuits, or even some shortbread cookies for the crust. Just make sure you crush them finely and mix them well with the melted butter, just like you would with graham crackers. If you need even more no-bake ideas, check out these no-bake peanut butter oat cups!
Serving and Storage Instructions
These bars are just begging to be served chilled! Once they’ve had their good long chill (at least 2 hours in the fridge, remember?), slice them up into those perfect squares. They’re fantastic as is, but a little extra sprinkle of sea salt on top never hurt anyone!
Leftovers? What leftovers?! Just kidding! Store any that miraculously survive in an airtight container in the refrigerator. They’ll stay wonderfully fresh and delicious for about a week, maybe even a little longer if you’re lucky!
Estimated Nutritional Information
Alright, let’s talk numbers! Keep in mind these are just estimates, since the exact amounts can change depending on brands and stuff. But generally, one of these glorious bars has about 250 calories, 15g of fat (with 7g saturated), 25g carbs, and 4g protein. Deliciousness like this always comes with some decadence, right?