
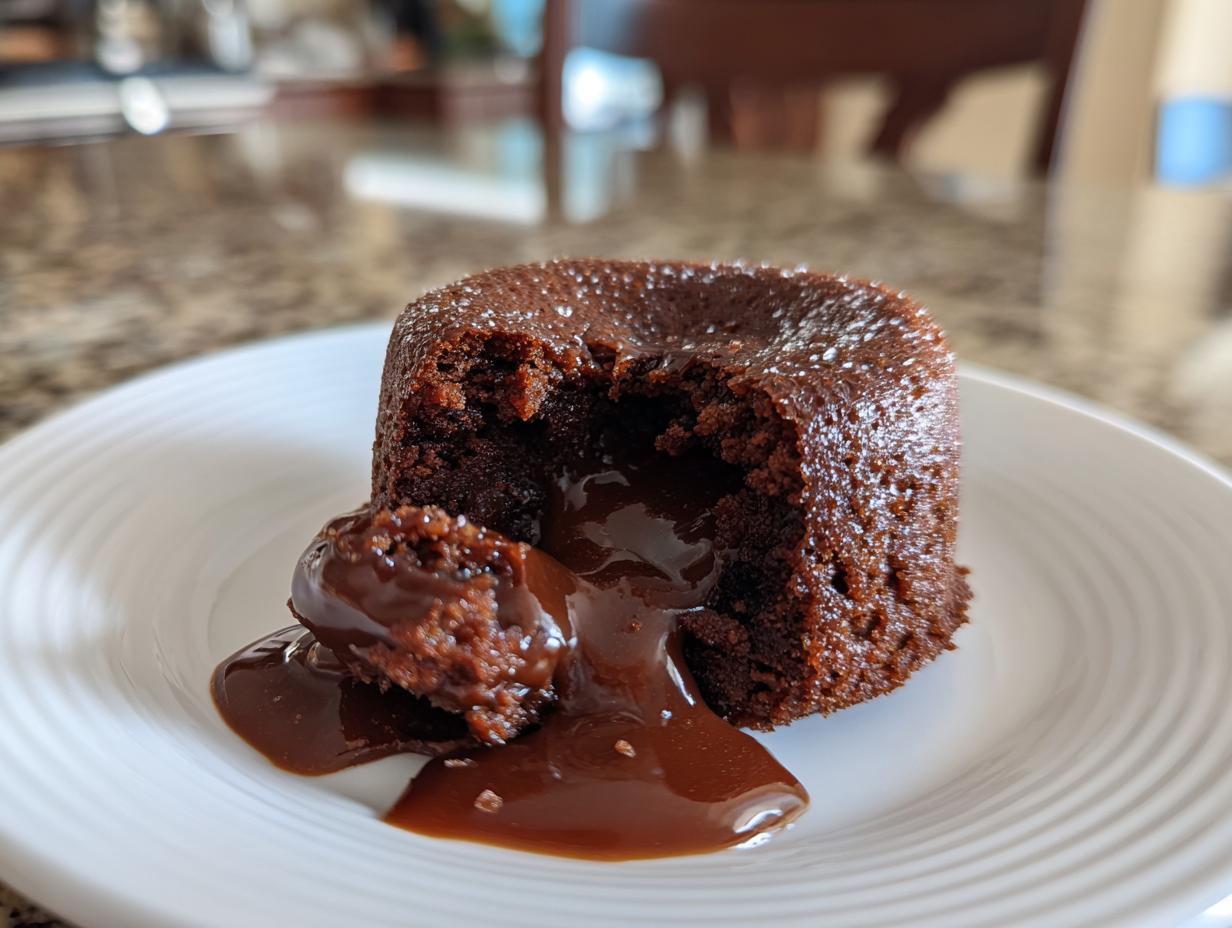
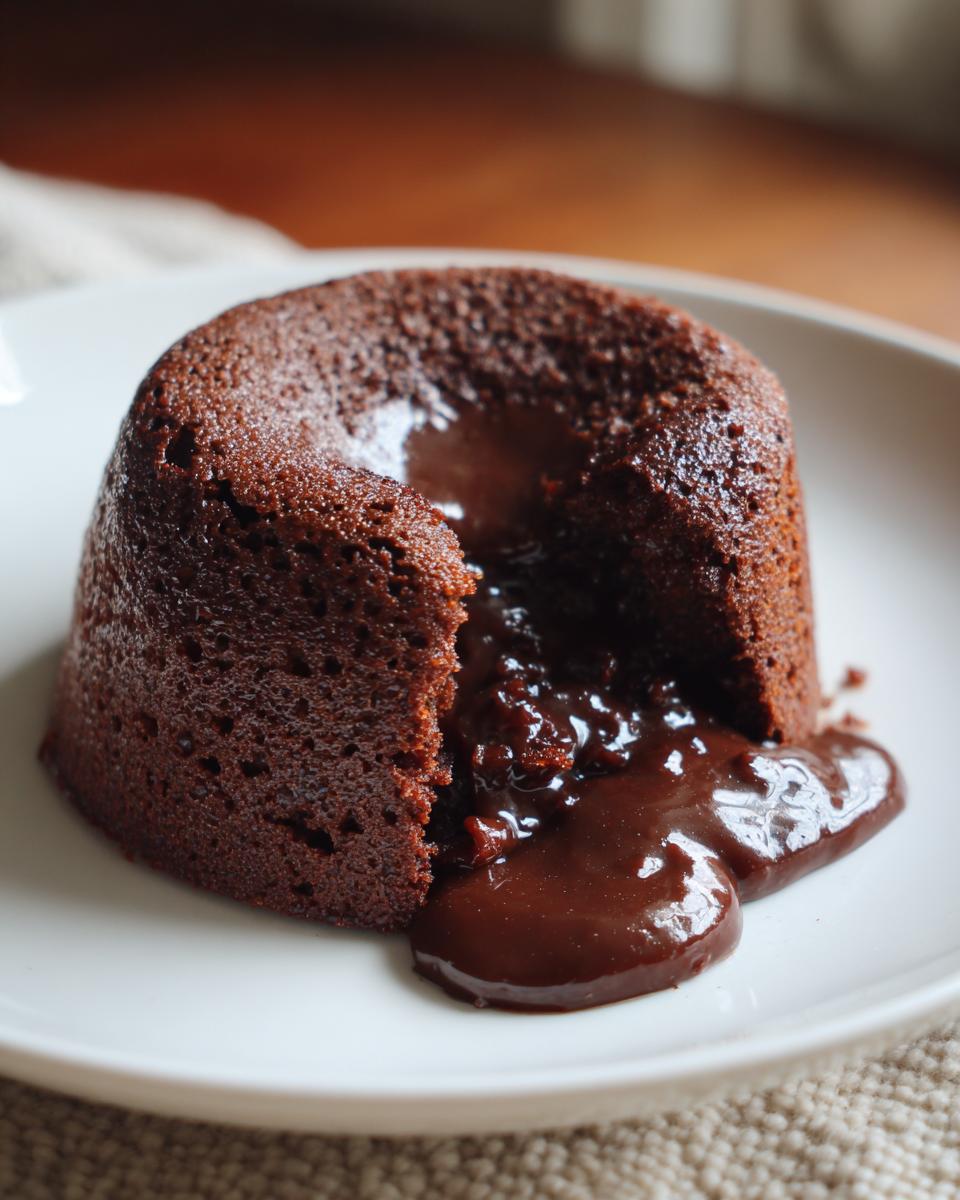
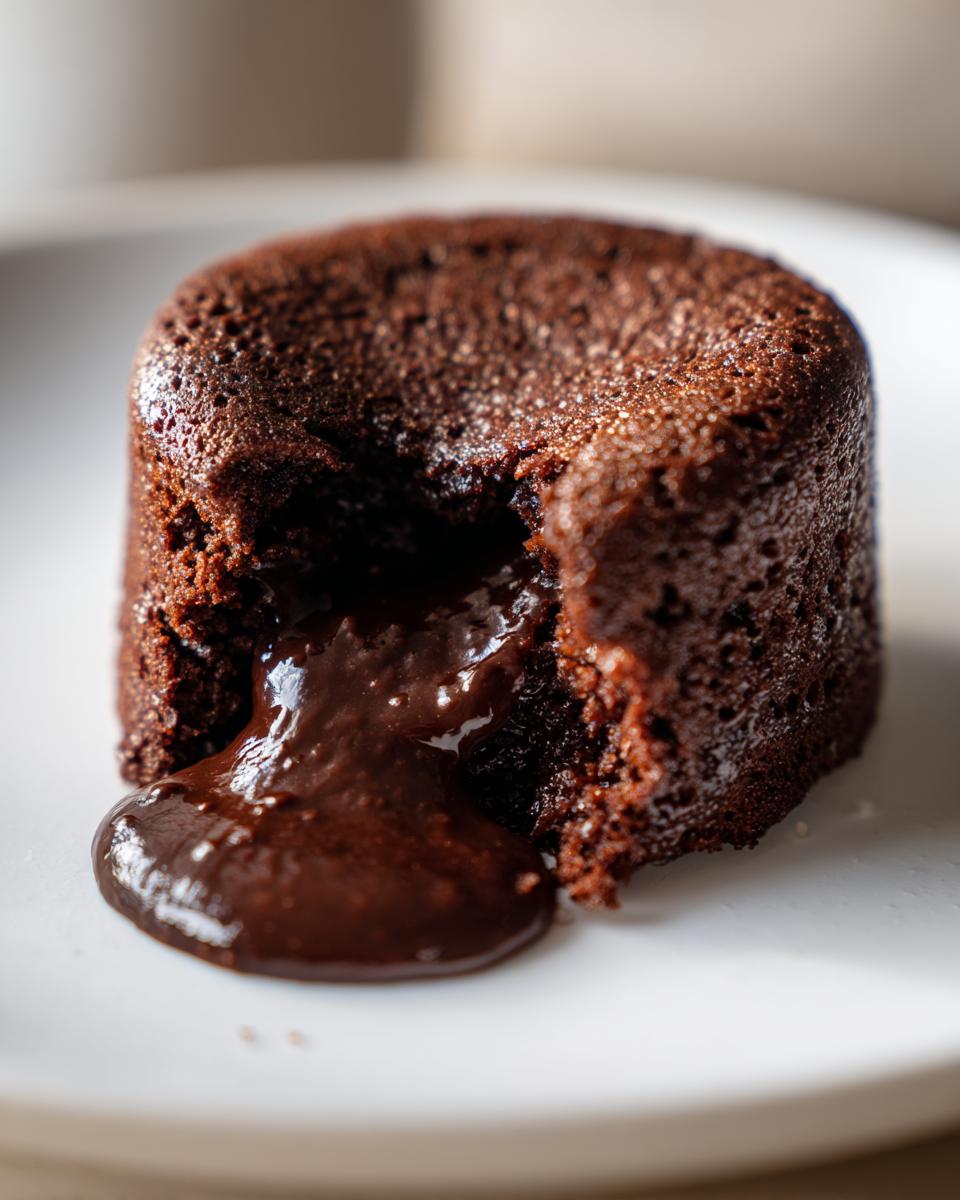
Oh, chocolate! Is there anything more comforting, more decadent, more utterly irresistible? When that craving hits, you know you need something *serious*, something that makes you close your eyes and just savor every bite. That’s where the magic happens, and honestly, it’s why this thing became known as The Chocolate Dessert That Breaks the Internet. We’re talking about Chocolate Lava Cake, folks! It’s this little individual cake on the outside, but break it open and BAM! A river of warm, gooey chocolate goodness comes pouring out. It sounds fancy, but trust me, it’s shockingly easy to make, and it always, always impresses.
Why You’ll Love This The Chocolate Dessert That Breaks the Internet
Seriously, what’s not to love about this recipe? Let me break it down:
- Super Easy: You can whip these up in a flash – way faster than you think!
- Crazy Decadent: That molten chocolate center? Pure heaven. It tastes so rich and luxurious.
- Always Impressive: Pull this out, and everyone will think you’re a baking genius, even if you’re not!
- Quick Fix: Seriously, it’s ready in about 30 minutes from start to finish. Perfect for when you need a chocolate fix NOW.
Gather Your Ingredients for The Chocolate Dessert That Breaks the Internet
Alright, let’s get down to business! You don’t need a whole lot of fancy stuff for this chocolate masterpiece. The key is good quality chocolate – it makes all the difference, trust me. You’ll need:
- 6 ounces of good semi-sweet chocolate, chopped up into little pieces. This helps it melt nice and smooth.
- 1/2 cup (that’s one stick!) of unsalted butter. Make sure it’s softened a bit.
- 2 big, beautiful large eggs, plus 2 extra large egg yolks. These give it that super rich, Custardy center.
- 1/4 cup of regular granulated sugar. Just enough to sweeten things up.
- 2 tablespoons of all-purpose flour. Yep, just a tiny bit!
- And a little pinch of salt. It really makes the chocolate flavor pop!
Having these ready to go makes the whole process a breeze. You can find more super yummy chocolate lava cake inspiration if you need it!
Equipment Needed for Your Chocolate Lava Cake
Okay, so you don’t need a whole restaurant kitchen for this! Here’s what you’ll want to have ready to go:
- Two 6-ounce ramekins. These are the little ceramic cups that bake the cakes perfectly.
- A couple of mixing bowls – one for melting and one for whisking.
- A whisk is definitely your best friend here for getting things smooth.
- A saucepan or a microwave-safe bowl for melting that chocolate and butter.
- And of course, a good old-fashioned tablespoon and measuring cups for getting your ingredients just right!
Having these handy makes a world of difference!
Step-by-Step Guide to Making The Chocolate Dessert That Breaks the Internet
Alright, let’s get down to the nitty-gritty! Making these little chocolate wonders is surprisingly straightforward. Just follow these steps and you’ll have a dessert that’ll blow everyone away. First things first, let’s get that oven humming!
- Preheat your oven to a nice hot 425°F (220°C). This high heat is key for getting that perfect balance of cooked cake and gooey center. While it’s heating up, grab your two ramekins. Give them a good greasing and then a light dusting of flour. This is super important – it stops them from sticking, and nobody wants a lava cake stuck in the dish!
- Now for the delicious part: melting the chocolate and butter. You can do this gently in a saucepan over low heat, stirring until it’s all smooth and glossy. Or, if you’re like me and like to keep things simple, pop them in a microwave-safe bowl and zap them in 30-second intervals, stirring in between, until they’re totally melted and combined. Super easy!
- In a separate bowl, grab your whisk! Whisk together those two large eggs and the two extra egg yolks with the granulated sugar. You want to whisk them until they’re nice and pale yellow and a little fluffy. This just helps incorporate some air.
- Next, it’s time to add the flour and the pinch of salt to the egg mixture. Flour goes in, give it a good whisk until it’s just combined. Don’t go crazy overmixing here!
- Now, gently pour that luscious melted chocolate and butter mixture into the egg and flour batter. Stir everything together until you have a beautiful, smooth chocolate batter. It should look rich and inviting. If you’re looking for more double chocolate ideas, now’s your chance to browse!
- Carefully divide your glorious chocolate batter evenly between those two prepared ramekins. Fill them up, but don’t pack them too tightly – leave a little room for them to puff up.
- Pop those ramekins onto a baking sheet (just in case of any little spills) and slide them into your preheated oven. Bake them for about 12 to 15 minutes. This is the crucial part! You want the edges to look set and the center to still be a little soft and jiggly. Trust your gut here! It’s better to underbake slightly than overbake! For more amazing dessert cake ideas, check out this link.
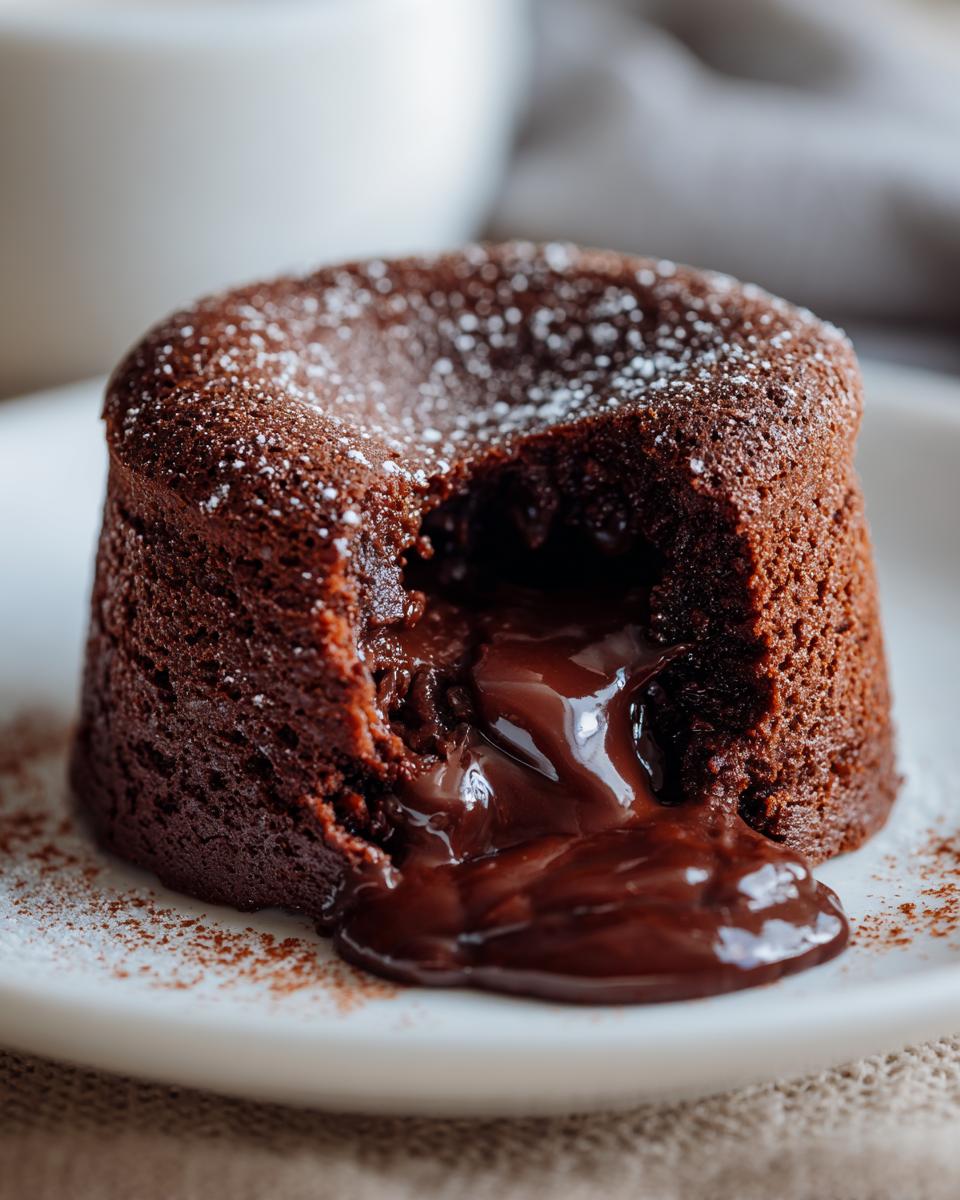
- Once they’re done, carefully take them out of the oven. Let them rest in the ramekins for just a minute or two. Then, grab a plate, flip the ramekin over onto it, give it a gentle tap, and watch that glorious molten center ooze out! Serve them immediately so that chocolate is perfectly warm and gooey.
Tips for Perfect Chocolate Lava Cake Every Time
Okay, so you’ve got the recipe, you’ve got the ingredients, but how do you make sure these little chocolate wonders turn out *perfect* every single time? It’s all about a few little tricks! Honestly, the biggest thing is not to overbake these beauties. That molten center is the star of the show, right? So, pay close attention to those baking times. If the edges look set but the center is still a little jiggly when you gently shake the ramekin, they’re probably ready. It’s better to err on the side of caution and have a slightly softer center than a fully cooked cake!
Seriously, my favorite tip is to even have an extra ramekin with batter ready to go, just in case you pull one out and it looks a *tiny* bit too done. You can pop the second one in if you need to! Also, once they’re inverted onto the plate, serve them right away! That oozy lava is best when it’s warm. If you want to make them ahead, you can actually prep the batter and put it in the greased ramekins, cover them tightly, and keep them in the fridge. Just add a couple of extra minutes to the baking time if you’re baking from cold.
And for serving? Don’t be shy! A little dusting of powdered sugar looks super elegant, or you can go all out with a scoop of vanilla bean ice cream or some fresh raspberries. Trust me, seeing that melty chocolate goodness spilling out is always a showstopper. For more amazing ideas on warm molten chocolate lava cakes, check this out!
Ingredient Notes and Substitutions
Let’s talk about some of the ingredients and why they matter so much in this recipe. First up, the chocolate! I really, really like using a good quality semi-sweet chocolate. It has that perfect balance of rich chocolate flavor without being too sweet or too bitter, which is exactly what you want when it’s going to be all gooey and molten. If you can’t find semi-sweet, a dark chocolate with about 60-70% cacao would work beautifully too, but you might want to add just a tiny bit more sugar to the batter if you go too dark.
Now, for the butter. Unsalted butter is my go-to because it lets you control the saltiness of the final dessert. Using salted butter works in a pinch, but you’ll want to skip or seriously reduce the pinch of salt at the end, otherwise, it can get a little too salty. And those egg yolks? They’re little powerhouses of richness! They make the center extra creamy and decadent. Don’t skip them if you can help it!
Serving Suggestions for Your Internet-Breaking Dessert
Okay, so you’ve made this incredible chocolate lava cake, and it’s hot and ready. What do you do next? You gotta serve it up right! The best way, hands down, is with something cool and creamy to contrast that warm, gooey chocolate. A scoop of really good vanilla bean ice cream is a classic for a reason – it’s just perfection. If you’re feeling a bit more adventurous, try a dollop of fresh whipped cream or a swirl of raspberry coulis. The tartness of the berries cuts through the richness beautifully! You can also never go wrong with a little dusting of powdered sugar for that extra fancy touch. For more ideas on chocolate desserts, give this a peek!

Storage and Reheating Instructions
So, what if you have these amazing lava cakes and you can’t eat them all at once? Totally understandable! You can store any leftovers in the fridge for about a day. Just pop them into an airtight container. To reheat and get that lava flowing again, pop them in a preheated oven at 350°F (175°C) for about 10-15 minutes. You want the center to be warm and gooey again, not fully cooked through!
Frequently Asked Questions About Chocolate Lava Cake
Got questions about making your own internet-breaking chocolate lava cake? I totally get it! It’s one of those recipes that sounds super fancy, and you just want to make sure you nail it. Here are some of the most common things people ask:
Can I make lava cakes ahead of time?
Oh yes, you absolutely can! This is one of my favorite tricks. Mix up your batter, spoon it into your greased and floured ramekins, cover them and pop them in the fridge. They can hang out there for up to 24 hours. When you’re ready to serve, just pop them straight into that hot oven (you might need to add a few extra minutes to the baking time since they’ll be cold, so keep an eye on them!).
What kind of chocolate is best for lava cakes?
Honestly, the better the chocolate, the better your lava cake will be, period. I really like using a good quality semi-sweet chocolate, something with around 60-70% cacao. It gives you that perfect balance of rich chocolate flavor without being too sweet or too bitter. If you use milk chocolate, it’ll likely be too sweet and might not set up right. Dark chocolate works too, but make sure it’s something you enjoy eating on its own!
How do I know when my lava cake is done?
This is the million-dollar question, right? You want that molten center! The edges of the cake should look set – they’ll be firm to the touch and slightly puffed. But the very center should still look a little soft, a bit jiggly when you gently shake the ramekin. It’s totally okay if it looks a little underdone in the middle; that’s what makes it lava! If you’re unsure, err on the side of underbaking. You can always pop it back in for another minute, but you can’t undo an overbaked cake.
For more super easy lava cake ideas, you should totally check out these Nutella lava cakes!
Nutritional Information
So, you’re curious about what’s actually in these little bites of heaven? While it’s super hard to get exact numbers because we all use slightly different brands and ingredients, here’s a ballpark of what you can expect per serving of this amazing chocolate lava cake. Remember, these are just estimates!
- Serving Size: 1 cake
- Calories: Around 450
- Fat: About 30g (with roughly 18g of that being saturated fat)
- Carbohydrates: Around 40g
- Sugar: About 35g
- Protein: Around 7g
- Sodium: About 100mg
- Cholesterol: Around 150mg
Keep in mind that using different types of chocolate or butter can slightly change these numbers. But hey, it’s a treat, right?
Print
Mediterranean Lemon Lentil Soup
- Total Time: 60 min
- Yield: 6 servings 1x
- Diet: Vegetarian
Description
A hearty and flavorful lentil soup with bright lemon and Mediterranean herbs.
Ingredients
- 1 tablespoon olive oil
- 1 large onion, chopped
- 2 carrots, chopped
- 2 celery stalks, chopped
- 4 cloves garlic, minced
- 1 teaspoon dried oregano
- 1 teaspoon dried thyme
- 1/2 teaspoon ground cumin
- 1/4 teaspoon red pepper flakes (optional)
- 1 cup brown or green lentils, rinsed
- 6 cups vegetable broth
- 1 (14.5 ounce) can diced tomatoes, undrained
- 1 bay leaf
- Juice of 1 lemon
- Salt and freshly ground black pepper to taste
- Fresh parsley, chopped, for garnish
Instructions
- Heat olive oil in a large pot or Dutch oven over medium heat. Add onion, carrots, and celery. Cook until softened, about 8-10 minutes.
- Add garlic, oregano, thyme, cumin, and red pepper flakes (if using). Cook for 1 minute more until fragrant.
- Stir in the rinsed lentils, vegetable broth, diced tomatoes, and bay leaf.
- Bring the soup to a boil, then reduce heat and simmer, covered, for 30-40 minutes, or until lentils are tender.
- Remove the bay leaf. Stir in the lemon juice.
- Season with salt and pepper to taste.
- Ladle soup into bowls and garnish with fresh parsley.
Notes
- For a creamier soup, you can blend a portion of it using an immersion blender or transfer some to a regular blender.
- Add a pinch of sugar if your tomatoes are very acidic.
- This soup freezes well.
- Prep Time: 15 min
- Cook Time: 45 min
- Category: Soup
- Method: Stovetop
- Cuisine: Mediterranean
Nutrition
- Serving Size: 1.5 cups
- Calories: 250
- Sugar: 8g
- Sodium: 600mg
- Fat: 5g
- Saturated Fat: 1g
- Unsaturated Fat: 4g
- Trans Fat: 0g
- Carbohydrates: 40g
- Fiber: 15g
- Protein: 15g
- Cholesterol: 0mg
Keywords: lentil soup, mediterranean, lemon, vegetarian, healthy, easy, soup recipe