
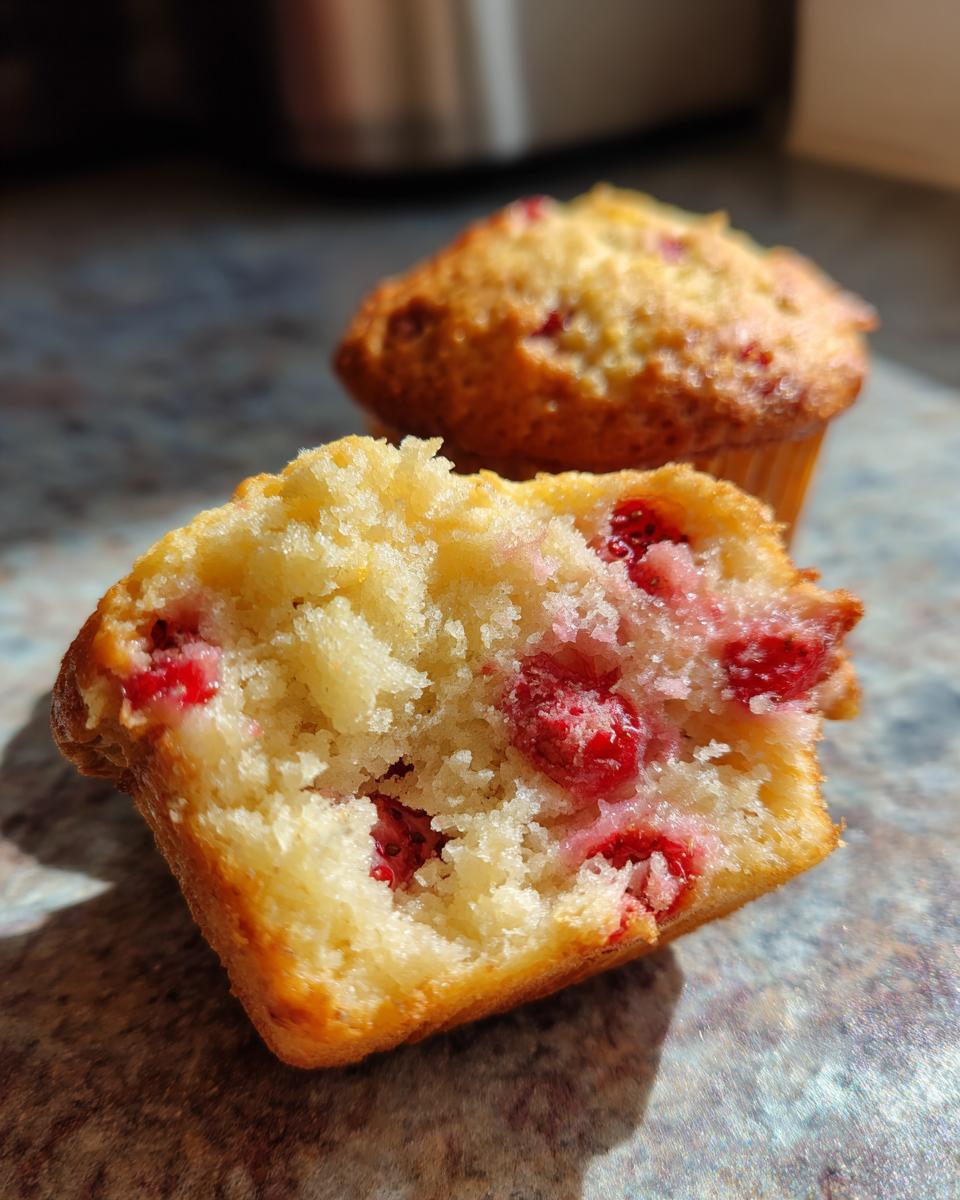
I absolutely *love* making breakfast for my family! Seriously, it’s the best way to start the day. And these strawberry muffins? Oh my gosh, they’re a total game-changer. They’re fluffy, bursting with fresh strawberry flavor, and so easy, my kids practically make them with me (okay, I do most of the work, but they *help*!). I’ve been perfecting this recipe for years, tweaking it here and there, and let me tell you, it’s pure *perfection*!
Why You’ll Love These Delicious Strawberry Muffins
Okay, so, besides the fact that they’re totally delish, why will you *actually* love these strawberry muffins? Let me count the ways!
- They’re ridiculously easy to make. Seriously, even if you’re a beginner baker, you’ve got this!
- The fresh strawberry flavor just *explodes* in your mouth. You’ll be transported straight to summer!
- They’re perfect for breakfast, brunch, or an afternoon snack. You can’t go wrong!
And the best part? Your kitchen will smell *amazing* while they bake. Trust me, these muffins are a win-win all around!

Ingredients You’ll Need for the Perfect Strawberry Muffins
Alright, so here’s what you’ll need to whip up these amazing strawberry muffins. Don’t worry, it’s all pretty basic stuff you probably already have in your pantry!
- 2 cups all-purpose flour—yup, the regular kind!
- ¾ cup granulated sugar.
- 2 ½ teaspoons of baking powder—that’s what makes them rise!
- ½ teaspoon of salt—just a pinch.
- 1 cup milk—I usually use whatever I have on hand.
- ⅓ cup vegetable oil.
- 1 large egg.
- 1 teaspoon vanilla extract—the good stuff!
- 1 ½ cups fresh strawberries, hulled and chopped—fresh is BEST, trust me!
See? Nothing too fancy! Now let’s get baking!
Step-by-Step Instructions: How to Make Strawberry Muffins
Okay, friends, let’s get down to the nitty-gritty and bake these babies! Don’t be intimidated; it’s super simple, I promise. Just follow these steps, and you’ll be smelling delicious strawberry muffins in no time. This is how I do it every single time!
Preparing the Muffin Tin and Oven
First things first, preheat your oven to 400°F (that’s 200°C for my international friends!). Next, grab a muffin tin and line it with those cute paper liners. I find they make clean-up a breeze. Seriously, it’s such a lifesaver! Do this first so you’re ready to go when the batter is ready.
Combining the Dry Ingredients
In a big bowl (I love my trusty, old, red one!), whisk together the flour, sugar, baking powder, and salt. Get in there and make sure everything is mixed *really* well. You want the baking powder evenly distributed, that’s key to fluffy muffins! I usually use a whisk, it’s the easiest thing.
Mixing the Wet Ingredients
Now, grab another bowl – and this is where it gets fun! Whisk together the milk, oil, egg, and vanilla extract. You want everything combined, but don’t overmix. A little whisking action is all it takes! The vanilla gives it that amazing aroma… you’ll see.
Combining Wet and Dry Ingredients and Adding Strawberries
Here’s where the magic happens! Pour the wet ingredients into the dry ingredients. Gently stir until *just* combined. Don’t overmix! A few lumps are totally fine. Then, *gently* fold in those chopped strawberries. Careful not to mash them up too much–we want those beautiful chunks of strawberry goodness in every bite!
Baking the Strawberry Muffins
Fill each muffin liner about two-thirds full. Pop that muffin tin into the preheated oven and bake for 18-20 minutes. Keep an eye on them! You’ll know they’re done when a toothpick inserted into the center comes out clean. I usually peek around the 18-minute mark, just to be sure.

Cooling and Serving
Once they’re out of the oven, let them cool in the tin for a few minutes. Then, carefully transfer them to a wire rack to cool completely. I know it’s hard, but try to resist eating them straight from the tin! Let them cool a little more before digging in… if you can. These strawberry muffins are amazing warm, but oh-so-good at room temperature too!
Tips for Success: Making the Best Strawberry Muffins
Okay, so, you *want* the best strawberry muffins, right? Trust me, I get it! Here are a few of my tried-and-true tips to make sure yours are totally amazing, every single time. These are the little things that make a *big* difference!
First off, prep those strawberries *properly*. Hull them and chop them just before you add them to the batter. That way, they don’t get all soggy! It’s so tempting to do it earlier, but trust me, fresh is best. Next, don’t overmix your batter! Overmixing develops the gluten in the flour, and you’ll end up with tough muffins. Yuck! Just mix until the wet and dry ingredients are *just* combined—a few streaks of flour are totally fine.
Also, make sure your baking powder is fresh. It can lose its oomph over time, and that’s a *total* bummer for rise. Finally, don’t open the oven door too often while they’re baking! Let those muffins work their magic without any interruptions. Follow these tips—and you’ll be on your way to muffin heaven!

Ingredient Notes and Possible Substitutions
Okay, let’s talk about some of the ingredients and what you can maybe swap out if you need to! Because, you know, sometimes you run out of stuff. It happens to the best of us!
First off, the flour: I use all-purpose because it’s what I always have. But, if you’re feeling fancy, or need gluten-free, feel free to experiment! Then we have the strawberries—fresh is always best, but if fresh strawberries aren’t available, frozen ones are a great second choice. Just be sure to thaw them, and pat them really, really dry. We don’t want soggy muffins! And hey, if you want to add a teaspoon of lemon zest you go right ahead!
Make-Ahead & Freezer Tips for Strawberry Muffins
So, sometimes you just don’t have time to bake fresh, I get it! Here’s how I make these strawberry muffins ahead: You can totally make the batter a day (or even two!) ahead of time. Just mix everything up, cover the bowl, and pop it in the fridge. Then, just before baking, fill your muffin tin and bake as usual! They might take an extra minute or two to bake, since the batter’s chilled.
As for freezing? These babies freeze like a dream! Let the muffins cool completely, then pop them into a freezer bag. They’ll last for about 2-3 months. To reheat, just thaw them at room temperature or microwave for a few seconds. Easy peasy!
Variations: Spice Up Your Strawberry Muffins
Okay, friends, let’s get creative! While the classic strawberry muffins are amazing as-is, sometimes you need a little *zing*. Here are a few ideas to jazz things up!
Try adding a teaspoon of cinnamon or nutmeg to the batter for a warm, spiced flavor. Chocolate chips? YES, please! Or, for a little extra tang, a handful of fresh blueberries pairs *perfectly* with the strawberries. And if you’re feeling extra, try a simple streusel topping… yum!
Frequently Asked Questions About Strawberry Muffins
Got questions about these amazing strawberry muffins? I’ve got answers! I get asked all the time about the best ways to make these, so I thought I’d share the FAQs with you all! Let’s get to it!
Can I use frozen strawberries?
Absolutely! I’ve been there; fresh strawberries aren’t always in season, or, let’s be real, sometimes you just forget to buy them! If using frozen strawberries, make sure you thaw them completely and pat them super dry with paper towels before adding them to the batter. This helps prevent the muffins from getting soggy. Nobody wants a soggy muffin, am I right?
How can I make these muffins extra moist?
Besides this already perfect recipe, a little trick I’ve learned is to not overmix and to use fresh strawberries. Overmixing causes tough muffins and no one wants that! Also, you can add a tablespoon or two of milk to the batter. A little extra moisture does wonders! Make sure you measure everything, too, so your muffins come out perfect every time.
Can I add anything else to the muffins?
Of course, this is your kitchen, have fun and get creative! My favorite thing to add is a sprinkle of cinnamon, oh my gosh, it just warms up the whole recipe! You can also throw in a handful of chocolate chips or even some blueberries. Have a little fun and make it your own! The best part of baking is getting to make it how you like!
How do I store these strawberry muffins?
If you have any leftovers (which, let’s be honest, is rare at my house!), store them in an airtight container at room temperature for up to 3 days. Or, for longer storage, pop them in the freezer! Just put them in a freezer-safe bag or container.
Estimated Nutritional Information for Strawberry Muffins
Alright, so here’s a rough idea of what you’re getting in one of these delicious strawberry muffins. Keep in mind, this is just an estimate, since ingredients can vary. But hey, it gives you a general idea!
- Calories: Around 200 (give or take!)
- Sugar: About 15g
- Sodium: 150mg
- Fat: 8g
- Protein: 3g
- Carbohydrates: 30g
Enjoy those muffins!
Print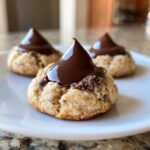
Santa’s Favorite Peanut Butter Blossoms
- Total Time: 30 min
- Yield: 36 cookies 1x
- Diet: Vegetarian
Description
Classic peanut butter cookies topped with a chocolate kiss.
Ingredients
- 2 1/4 cups all-purpose flour
- 1 teaspoon baking soda
- 1/2 teaspoon salt
- 1 cup (2 sticks) unsalted butter, softened
- 1 cup creamy peanut butter
- 3/4 cup granulated sugar
- 3/4 cup packed brown sugar
- 2 large eggs
- 1 teaspoon vanilla extract
- 1 (12 ounce) package Hershey’s Kisses
Instructions
- Preheat your oven to 375 degrees F (190 degrees C).
- In a small bowl, whisk together the flour, baking soda, and salt.
- In a large bowl, cream together the softened butter, peanut butter, granulated sugar, and brown sugar until light and fluffy.
- Beat in the eggs one at a time, then stir in the vanilla extract.
- Gradually add the dry ingredients to the wet ingredients, mixing until just combined.
- Roll the dough into 1-inch balls.
- Place the balls onto ungreased baking sheets.
- Bake for 9 to 11 minutes, or until the edges are lightly golden.
- Immediately press a chocolate kiss into the center of each warm cookie.
- Let the cookies cool on the baking sheets for a few minutes before transferring them to a wire rack to cool completely.
Notes
- For a festive touch, you can use holiday-themed Hershey’s Kisses.
- Store cookies in an airtight container at room temperature.
- Prep Time: 20 min
- Cook Time: 10 min
- Category: Dessert
- Method: Baking
- Cuisine: American
Nutrition
- Serving Size: 1 cookie
- Calories: 150
- Sugar: 12g
- Sodium: 60mg
- Fat: 8g
- Saturated Fat: 3g
- Unsaturated Fat: 5g
- Trans Fat: 0g
- Carbohydrates: 17g
- Fiber: 1g
- Protein: 3g
- Cholesterol: 15mg
Keywords: peanut butter cookies, chocolate kiss cookies, Christmas cookies, holiday baking, Santa's cookies, classic cookies