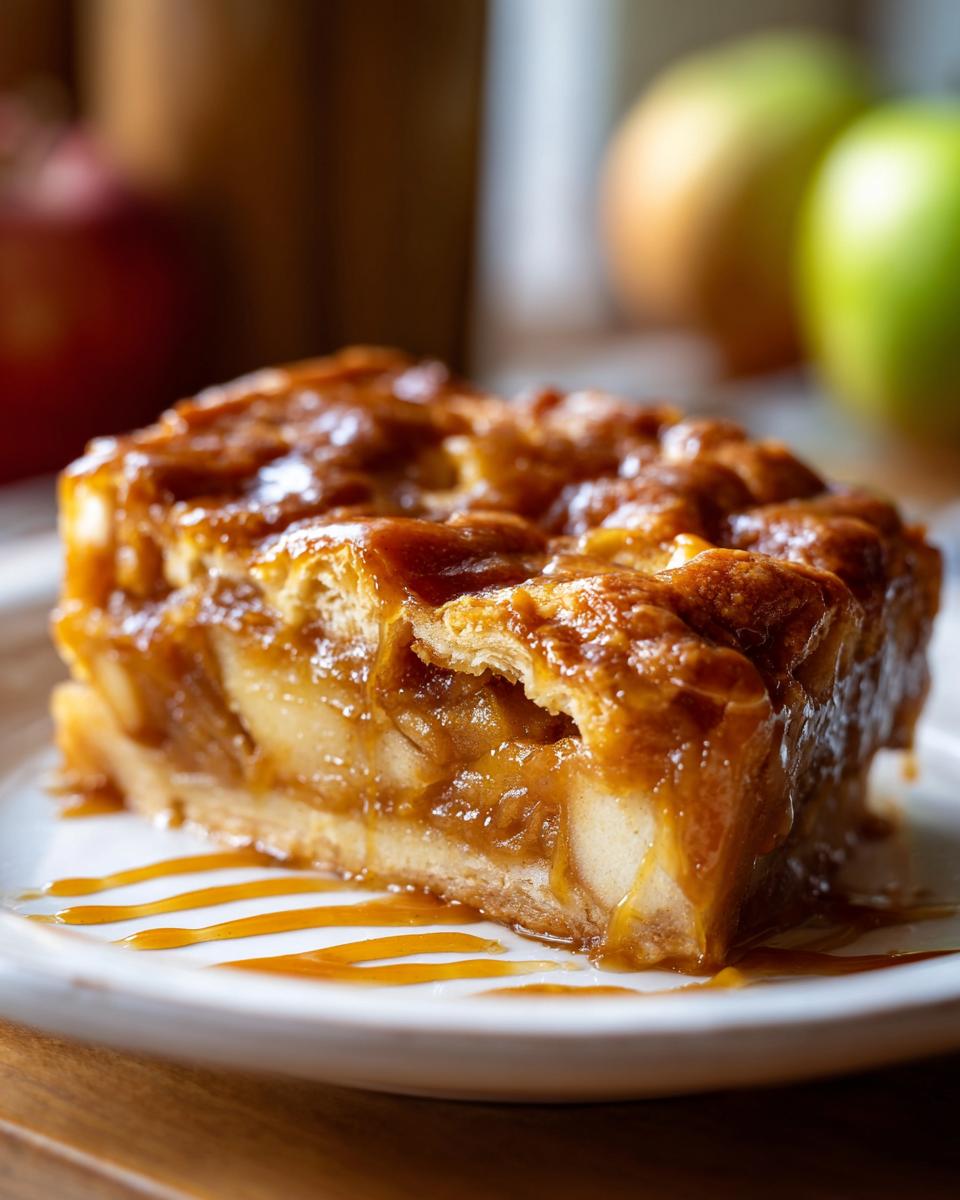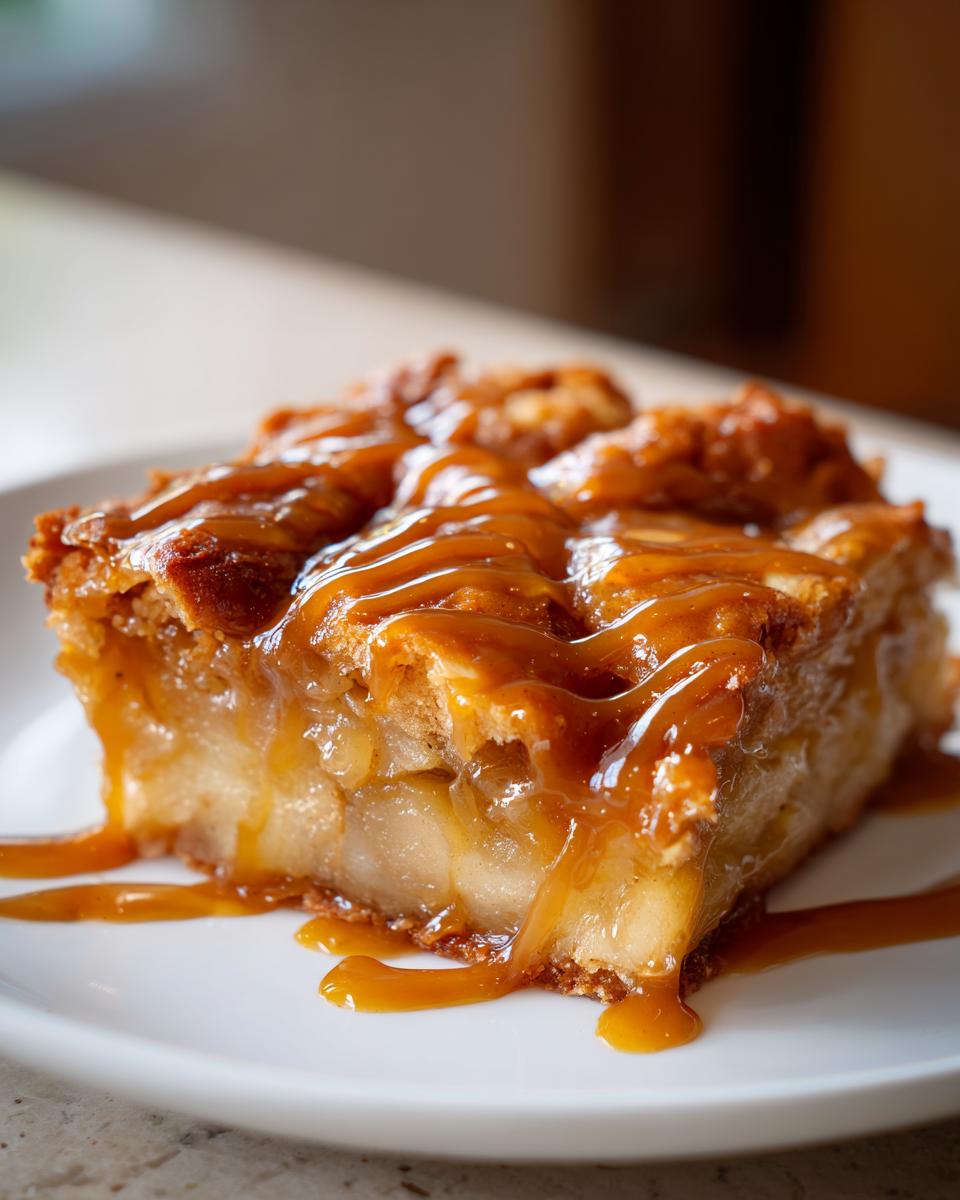
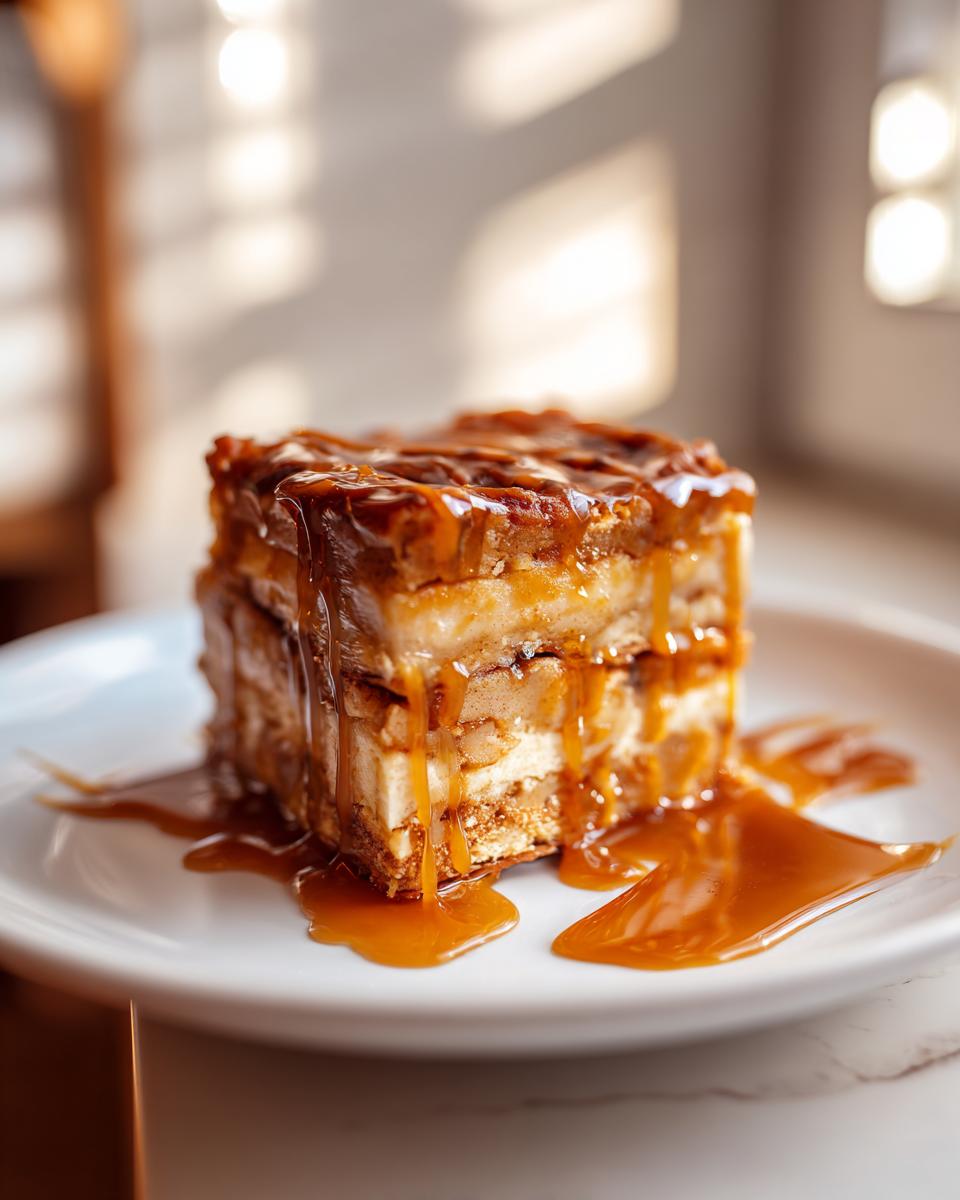
Oh my goodness, if you love the cozy flavors of apple pie and the dreamy sweetness of salted caramel, you are in for a treat! These salted caramel apple pie bars bring together everything wonderful about fall baking in one easy-to-make dessert. Honestly, they’re so simple—just a buttery crust, spiced apple filling, and that luscious caramel drizzle. I make them every year when apple season hits, and they disappear faster than I can say “seconds, please!” Whether it’s a potluck, a weeknight treat, or just because, these bars are guaranteed to make everyone smile.
Why You’ll Love These Salted Caramel Apple Pie Bars
Listen, I know you’ve got about a million dessert recipes saved, but let me tell you why these bars deserve a permanent spot in your rotation:
- Insanely easy – No fancy pie crust skills needed! Just press, layer, and bake. Even my 8-year-old niece can help make these.
- That perfect sweet-salty combo – The cinnamon-spiced apples play so nicely with the rich, salted caramel. It’s like autumn in every bite.
- Crowd pleaser magic – I’ve brought these to countless gatherings, and I always get asked for the recipe. They disappear faster than you can say “apple season!”
- Make-ahead dream – These actually taste better the next day as the flavors mingle. Plus they keep beautifully for 3 days (if they last that long).
Seriously, once you try these, you’ll understand why they’re my most requested recipe. That caramel drizzle? Life-changing.
Ingredients for Salted Caramel Apple Pie Bars
Okay, let’s talk ingredients—because using the right stuff makes all the difference here. Trust me, I’ve learned the hard way that shortcuts don’t pay off with these bars! Here’s what you’ll need:
- 2 cups all-purpose flour – Spoon and level it, don’t scoop! You want that perfect crumbly texture.
- 1/2 cup granulated sugar – Just regular white sugar for the crust. Simple but perfect.
- 1/2 teaspoon salt – Balances the sweetness and makes those flavors pop.
- 1 cup unsalted butter, cold and cubed – I stick mine in the freezer for 10 minutes before using. Cold butter = flaky crust magic.
- 4 medium apples, peeled and diced – Granny Smiths are my go-to—they hold their shape and add the perfect tartness.
- 1/4 cup brown sugar – For the apples. That molasses richness? Yes, please.
- 1 teaspoon cinnamon + 1/4 teaspoon nutmeg – The dream team for spiced apple goodness.
- 1 tablespoon lemon juice – Keeps the apples from browning and adds a little zing.
- 1/2 cup salted caramel sauce – Homemade or store-bought, I won’t judge! Just make sure it’s the good, gooey kind.
See? Nothing too crazy, but every ingredient pulls its weight. Now let’s make some magic!
How to Make Salted Caramel Apple Pie Bars
Alright, let’s get baking! I promise these salted caramel apple pie bars are way easier than they look. Just follow these simple steps, and you’ll have a pan of pure deliciousness in no time.
Preparing the Crust
First things first – preheat that oven to 350°F (175°C). Grab your 8×8-inch pan and line it with parchment paper (trust me, this makes cleanup a breeze). Now, let’s make that buttery crust:
- In a big bowl, whisk together the flour, granulated sugar, and salt. Simple!
- Add your cold, cubed butter. Here’s my trick: use a pastry cutter or your fingers to work the butter into the flour until it looks like coarse crumbs with some pea-sized bits. You want it to hold together when pressed – that’s when you know it’s perfect.
- Press half of this mixture firmly into your prepared pan. I mean really press it – this is your foundation! Pop it in the oven for 15 minutes until it’s just starting to turn golden at the edges.
Making the Apple Filling
While the crust bakes, let’s make the star of the show: the apple filling!
- Toss your peeled, diced apples with brown sugar, cinnamon, nutmeg, and lemon juice. Get in there with your hands – you want every piece coated in that spiced sweetness.
- Let it sit for 5 minutes. The sugar will draw out some juice from the apples – that’s good! It’ll make the filling extra luscious.
Assembling and Baking
Okay, showtime! Your crust should be ready now – it’ll look pale but set.
- Spread the apple mixture evenly over the warm crust. No need to drain any liquid – that juicy goodness is flavor gold.
- Sprinkle the remaining crust mixture over the top. Don’t press it down – you want those crumbly bits to get nice and golden.
- Bake for 30 minutes. You’ll know it’s done when the top is golden brown, and you can see the apples bubbling at the edges.
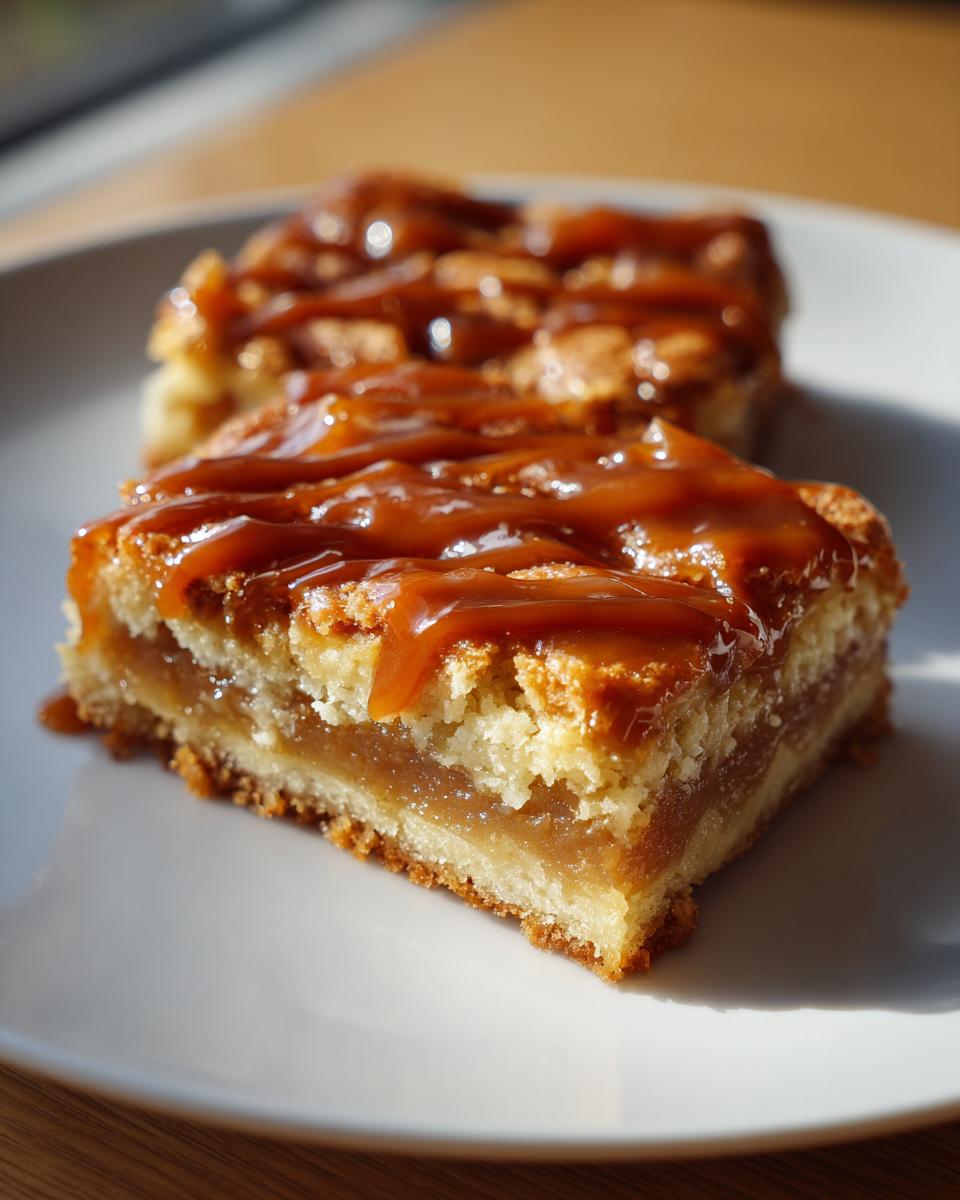
- Remove from oven and immediately drizzle with that glorious salted caramel sauce. Pro tip: warm the caramel slightly so it flows beautifully.
- Now the hard part – let it cool completely before cutting into bars. I know, I know… the waiting is torture! But it’ll hold together much better if you’re patient.
Tips for Perfect Salted Caramel Apple Pie Bars
After making these bars more times than I can count (and eating even more!), I’ve picked up some foolproof tricks to guarantee perfection every time:
- Apple wisdom: Granny Smiths are my ride-or-die—they bake up tender but never mushy. If you use sweeter apples, reduce the sugar a smidge.
- Crust insurance: That initial 15-minute bake for the bottom crust? Non-negotiable! It creates a barrier so your apples don’t turn it soggy.
- Caramel control: If your caramel sauce is too thick, warm it gently with a teaspoon of cream. Too thin? Simmer it for 2 minutes to thicken.
- Slice smart: Use a sharp knife dipped in hot water for clean cuts—wipe between slices for picture-perfect bars every time.
Oh, and one bonus tip? Always make a double batch—these disappear faster than you can say “caramel drizzle!”
Ingredient Substitutions and Notes
Listen, I get it – sometimes you need to tweak things based on what’s in your pantry or dietary needs. Here’s how to adapt these bars without losing that amazing flavor:
- Gluten-free? Swap the all-purpose flour 1:1 with your favorite GF blend. I like the ones with xanthan gum already added.
- No brown sugar? Use all granulated sugar plus 1/2 teaspoon molasses. Or honey works too – just reduce other liquids slightly.
- Vegan option: Coconut oil works for butter, but chill the dough extra well. And use maple syrup caramel!
- Short on time? Pre-made caramel sauce is totally fine – I won’t tell! Just choose a good quality one.
The beauty is, these bars are pretty forgiving. Just don’t skimp on the apples or spices – that’s where the magic happens!
Storing and Serving Salted Caramel Apple Pie Bars
Okay, here’s the deal – these bars taste amazing warm, but resist the urge to cut them right away! Let them cool completely in the pan (about 2 hours) so they hold their shape. I usually leave mine overnight – the flavors get even better!
Once cooled, lift them out using the parchment paper and slice with a sharp knife. Store any leftovers (ha!) in an airtight container at room temp for 2 days, or refrigerate for up to 5 days. Want to reheat? Just pop a bar in the microwave for 10 seconds to bring back that fresh-from-the-oven magic. Pro tip: Warm caramel makes these extra dreamy with vanilla ice cream!
Nutritional Information for Salted Caramel Apple Pie Bars
Just so you know, these numbers are estimates—your exact counts might vary based on specific ingredients. But here’s the scoop per bar (based on 9 servings):
- Calories: 320
- Fat: 16g (10g saturated)
- Carbs: 42g
- Sugar: 25g
- Protein: 3g
Let’s be real—these are a treat, not health food! But that caramel-apple goodness? Worth every delicious bite.
Frequently Asked Questions
I get asked these questions all the time about my salted caramel apple pie bars – here’s what you need to know:
Can I use store-bought caramel sauce?
Absolutely! I won’t judge – sometimes you just need that shortcut. Look for a good quality salted caramel (the kind that pours but isn’t runny). My favorite hack? Warm it slightly before drizzling for that perfect flow. Share Your Creations!
How long do these bars stay fresh?
They’ll keep at room temperature for 2 days (covered), or up to 5 days in the fridge. The crust stays surprisingly crisp! Just let chilled bars come to room temp before serving – or microwave briefly for that fresh-baked feel.
Can I freeze these?
Yes! Freeze before adding caramel. Wrap cooled bars tightly and freeze for up to 3 months. Thaw overnight in the fridge, then add caramel when serving. Perfect for getting ahead during apple season!
Why Granny Smith apples?
Their tartness balances the sweet caramel perfectly, and they hold their shape when baked. If you use sweeter apples (like Honeycrisp), reduce the brown sugar by a tablespoon so it’s not overly sweet.
Share Your Salted Caramel Apple Pie Bars
I’d love to see your creations! Snap a pic of your salted caramel apple pie bars and tag me on Instagram—I always do a little happy dance when I see you baking my recipes. And if you loved them? Leave a star rating so others can find this gem too!