
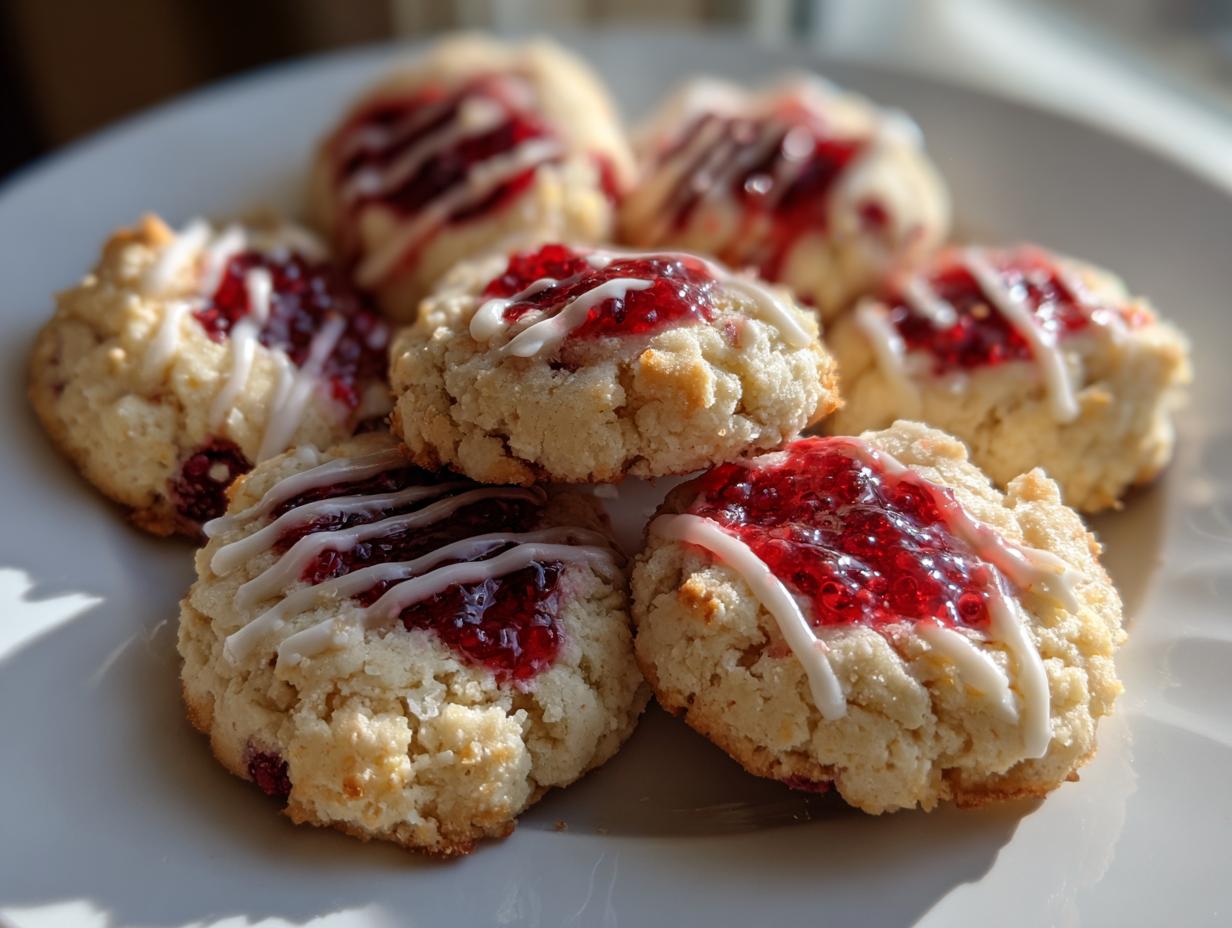
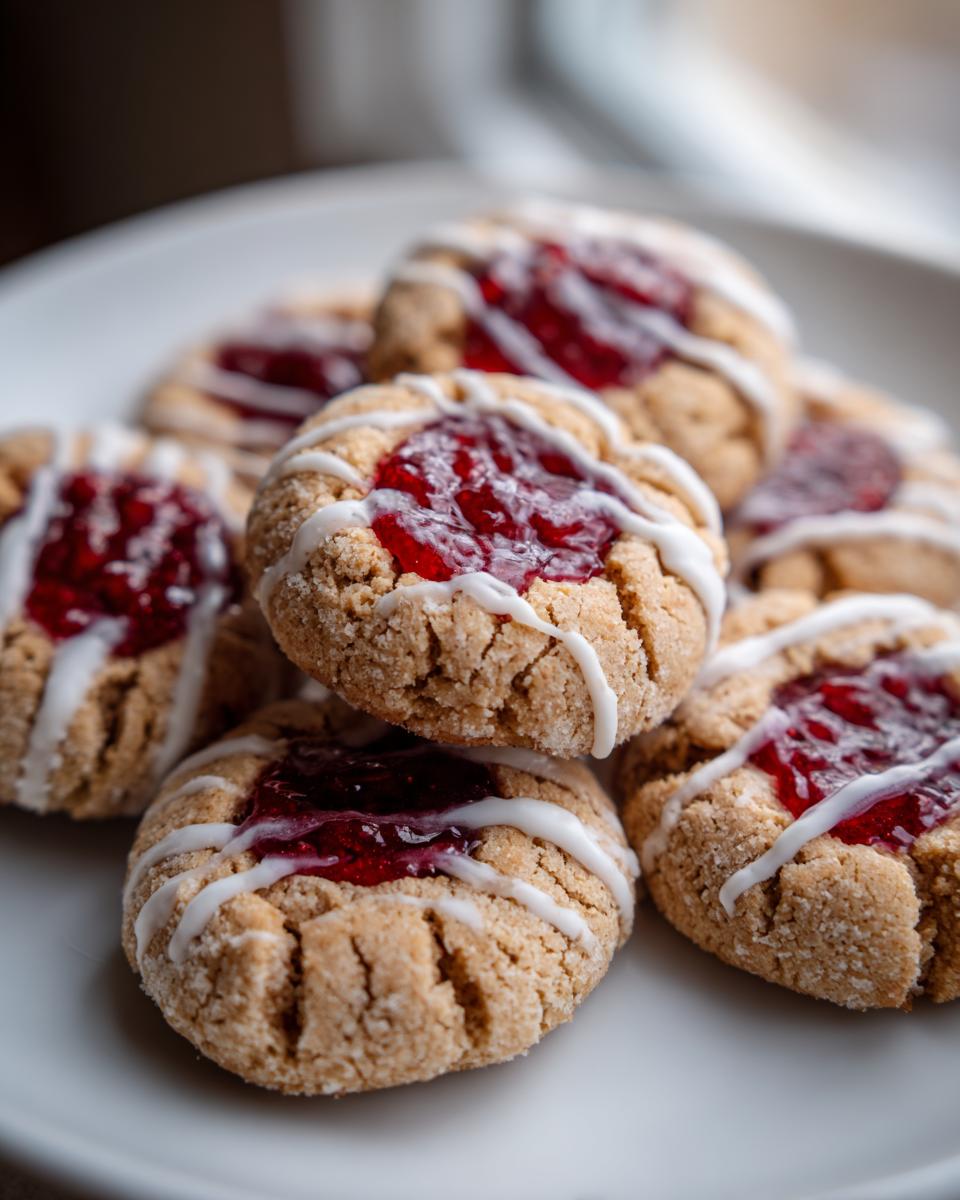
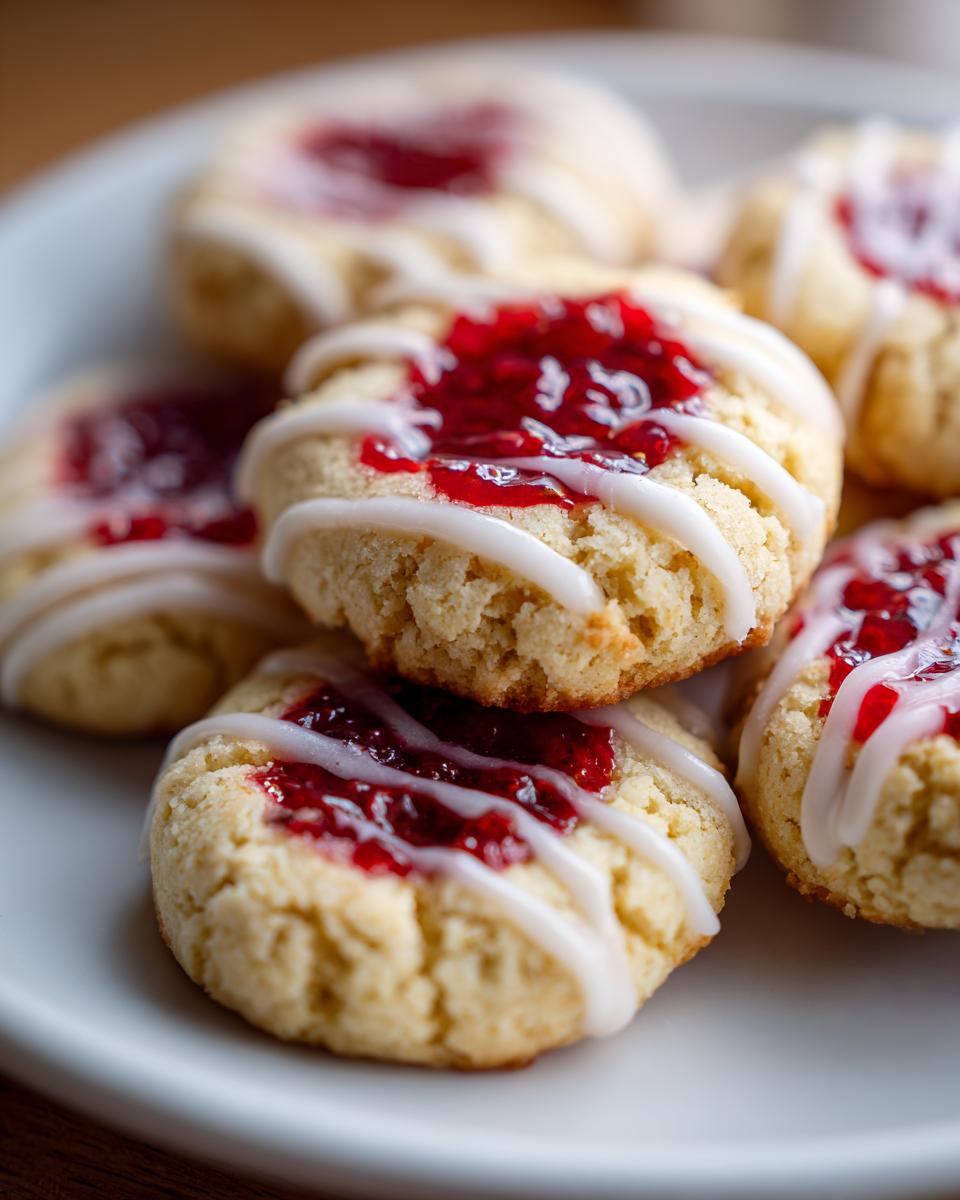
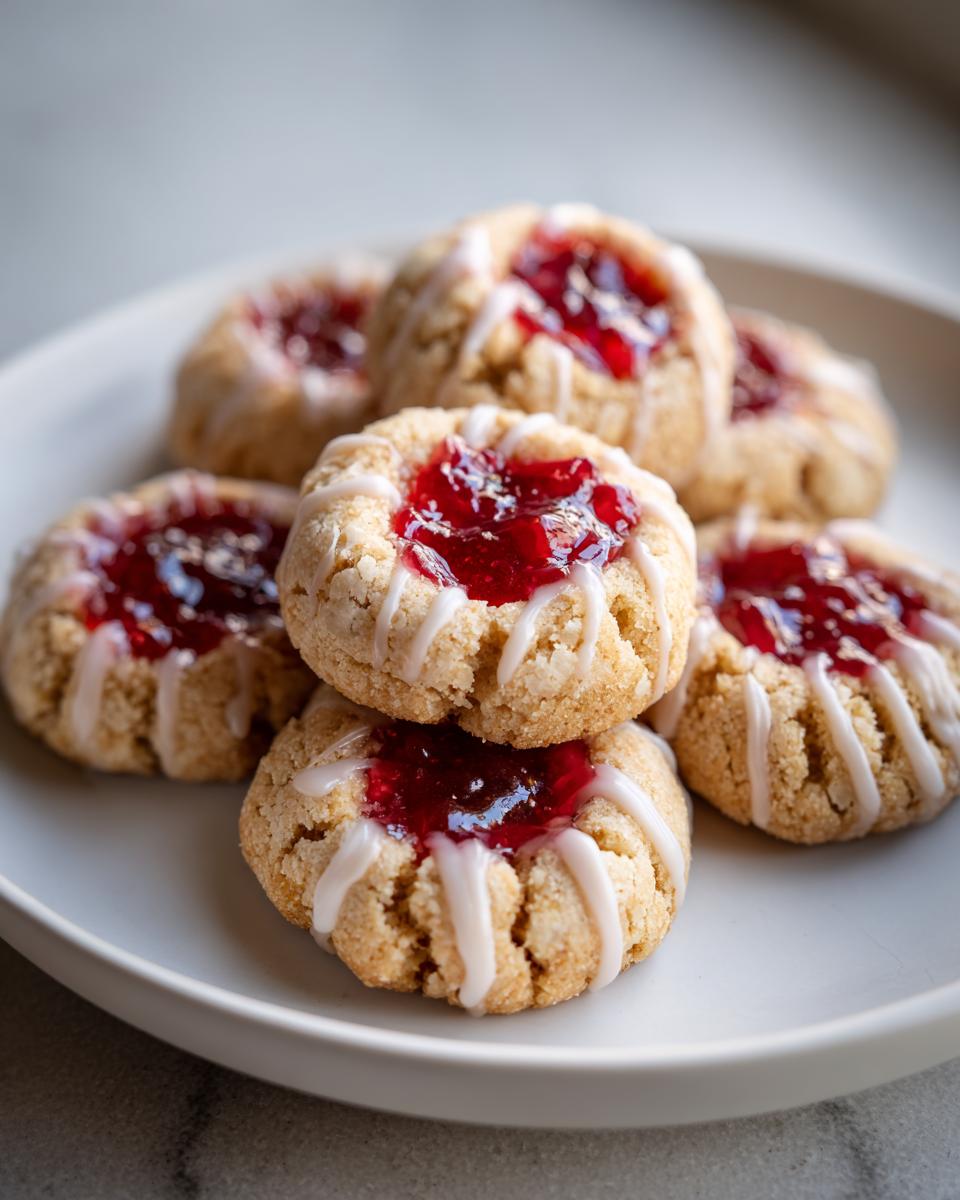
Oh, cookies! Is there anything better than a warm, comforting cookie straight from your own oven? I just adore making a batch of these Raspberry Thumbprint Cookies with Icing, especially when I want something sweet but don’t want a ton of fuss. They’re like little bursts of sunshine, aren’t they? My grandma used to make these for me after school, and the smell of the raspberry jam just warms my soul. They’re such a classic for a reason – that tender, buttery cookie hugging a sweet, jewel-like dollop of jam, all finished with a pretty drizzle of icing. Seriously, they’re simple, they’re delicious, and they just make everyone happy!
Why You’ll Love These Raspberry Thumbprint Cookies with Icing
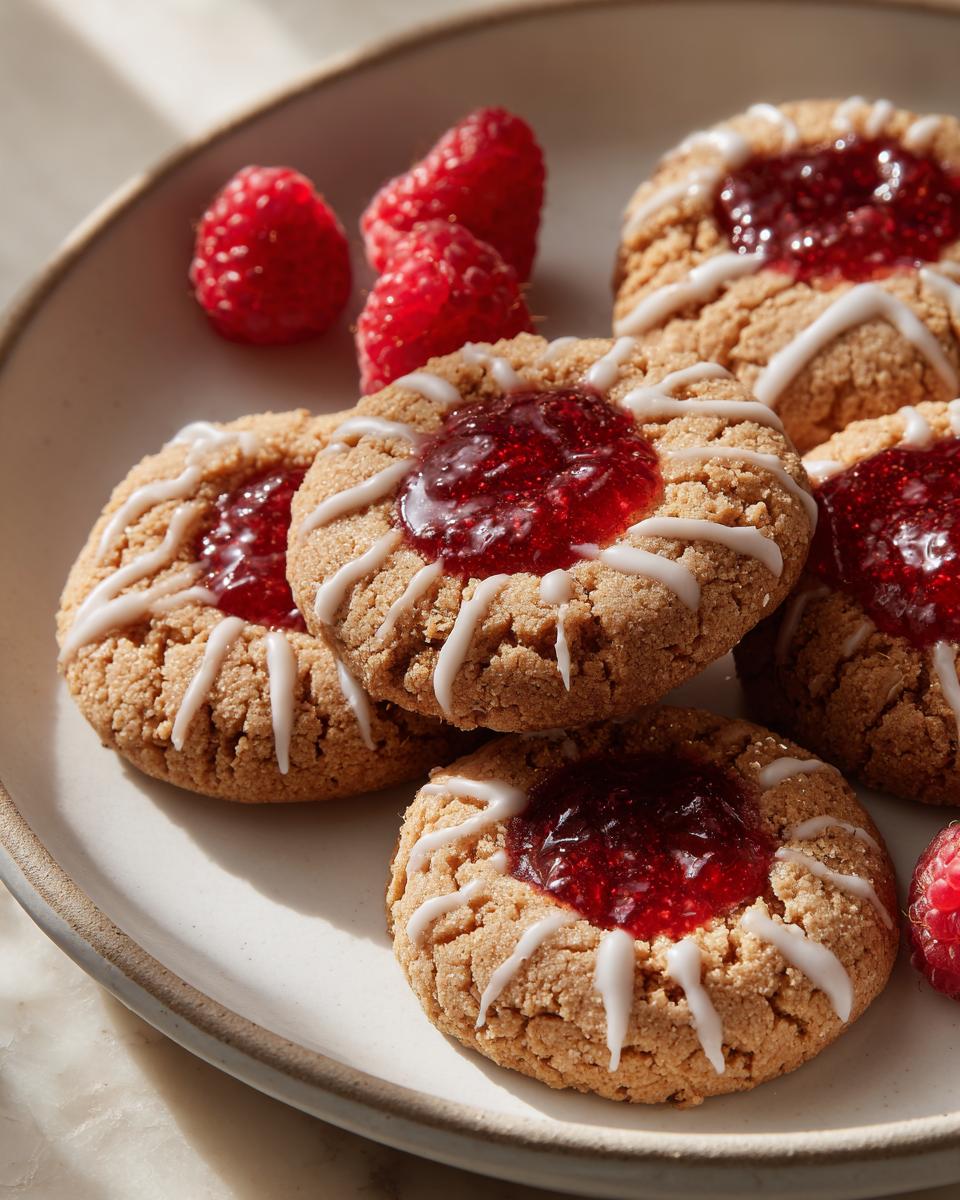
Trust me, these cookies are a total winner! Here’s why you’ll be making them again and again:
- They’re surprisingly easy to whip up, even for beginner bakers! You won’t believe how simple it is.
- The buttery shortbread-like cookie is just melt-in-your-mouth perfection. Seriously addictive!
- That burst of sweet raspberry jam in the middle is absolute heaven – pure cookie bliss.
- The simple icing drizzle adds a touch of elegance and extra sweetness without being over the top.
- They look gorgeous on any cookie platter, feeling fancy without any real fuss.
- Perfect for holidays, bake sales, or just because you deserve a truly delicious, homemade treat.
Gather Your Ingredients for Raspberry Thumbprint Cookies with Icing
Alright, let’s get our ducks in a row and gather everything we need for these delightful raspberry thumbprint cookies. It’s pretty straightforward stuff, mostly pantry staples!
- 1 cup unsalted butter, softened: Make sure it’s nice and soft, not melted!
- 2 cups all-purpose flour: Just your standard all-purpose flour works beautifully here.
- 1/2 cup granulated sugar: For that perfect sweetness in the cookie base.
- 1 large egg yolk: This helps bind everything together and gives a lovely richness.
- 1 teaspoon vanilla extract: A little splash of vanilla makes a big difference, trust me!
- 1/4 teaspoon salt: Just a pinch to balance out all that sweetness.
- 1/2 cup raspberry jam: Oh, this is key! Use a good quality jam that you really love. It makes all the difference in flavor, so pick one that’s bright and a little tart.
- 1 cup powdered sugar: For our sweet little icing drizzle.
- 2 tablespoons milk: To get that icing just right.
Essential Equipment for Baking Raspberry Thumbprint Cookies
To make these lovely raspberry thumbprint cookies, you don’t need a fancy kitchen at all! Just a few basic things will do the trick:
- A good mixing bowl
- Measuring cups and spoons
- A baking sheet (or two!)
- Parchment paper
- A tablespoon or small spoon for the indentations
- A wire rack for cooling
- A small bowl and whisk for the icing
Step-by-Step Guide to Making Raspberry Thumbprint Cookies with Icing
Alright, let’s get our hands a little messy and make some magic happen! Following these steps will give you the most amazing raspberry thumbprint cookies. Don’t worry if your first few aren’t perfectly shaped – they’ll taste just as good!
Preparing the Cookie Dough
First things first, grab your softened butter and that granulated sugar. Beat them together in a big bowl until they look fluffy and pale, like little clouds! Then, beat in the egg yolk and vanilla extract until it’s all nicely blended. In a separate bowl, give your flour and salt a quick whisk. Now, slowly add the dry stuff to the wet, mixing it all up until it just comes together. Honestly, don’t overmix this part; a few little flour streaks are fine! Pop the whole bowl in the fridge for about 30 minutes to chill – this is super important so they hold their shape.
Shaping and Filling the Raspberry Thumbprint Cookies
Once the dough is nice and chilled, preheat your oven to 350°F (175°C). Line a couple of baking sheets with parchment paper – this is my secret weapon for easy cleanup! Roll the dough into lovely little balls, about an inch big, and place them on your prepared sheets. Now for the fun part: use your thumb (I like to lightly flour it first so it doesn’t stick!) or the end of a wooden spoon to make a nice little well in the center of each ball. Spoon about half a teaspoon of your gorgeous raspberry jam right into each hollow. Try not to push too hard, or you might crack the sides of the cookie! For more thumbprint inspiration, you could check out these chocolate thumbprint cookies!
Baking Your Perfect Thumbprint Cookies
Pop those beauties into your preheated oven. You’ll want to bake them for about 12 to 15 minutes. Keep an eye on them; you’re looking for the edges to be just lightly golden brown. They’ll still look a little soft in the middle, but that’s okay! Let them hang out on the baking sheet for about 5 minutes after they come out – this helps them firm up a bit more. Then, carefully move them to a wire rack to cool completely. Warm cookies are fragile, so be gentle!
Creating and Applying the Simple Icing
While your cookies are doing their cooling thing, let’s whip up the icing. It couldn’t be easier! Just whisk together the powdered sugar and milk in a small bowl until it’s nice and smooth. You want it thin enough to drizzle, but not so watery that it just runs off. Grab a spoon and drizzle it back and forth over your cooled cookies. It looks so pretty, doesn’t it? You could also pipe it on if you’re feeling extra fancy, but a simple drizzle is my go-to for that classic look. How about checking out these chocolate chip cookies for another easy baking project?
Tips for Baking the Best Raspberry Thumbprint Cookies
Okay, sometimes little tweaks can make a big difference, right? Here are a few of my favorite tricks to make sure your raspberry thumbprint cookies turn out absolutely amazing every single time:
- Don’t skip the chill! Seriously, this is so important. Chilled dough is less likely to spread out like a pancake in the oven. If your kitchen is warm and the dough starts feeling a bit too soft while you’re rolling, just pop it back in the fridge for another 10 minutes. It’s worth the little wait!
- Jam matters! I always go for a thicker, good-quality raspberry jam. If your jam is too thin, it might just ooze out the sides or sink into the cookie. Sometimes I even give it a tiny chop if there are big fruit chunks, so it fits nicely into the little thumbprint well.
- Watch your oven carefully. Ovens can be so different! Keep an eye on those cookies when they’re baking. You’re looking for that light golden edge. Too dark and they might be a bit crisp, too pale and they won’t have that lovely baked flavor. Just a few minutes can make all the difference. For more cookie baking fun, check out my chocolate chip cookie recipe!
- Ice ’em when they’re cool! Make sure your cookies are completely cool before you start drizzling that icing. If they’re still warm, the icing will just melt right off and make a mess instead of a pretty design. Patience really pays off here!
Ingredient Notes and Substitutions for Raspberry Thumbprint Cookies
Sometimes life throws you a curveball and you’re missing an ingredient, or maybe you just want to shake things up a little! Don’t worry, these raspberry thumbprint cookies are pretty forgiving.
Butter: I always, always use unsalted butter for cookies. It lets me control the saltiness myself, which is important! If you only have salted butter, just skip the 1/4 teaspoon of salt in the recipe. Margarine or vegan butter sticks can work too, but the flavor and texture might change a bit – they tend to spread more.
Jam: Raspberry is my go-to because it’s got that perfect sweet-tart balance. But honestly, any good quality jam works wonders! Strawberry, apricot, or even a nice cherry jam would be delicious. Just make sure it’s not too runny; a thicker jam is best for those little wells. You could even try a fun combo, like a swirl of raspberry and strawberry!
Egg Yolk Benefit: That single egg yolk is a little powerhouse! It adds richness and helps the cookie have that perfect tender, slightly crumbly texture. If you’re ever in a pinch and need to avoid eggs, you might try a flax egg (1 tablespoon ground flaxseed mixed with 3 tablespoons water, let it sit for 5 minutes), but the texture will be a bit different. For more baking adventures, give my banana bread a whirl!
Frequently Asked Questions about Raspberry Thumbprint Cookies with Icing
Got questions about these little gems? I’ve got answers! These raspberry thumbprint cookies are pretty straightforward, but here are a few things folks often ask about.
Can I use a different type of jam?
Oh, absolutely! While raspberry is my favorite, any jam you love will work beautifully. Apricot, strawberry, or even a nice cherry jam are fantastic choices!
How do I store these cookies?
Keep them in an airtight container at room temperature. They’ll stay wonderfully fresh for about 3-4 days. Just make sure they’re completely cool before you seal the container!
My cookies spread too much, what went wrong?
This usually happens if the butter was too soft or the dough wasn’t chilled enough. Chilling the dough for at least 30 minutes is key! Also, make sure your oven is at the right temperature.
Can I make these cookies ahead of time?
Yes! You can make the dough and chill it for a day or two before baking. Or, bake them completely, let them cool, and store them in an airtight container until you’re ready to serve. The icing is best added closer to serving.
Nutritional Information
Just a heads-up, the nutrition info for these raspberry thumbprint cookies is an estimate! It can totally change depending on the exact ingredients you use, especially the jam and butter. But generally, each cookie has about 150 calories, 8g of fat, 18g of carbohydrates, 12g of sugar, and 2g of protein. Enjoy!
Share Your Raspberry Thumbprint Cookie Creations!
Alright, bakers, I’ve spilled all my raspberry thumbprint secrets! Now it’s your turn. Did you make these? How did they turn out? I’d absolutely LOVE to hear all about it in the comments below! Feel free to rate the recipe too – it really helps other home cooks out there. And if you share photos of your creations on social media, please tag me! You can also reach me directly through my contact page. Happy baking, everyone!
Print
Raspberry Thumbprint Cookies with Icing
- Total Time: 35 min
- Yield: 24 cookies 1x
- Diet: Vegetarian
Description
Classic thumbprint cookies filled with raspberry jam and topped with a simple icing.
Ingredients
- 1 cup unsalted butter, softened
- 1/2 cup granulated sugar
- 1 large egg yolk
- 1 teaspoon vanilla extract
- 2 cups all-purpose flour
- 1/4 teaspoon salt
- 1/2 cup raspberry jam
- 1 cup powdered sugar
- 2 tablespoons milk
Instructions
- Cream together the butter and granulated sugar until light and fluffy.
- Beat in the egg yolk and vanilla extract.
- In a separate bowl, whisk together the flour and salt.
- Gradually add the dry ingredients to the wet ingredients, mixing until just combined.
- Chill the dough for 30 minutes.
- Preheat your oven to 350°F (175°C). Line baking sheets with parchment paper.
- Roll the dough into 1-inch balls and place them on the prepared baking sheets.
- Use your thumb or the back of a small spoon to make an indentation in the center of each cookie.
- Fill each indentation with about 1/2 teaspoon of raspberry jam.
- Bake for 12-15 minutes, or until the edges are lightly golden.
- Let the cookies cool on the baking sheets for a few minutes before transferring them to a wire rack to cool completely.
- While the cookies cool, whisk together the powdered sugar and milk until smooth to make the icing.
- Drizzle the icing over the cooled cookies.
Notes
- For a richer cookie, you can add 1/4 cup of finely chopped almonds to the dough.
- If the dough becomes too soft while working with it, return it to the refrigerator for a few minutes.
- Store cookies in an airtight container at room temperature.
- Prep Time: 20 min
- Cook Time: 15 min
- Category: Dessert
- Method: Baking
- Cuisine: American
Nutrition
- Serving Size: 1 cookie
- Calories: 150
- Sugar: 12g
- Sodium: 20mg
- Fat: 8g
- Saturated Fat: 5g
- Unsaturated Fat: 3g
- Trans Fat: 0g
- Carbohydrates: 18g
- Fiber: 1g
- Protein: 2g
- Cholesterol: 25mg
Keywords: raspberry thumbprint cookies, jam cookies, iced cookies, holiday cookies, shortbread cookies, easy cookies