
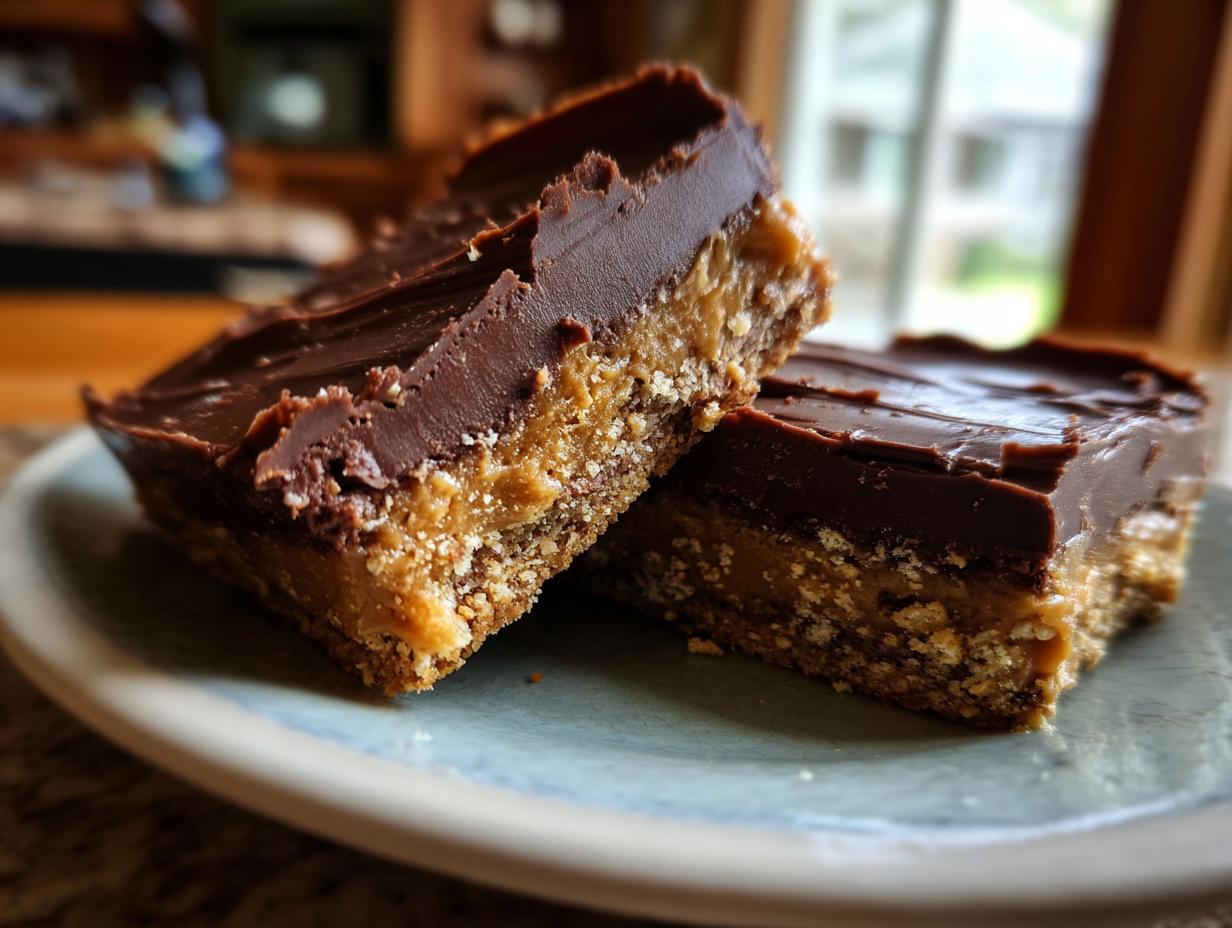
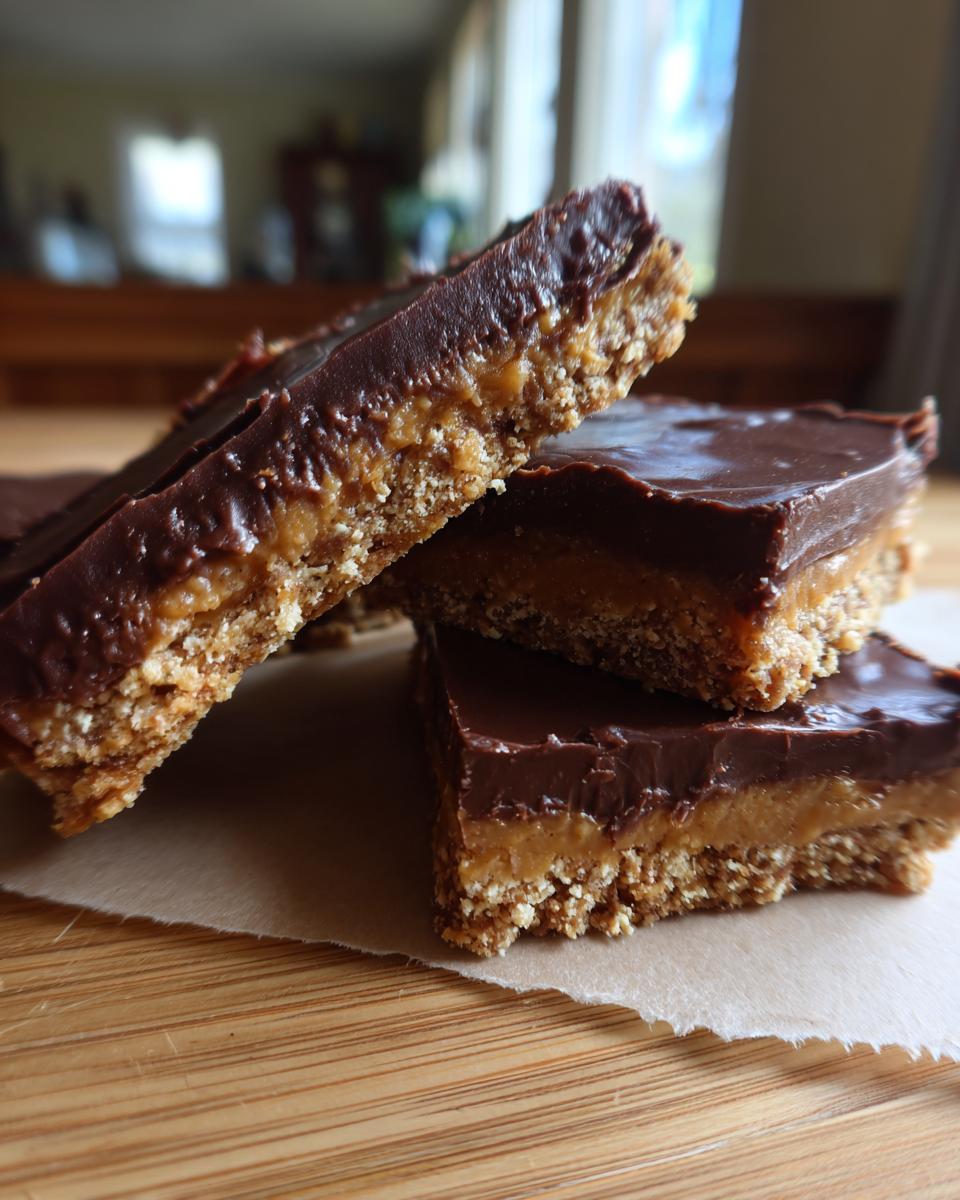
Sometimes, you just *need* a treat, right? Like, right NOW. And the last thing you want is to fuss with a hot oven, especially when the craving hits hard. That’s where these bars swoop in like a superhero! We’re talking about pure dessert magic, the kind that’s No Oven, No Stress, Just Pure Dessert. These No-Bake Chocolate Peanut Butter Bars are my absolute go-to when I need something sweet and decadent without any of the baking drama. I first whipped these up for a last-minute potluck years ago, and they were gone in minutes! So glad I discovered them, kind of like how I found these awesome no-bake peanut butter oat cups. Trust me, these bars live up to the hype.
Why You’ll Love These No Oven, No Stress, Just Pure Dessert Bars
Seriously, why wouldn’t you love these? They’re a dream come true for any dessert lover who’s short on time or just not in the mood for oven-based baking.
- Super Speedy: We’re talking about maybe 15 minutes of actual work before they chill. It’s dessert for the impatient!
- Minimal Fuss, Maximum Flavor: The combination of chocolate and peanut butter is just perfection, and these bars nail it every single time.
- No Heat Required: Forget preheating the oven, dodging hot pans, or burning yourself. These are literally cool to make. So much win!
- Seriously Simple Ingredients: You probably have most of what you need in your pantry right now. No fancy trips to the store needed.
- Clean Up is a Breeze: Usually, it’s just a bowl or two and your pan. Way better than scrubbing baking sheets, right?
- Crowd Pleaser Guaranteed: Whether it’s a party, a family gathering, or just a Tuesday night craving, everyone goes crazy for these.
Gather Your Ingredients for No-Bake Chocolate Peanut Butter Bars
Alright, let’s get down to business! To make these little pieces of heaven, you’ll need just a handful of things. It’s pretty simple, honestly, but getting the measurements right is key for that perfect texture. We’re keeping it real easy, just like my super simple peanut butter brownies.
- 1 1/2 cups graham cracker crumbs (about 10-12 full crackers!)
- 1/2 cup unsalted butter, melted
- 1 cup creamy peanut butter (my fave is Jif, but use what you love!)
- 1 cup powdered sugar, sifted if you’re feeling fancy (or just to avoid lumps!)
- 1 1/2 cups chocolate chips (milk or semi-sweet, your call!)
- 1 tablespoon coconut oil (this makes the chocolate topping smooth as silk)
Step-by-Step Guide to Your No-Bake Dessert
Okay, ready to whip up some magic? It’s seriously so easy, you’ll wonder why you ever bothered with an oven for chocolate peanut butter things before. This is truly the heart of our No Oven, No Stress, Just Pure Dessert experience! Grab an 8×8 inch pan – that’s the perfect size for these. If you don’t have one, a similar-sized pan will work just fine. It’s all about that perfect thickness!
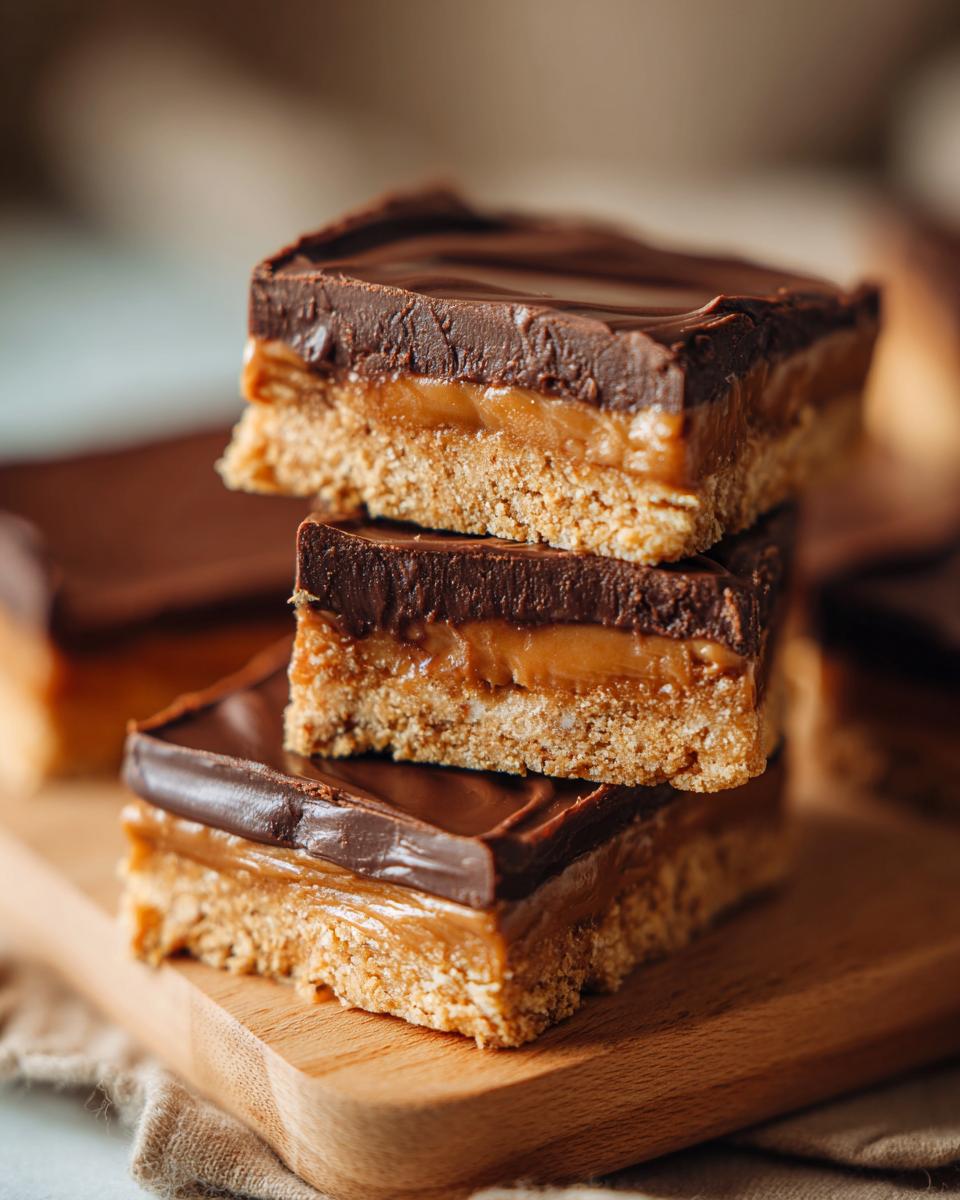
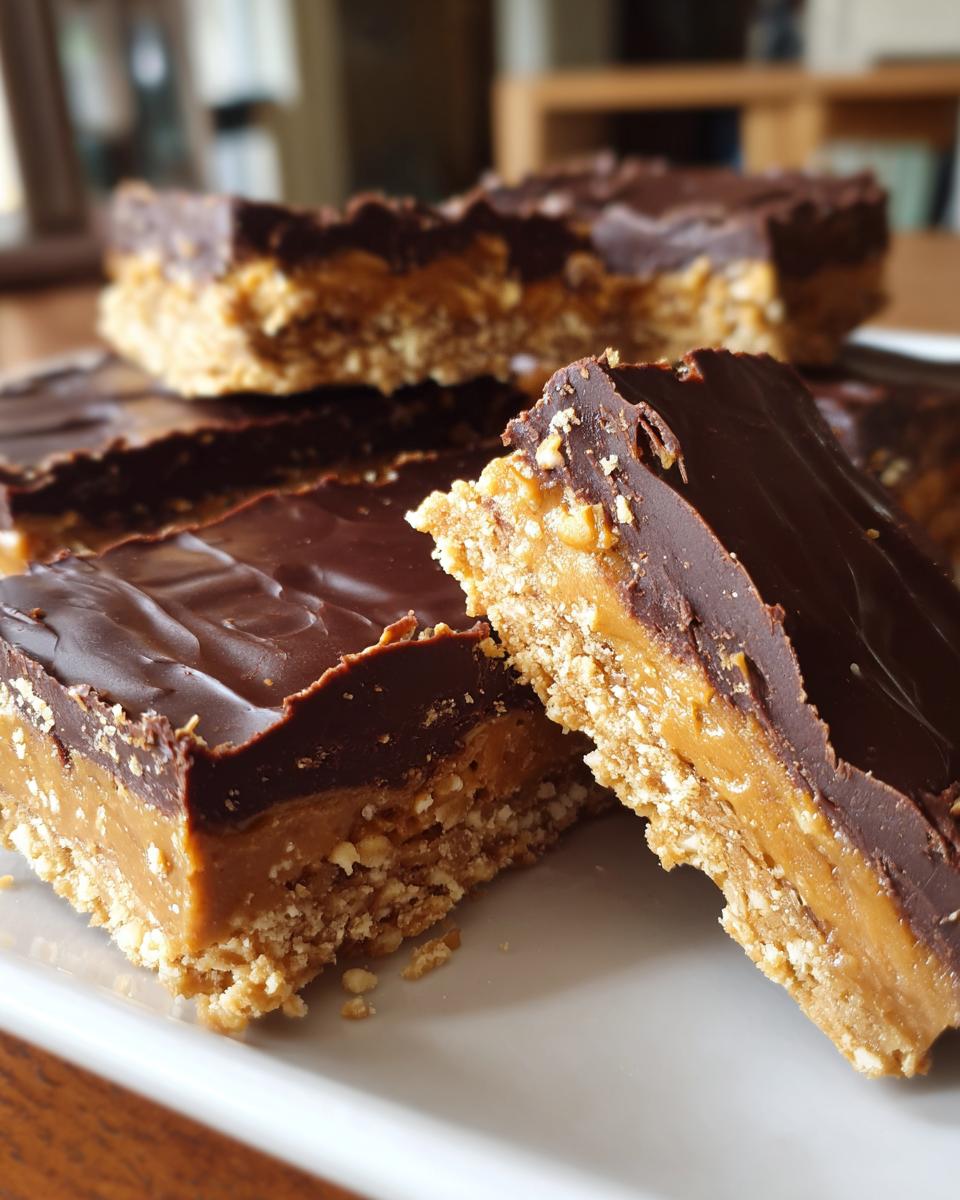
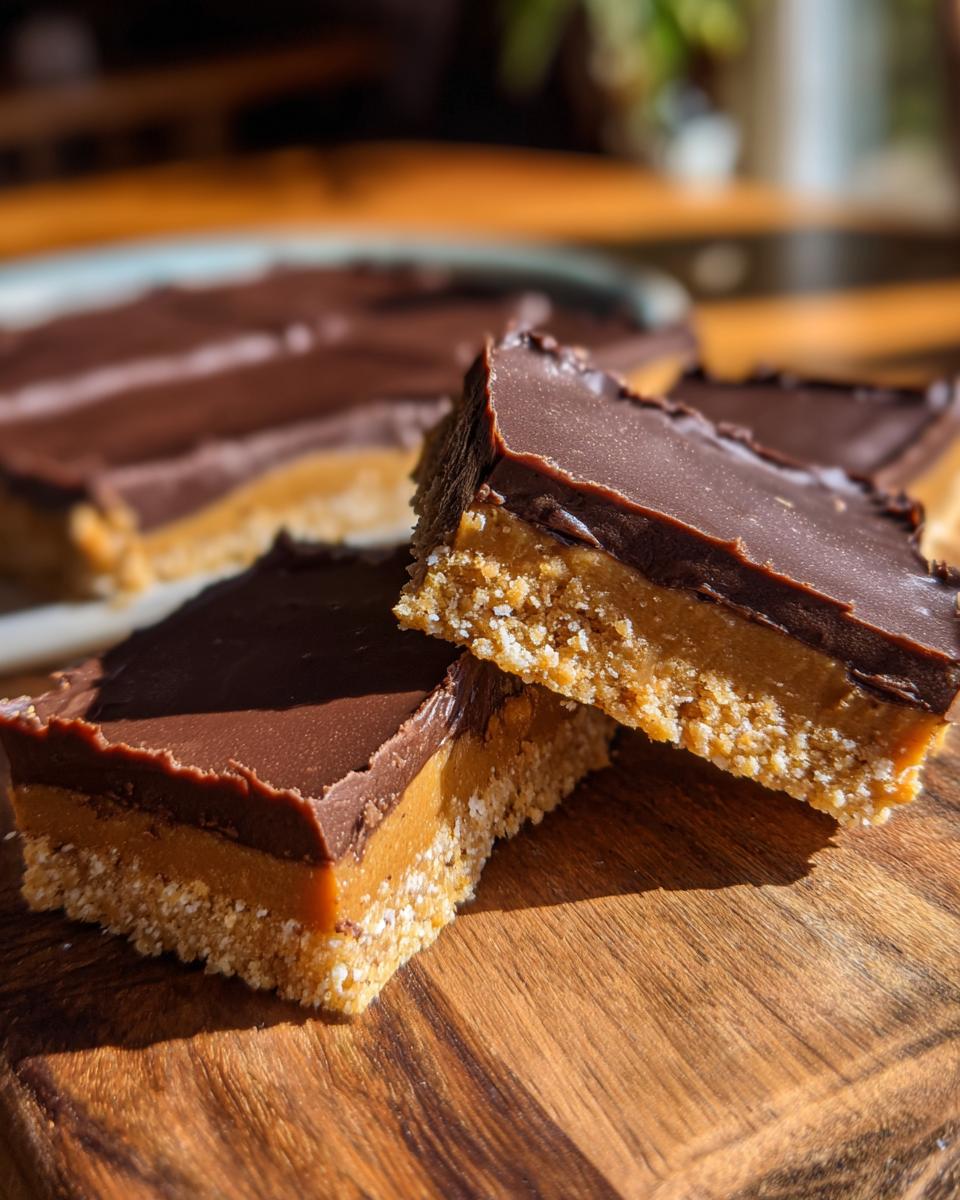
- Make that Crust: First things first, grab a medium bowl. Toss in your graham cracker crumbs and pour in that melted butter. Give it a good stir until all the crumbs are nicely moistened. It should look a bit like wet sand. Dump this mixture into your 8×8 inch pan and press it down firmly with the bottom of a glass or a measuring cup. You want a nice, even layer that holds together. This is your base, so make it sturdy!
- Peanut Butter Power Layer: Now for the best part, right? In that same bowl (less washing, yay!), beat together your creamy peanut butter and the sifted powdered sugar. Mix it until it’s smooth and totally combined. It’ll be thick! Dollop this over your graham cracker crust and spread it out evenly. Use a spatula or the back of a spoon to get it nice and smooth all the way to the edges. This is where that creamy peanut butter really shines, just like in my no-bake peanut butter oat cups!
- Chocolatey Goodness on Top: Time for the chocolate! In a microwave-safe bowl, combine your chocolate chips and that tablespoon of coconut oil. Microwave in 30-second intervals, stirring between each one, until it’s completely melted and smooth. Coconut oil is my secret for a super glossy, easy-to-pour chocolate topping that firms up just right. If you don’t have coconut oil, a little bit of vegetable oil can work in a pinch. Pour this melted chocolate mixture over the peanut butter layer. Gently tilt the pan or use a spatula to spread it out evenly, making sure to cover every bit of that peanut butter goodness.
- Chill Out! Now, the hardest part – waiting! Carefully place the pan into the refrigerator. Let it chill for at least 30 minutes, or until the chocolate is firm to the touch. Honestly, the longer it chills, the cleaner your bars will be when you cut them. Pop it back in the fridge if you need more time to get it perfectly firm. It’s all about patience for that perfect piece! Think of it like letting that gooey chocolate set up just right.
- Slice and Serve: Once it’s firm, take the pan out of the fridge. You can gently lift the whole thing out if you lined your pan with parchment paper (a little tip: run a knife around the edges first!). Otherwise, just cut right in the pan. Use a sharp knife to cut them into squares or bars. I usually aim for about 16 bars, but you do you! Clean the knife between cuts if you want super neat edges.
Tips for Perfect No-Bake Chocolate Peanut Butter Bars
Okay, so these bars are pretty foolproof, but a few little tricks can take them from really good to absolutely spectacular. It’s all about those small details, you know?
- Peanut Butter Pick: While creamy peanut butter is my go-to for a super smooth layer, don’t be afraid to get a little wild! If you love a bit of texture, crunchy peanut butter totally works too. You just might need to stir it a bit more to get it to spread evenly. And yes, natural peanut butters can sometimes be a bit oily, so give them a good stir first!
- Chocolate Choices: For that luscious topping, I usually reach for semi-sweet chocolate chips because they balance the sweetness of the peanut butter perfectly. But hey, milk chocolate is fantastic if you have a major sweet tooth, and dark chocolate chips add a richer, deeper flavor! You could even do a mix. If you’re feeling extra fancy, check out some double chocolate ideas for inspiration!
- Smooth Operator: Want that topping to melt like a dream? My trick is the coconut oil. It really makes the chocolate flow easily and sets up beautifully without getting hard as a rock. If you don’t have it, a teaspoon of vegetable oil or even shortening can help, but coconut oil is the champ here, trust me.
- Clean Cuts, Happy Eaters: The secret to those nice, neat bars? A sharp knife and a little patience. After chilling, run a sharp knife under hot water, wipe it dry, and then slice. Repeat between cuts if necessary. You can also try lifting the whole slab out of the pan ( Parchment paper is your friend!) and placing it on a cutting board for easier slicing.
Frequently Asked Questions About No-Bake Desserts
Got questions? I’ve got answers! No-bake desserts are pretty straightforward, but it’s always good to know a few things to make sure they turn out just right. These are some of my most common questions, and hopefully, they cover yours too!
Can I use crunchy peanut butter instead of creamy?
Absolutely! If you love a little texture in your dessert, crunchy peanut butter is totally fine. Just give it a good stir before measuring to make sure the oil is well incorporated. You might need to spread it a little more carefully, but the flavor is still amazing, just like with my other easy dessert recipes!
How long do these No-Bake Chocolate Peanut Butter Bars last?
Because they have all those yummy, moist ingredients and chocolate on top, they’re best stored in the refrigerator. In an airtight container, they should last for about a week. They might get a little harder the longer they sit, but they’ll still be delicious!
Can I freeze these bars?
Yes, you can! Freezing is a great option if you want to make them ahead of time or just have some on hand for future cravings. Wrap them well in plastic wrap or pop them into a freezer-safe container. They’ll keep in the freezer for up to about 3 months. Just let them thaw on the counter for about 15-20 minutes before you’re ready to eat them.
What kind of chocolate chips work best?
Honestly, any kind works! I usually go for semi-sweet because they balance the sweetness of the peanut butter perfectly. But milk chocolate is great if you have a major sweet tooth, and dark chocolate adds a really nice depth of flavor. You could even mix them!
Storage and Reheating Instructions
Keeping these delicious bars fresh is super simple, mostly because they’re so tempting you might not have leftovers! Since they’re no-bake, they do need a little chill time to stay their best. I always store mine in an airtight container right in the refrigerator. That way, they stay nice and firm, and they’ll keep for about a week. If you want to make a big batch or have them ready for weeks to come, pop them in the freezer! Just wrap them up tight and they’ll be good for up to 3 months. Thaw them on the counter for about 15-20 minutes before diving in.
Nutritional Information
Just a heads-up, these numbers are estimates! They can totally change depending on the brands you use and how you cut your bars. But, generally, you’re looking at roughly 250 calories, 18g of fat, and 20g of carbs per bar. It’s a sweet treat, so enjoy it!
Print
Creamy Tomato Basil Soup (No Cream!)
- Total Time: 45 min
- Yield: 6 servings 1x
- Diet: Vegetarian
Description
A rich and flavorful tomato basil soup made creamy without any dairy.
Ingredients
- 2 tablespoons olive oil
- 1 large onion, chopped
- 3 cloves garlic, minced
- 2 (28 ounce) cans crushed tomatoes
- 4 cups vegetable broth
- 1 teaspoon dried basil
- 1/2 teaspoon dried oregano
- Salt and black pepper to taste
- 1/4 cup raw cashews, soaked in hot water for at least 30 minutes
- Fresh basil leaves for garnish
Instructions
- Heat olive oil in a large pot or Dutch oven over medium heat. Add onion and cook until softened, about 5-7 minutes.
- Add garlic and cook for 1 minute more until fragrant.
- Stir in crushed tomatoes, vegetable broth, dried basil, and dried oregano. Bring to a simmer.
- Reduce heat and let simmer for 15 minutes, stirring occasionally.
- Drain the soaked cashews and add them to the pot.
- Carefully transfer the soup to a blender (or use an immersion blender) and blend until smooth and creamy. Work in batches if necessary, and be cautious when blending hot liquids.
- Return the soup to the pot and heat gently. Season with salt and pepper to taste.
- Serve hot, garnished with fresh basil leaves.
Notes
- For a smoother soup, you can strain it after blending.
- Adjust seasonings to your preference.
- If you don’t have cashews, you can use soaked sunflower seeds or omit them for a less creamy texture.
- Prep Time: 15 min
- Cook Time: 30 min
- Category: Soup
- Method: Stovetop
- Cuisine: American
Nutrition
- Serving Size: 1.5 cups
- Calories: 250
- Sugar: 15g
- Sodium: 600mg
- Fat: 10g
- Saturated Fat: 2g
- Unsaturated Fat: 8g
- Trans Fat: 0g
- Carbohydrates: 30g
- Fiber: 7g
- Protein: 8g
- Cholesterol: 0mg
Keywords: tomato basil soup, creamy tomato soup, dairy-free soup, vegan soup, healthy soup, easy soup recipe