
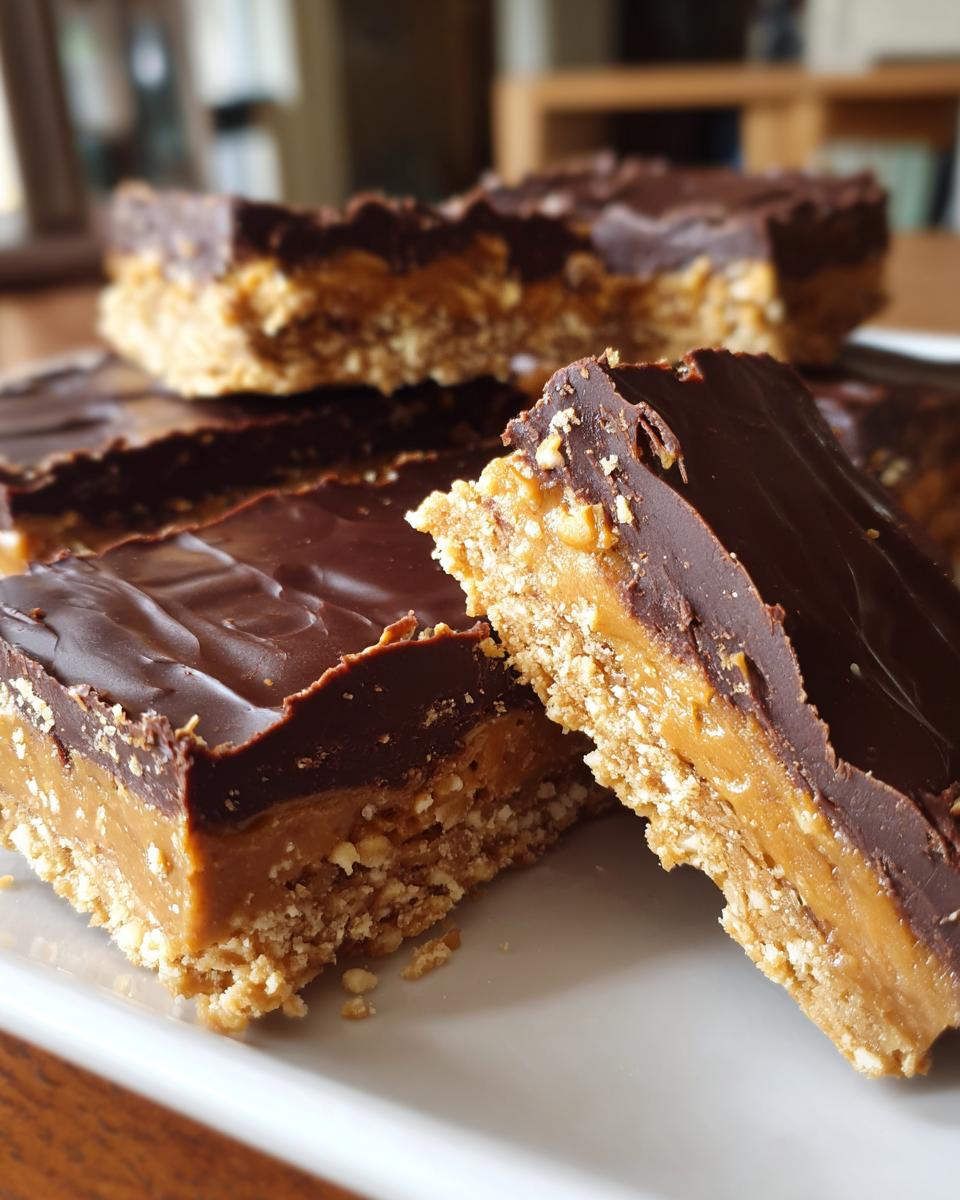
Oh, you know those days when a craving hits HARD, but the thought of turning on the oven just feels like too much work? Yeah, me too! That’s where these absolute gems come in: The No Oven, No Stress, Just Pure Dessert magic that is my No-Bake Chocolate Peanut Butter Bars. Seriously, these bad boys saved my life last summer during a heatwave when nobody wanted to do anything but lie on the couch. I whipped these up in about fifteen minutes, and they were gone faster than you can say ‘chocolatey goodness!’ They’re proof that you don’t need a hot oven to create something totally decadent and crowd-pleasing.
Why You’ll Love This No Oven, No Stress, Just Pure Dessert Recipe
Honestly, what’s not to adore about these bars? They are:
- Seriously Easy: We’re talking minimal effort for maximum reward. Just mix, spread, and chill!
- Barely Any Cleanup: Say goodbye to scrubbing greasy pans. A few bowls and a spatula are all you need.
- The Dream Team Flavor Combo: Chocolate and peanut butter together? It’s a classic for a reason, people!
- Perfect for Any Occasion: Potlucks, parties, or just a Tuesday night treat – these bars are always a winner.
It’s the ultimate, guilt-free way to satisfy those sweet cravings and perfectly embodies ‘No Oven, No Stress, Just Pure Dessert’.
Gather Your Simple Ingredients for No-Bake Chocolate Peanut Butter Bars
Okay, the best part about these bars is that you probably have most of this stuff already! You’ll just need:
- 1 1/2 cups graham cracker crumbs (I like to throw mine in a Ziploc bag and give ’em a good smash!)
- 1/2 cup unsalted butter, melted (Just pop it in the microwave for a sec!)
- 1 cup peanut butter (Creamy is my go-to for that smooth texture, but crunchy works too if you like a little bite!)
- 1 cup powdered sugar (Also known as confectioners’ sugar, super fine stuff!)
- 1 1/2 cups chocolate chips (Milk or semi-sweet, whatever makes your heart sing!)
- 1 tablespoon coconut oil (This is our secret weapon for a super glossy, smooth chocolate topping!)
That’s it! See? Simple!
Step-by-Step Guide to Making No-Bake Chocolate Peanut Butter Bars
Alright, let’s get these amazing bars into your kitchen! It’s seriously so easy, you’ll wonder why you haven’t made them a million times before. Grab an 8×8 inch pan (or similar), and let’s do this!
Creating the Perfect No-Bake Crust
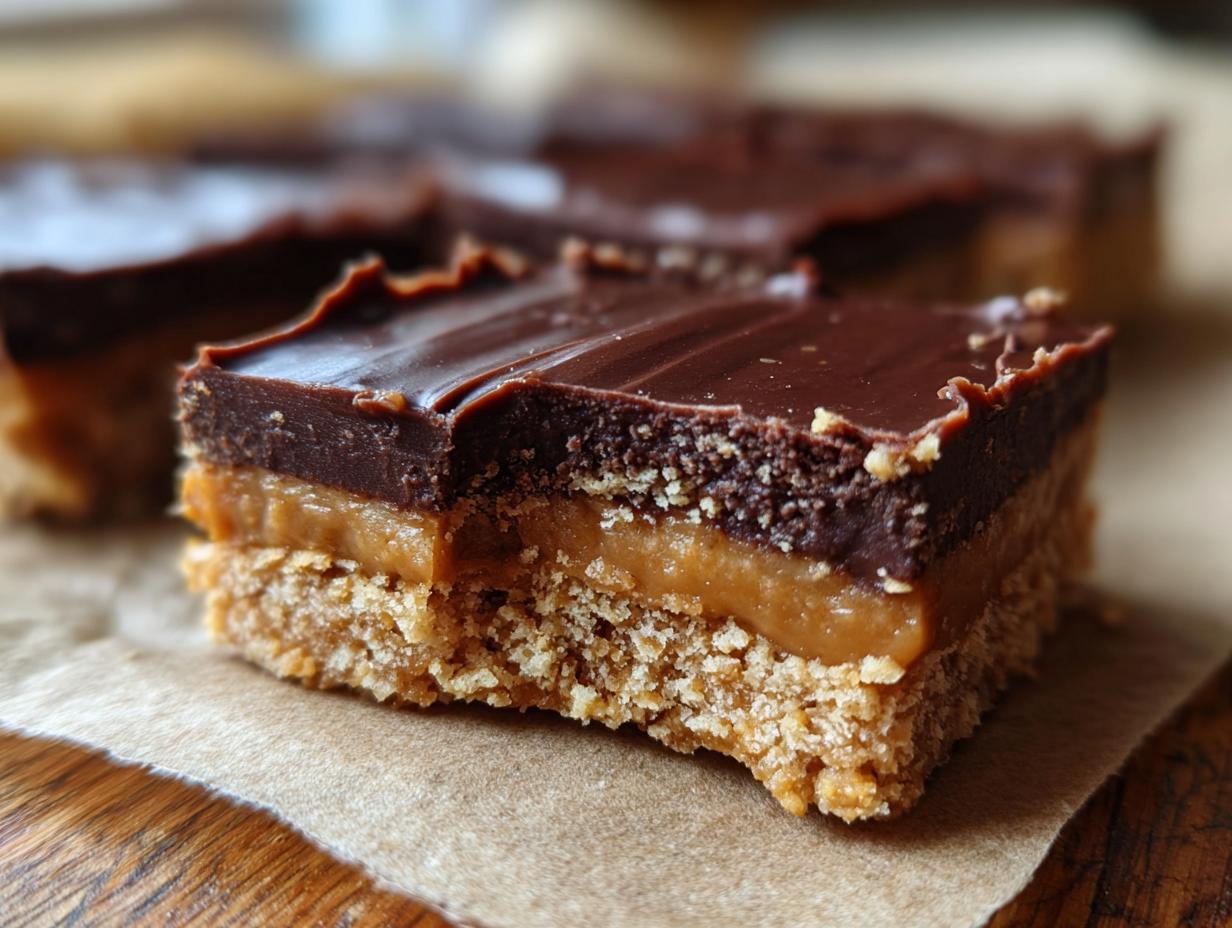
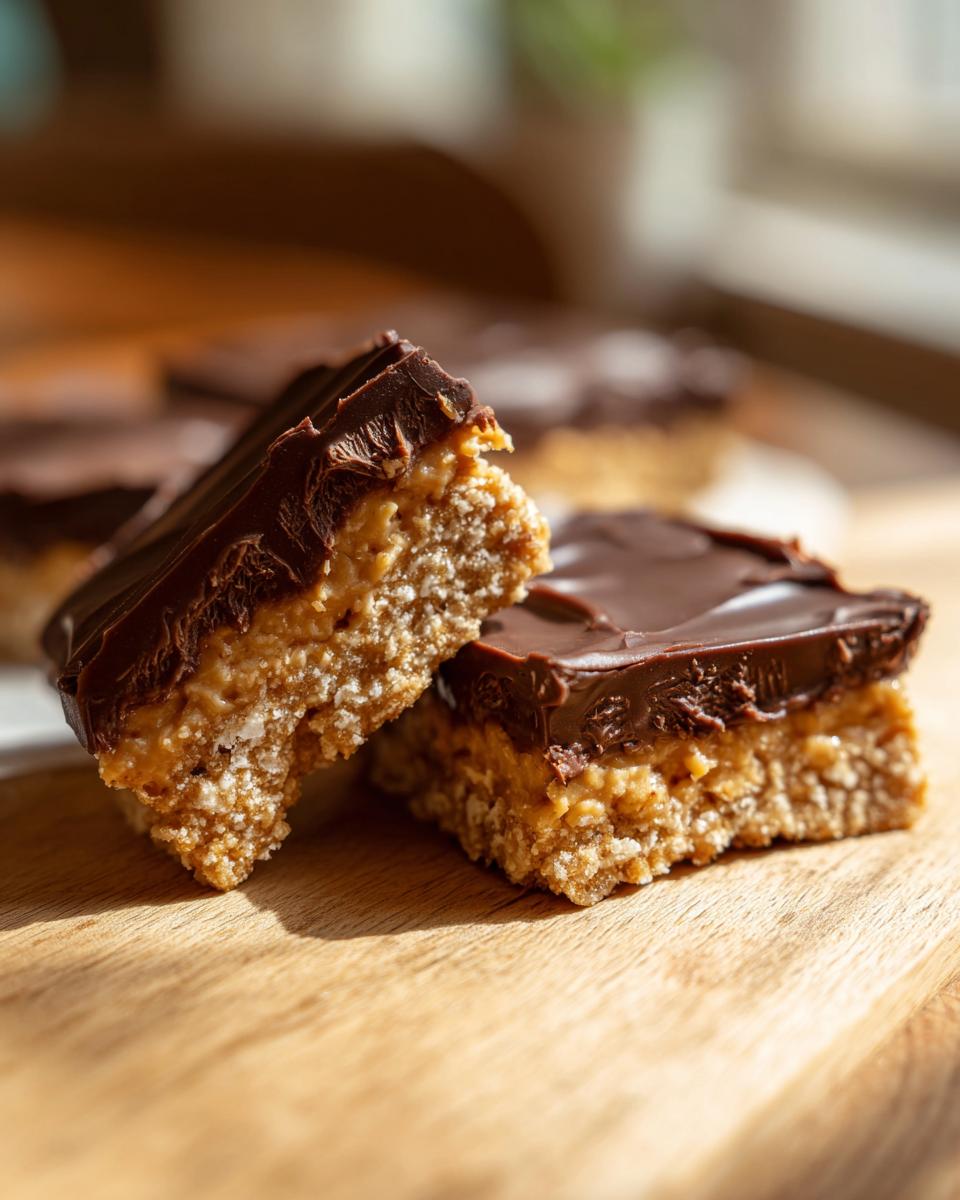
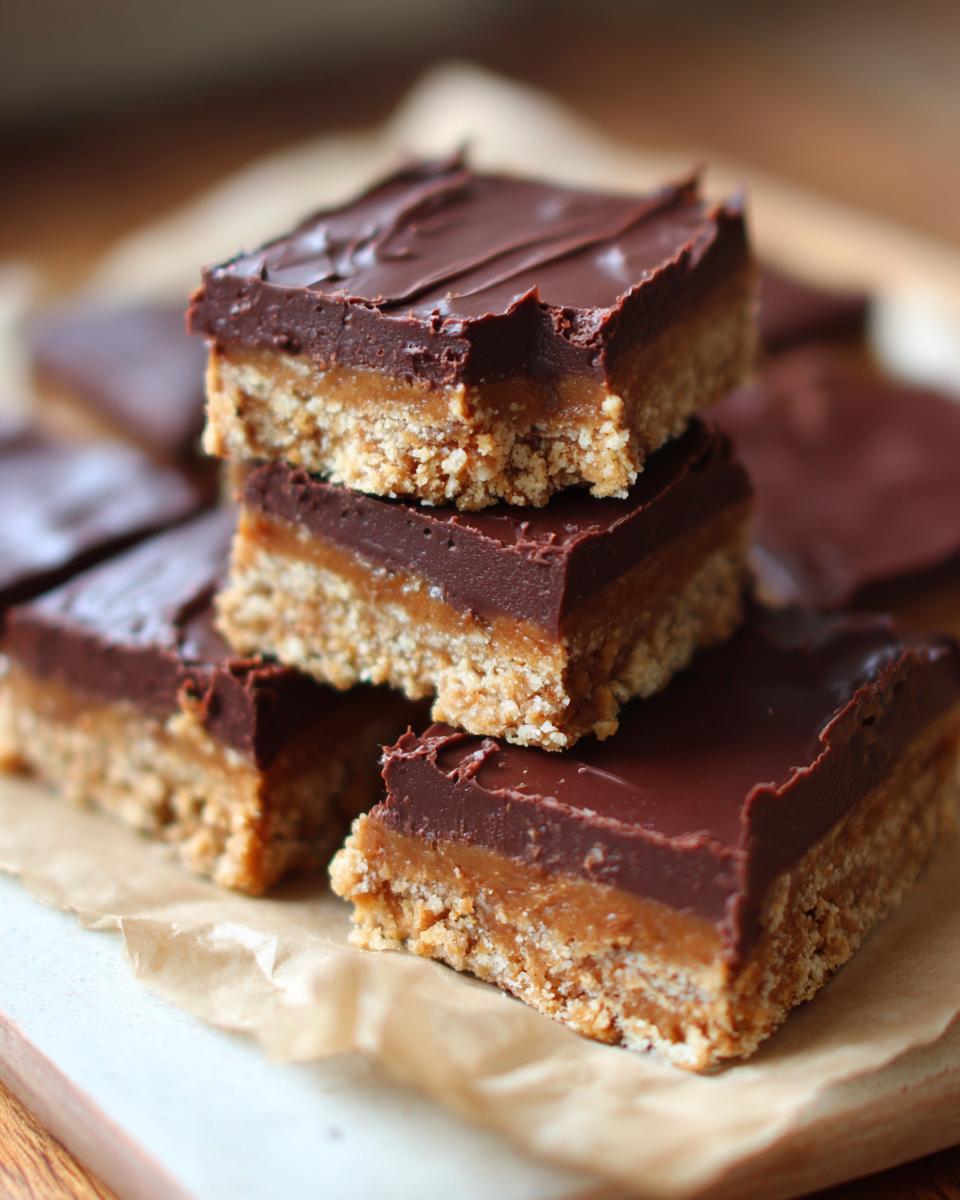
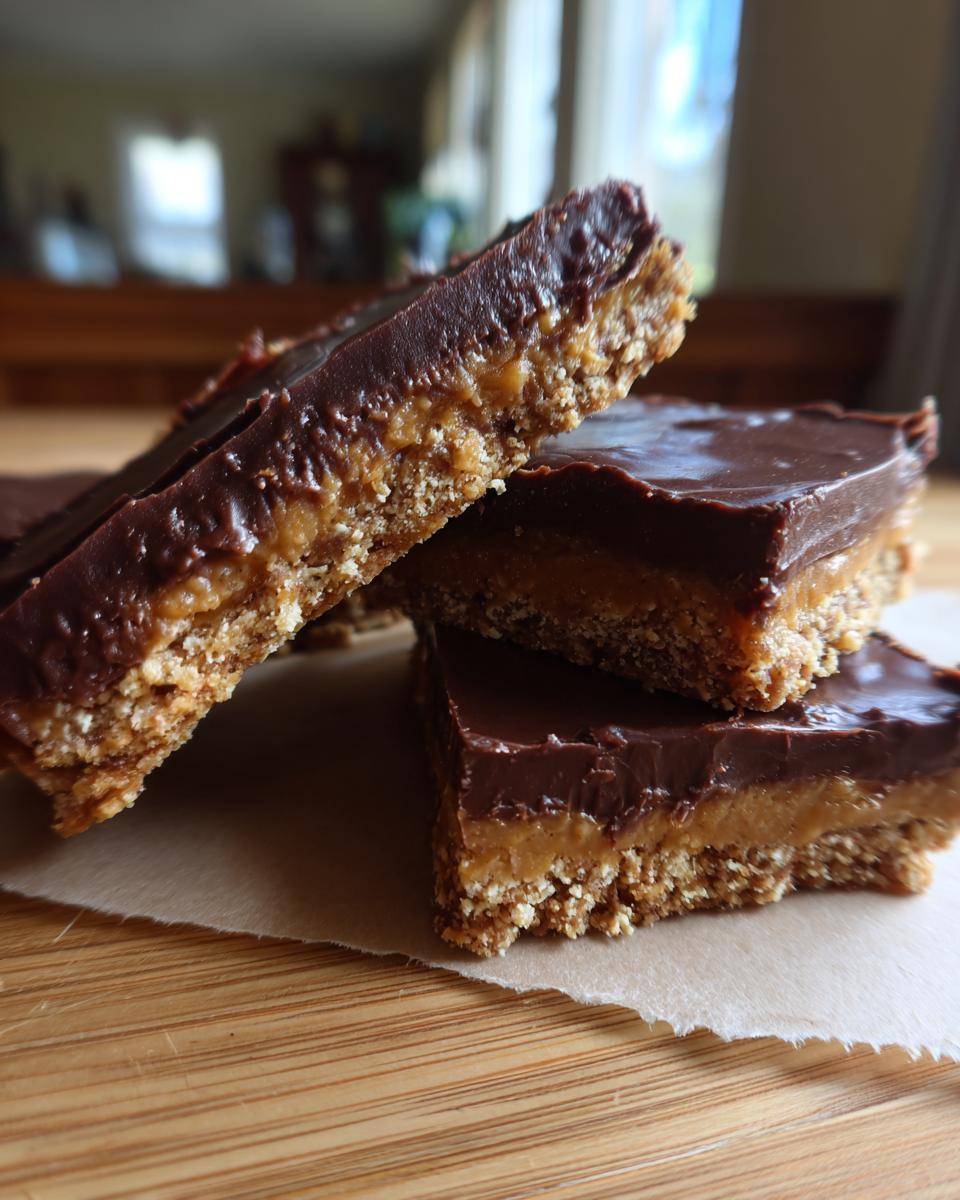
First things first, grab a bowl and toss in your graham cracker crumbs along with that melted butter. Give it a good mix until it all looks like wet sand. Now, press this mixture firmly and evenly into the bottom of your pan. This is super important because it forms the sturdy base for all that yummy goodness to come!
Assembling the Peanut Butter Layer
In a separate bowl, combine your peanut butter and powdered sugar. Beat them together until they’re nice and smooth. For an extra smooth layer that just melts in your mouth, make sure your peanut butter is at room temperature before you mix it! Then, spread this creamy mixture all over your graham cracker crust, making sure to get it nice and even. Trust me, it’s worth taking an extra minute to smooth it out!
Crafting the Chocolate Topping
Now for the best part! Melt your chocolate chips with that tablespoon of coconut oil. You can do this in a microwave-safe bowl in 30-second bursts, stirring in between, or use a double boiler. The coconut oil helps make the chocolate extra glossy and easy to spread. Once it’s all smooth and melty, pour it right over that peanut butter layer and spread it out carefully to cover the whole thing. Oh, and if you’re a fan of gooey chocolate, definitely check out this gooey chocolate recipe for inspiration!
Chilling and Serving Your Delicious Dessert
Okay, the hardest part: waiting! Pop that pan into the refrigerator for at least 1-2 hours, or until the chocolate is firm to the touch. This lets everything set up perfectly. Once it’s all chilled and firm, carefully lift the whole thing out using the parchment paper (if you used it!) and cut it into squares. A sharp knife helps get clean cuts, and if you’re a cookie fanatic, you might want to peek at this amazing chocolate chip cookie recipe while you wait!
Tips for Ultimate No Oven, No Stress, Just Pure Dessert Success
Honestly, these bars are pretty foolproof, but here are a few little tricks I’ve picked up over the years to make them absolutely perfect every single time. Remember, this is all about enjoying that ‘No Oven, No Stress, Just Pure Dessert’ vibe!
First off, quality matters! Using a really good peanut butter makes a difference – creamy peanut butter gives you that super smooth layer, so I always lean towards that. And don’t skimp on the chocolate chips if you can help it. If you’re looking for more no-bake ideas, check out these awesome no-bake peanut butter oat cups!
My personal little secret? If your peanut butter mixture seems a *tiny* bit too stiff and hard to spread, just warm it for about 10 seconds in the microwave. It makes it so much creamier and easier to get a perfectly even layer on your crust. It’s those little things that make baking feel less like work and more like fun, right? You can find even more super easy dessert recipes here if you’re on a roll!
Ingredient Notes and Substitutions
So, let’s chat about making these bars absolutely perfect for YOU! For the peanut butter, I usually grab creamy because it makes that middle layer super smooth and almost like frosting. But hey, if you love a little crunch, go for crunchy peanut butter! It just adds a different texture. If you need to keep things dairy-free, you can totally swap the butter for a vegan butter stick and use dairy-free chocolate chips. The coconut oil is pretty key for that gorgeous, melty chocolate topping; it helps it set up nice and glossy without getting hard like candy. It works wonders to give that smooth, decadent finish!
Frequently Asked Questions about No-Bake Chocolate Peanut Butter Bars
Got questions? I’ve got answers! These bars are pretty straightforward, but a few things come up now and then.
Can I use a different type of cookie crumb for the crust?
Oh, absolutely! While graham crackers are my go-to because they’re a classic and neutral base, you can totally switch it up. Try crushed vanilla wafers, shortbread cookies, or even finely crushed pretzels for a sweet and salty kick! Just make sure you use about the same amount, and mix it with the melted butter just like the recipe says. If you’re a big cookie fan, you might even find inspiration from things like this amazing chocolate chip cookie recipe to see what other cookie bases work.
How long do these bars last?
Well, if you can keep them around that long! Because they’re no-bake and have peanut butter and chocolate, they’re best stored in the refrigerator. They’ll stay fresh and delicious for about 5-7 days. The flavors actually meld together even more the next day, which is pretty awesome!
Can I make them dairy-free?
You sure can! It’s super easy to make these dairy-free. Just swap out the unsalted butter for a good quality vegan butter stick (make sure it’s solid at room temp), and use dairy-free chocolate chips. You can even use a plant-based milk if your chocolate chips need a little help melting. They still turn out amazing!
What if I don’t have coconut oil?
No coconut oil? No problem! You can substitute it with an equal amount of vegetable oil or even a neutral-flavored shortening if you have that on hand. It just helps the chocolate topping melt smoothly and set up with a nice sheen. It’s not the end of the world if it’s not perfectly glossy; they’ll still taste fantastic!
Storage and Reheating Instructions
These no-bake bars are best kept in the fridge, tucked away in an airtight container. That way, they stay nice and firm, and that delicious chocolate topping keeps its perfect texture. They’ll happily hang out in there for a good 5-7 days, though in my house, they disappear WAY faster than that! Since they’re designed to be chilled, you don’t need to reheat them at all – just grab one (or two!) straight from the fridge for the ultimate cool, creamy, chocolatey, peanut buttery bite. Easy peasy!
Nutritional Information (Estimated)
Just a heads-up, these numbers are estimates and can totally Tweak depending on the brands you use and exactly how you measure things. But, generally speaking, each of these glorious bars has about 250 calories, 18g of fat (with about 8g saturated), 20g of carbs, and 4g of protein. You’re also looking at around 20g of sugar and 2g of fiber. Pretty sweet deal for such a simple, decadent treat, right?
Share Your No-Bake Dessert Creations!
I just LOVE hearing from you all! Have you tried these No-Bake Chocolate Peanut Butter Bars? Did you tweak them in some crazy-awesome way? Maybe you made them for a party or a cozy night in? Please, please, please share your photos and stories in the comments below, and let me know what you think! It really makes my day to see your creations, and I’m always looking for new ideas, like maybe incorporating some turtle bar vibes or going full double chocolate!

Creamy Tomato Basil Soup (No Cream!)
- Total Time: 45 min
- Yield: 6 servings 1x
- Diet: Vegetarian
Description
A rich and flavorful tomato basil soup made creamy without any dairy.
Ingredients
- 2 tablespoons olive oil
- 1 large onion, chopped
- 3 cloves garlic, minced
- 2 (28 ounce) cans crushed tomatoes
- 4 cups vegetable broth
- 1 teaspoon dried basil
- 1/2 teaspoon dried oregano
- Salt and black pepper to taste
- 1/4 cup raw cashews, soaked in hot water for at least 30 minutes
- Fresh basil leaves for garnish
Instructions
- Heat olive oil in a large pot or Dutch oven over medium heat. Add onion and cook until softened, about 5-7 minutes.
- Add garlic and cook for 1 minute more until fragrant.
- Stir in crushed tomatoes, vegetable broth, dried basil, and dried oregano. Bring to a simmer.
- Reduce heat and let simmer for 15 minutes, stirring occasionally.
- Drain the soaked cashews and add them to the pot.
- Carefully transfer the soup to a blender (or use an immersion blender) and blend until smooth and creamy. Work in batches if necessary, and be cautious when blending hot liquids.
- Return the soup to the pot and heat gently. Season with salt and pepper to taste.
- Serve hot, garnished with fresh basil leaves.
Notes
- For a smoother soup, you can strain it after blending.
- Adjust seasonings to your preference.
- If you don’t have cashews, you can use soaked sunflower seeds or omit them for a less creamy texture.
- Prep Time: 15 min
- Cook Time: 30 min
- Category: Soup
- Method: Stovetop
- Cuisine: American
Nutrition
- Serving Size: 1.5 cups
- Calories: 250
- Sugar: 15g
- Sodium: 600mg
- Fat: 10g
- Saturated Fat: 2g
- Unsaturated Fat: 8g
- Trans Fat: 0g
- Carbohydrates: 30g
- Fiber: 7g
- Protein: 8g
- Cholesterol: 0mg
Keywords: tomato basil soup, creamy tomato soup, dairy-free soup, vegan soup, healthy soup, easy soup recipe