
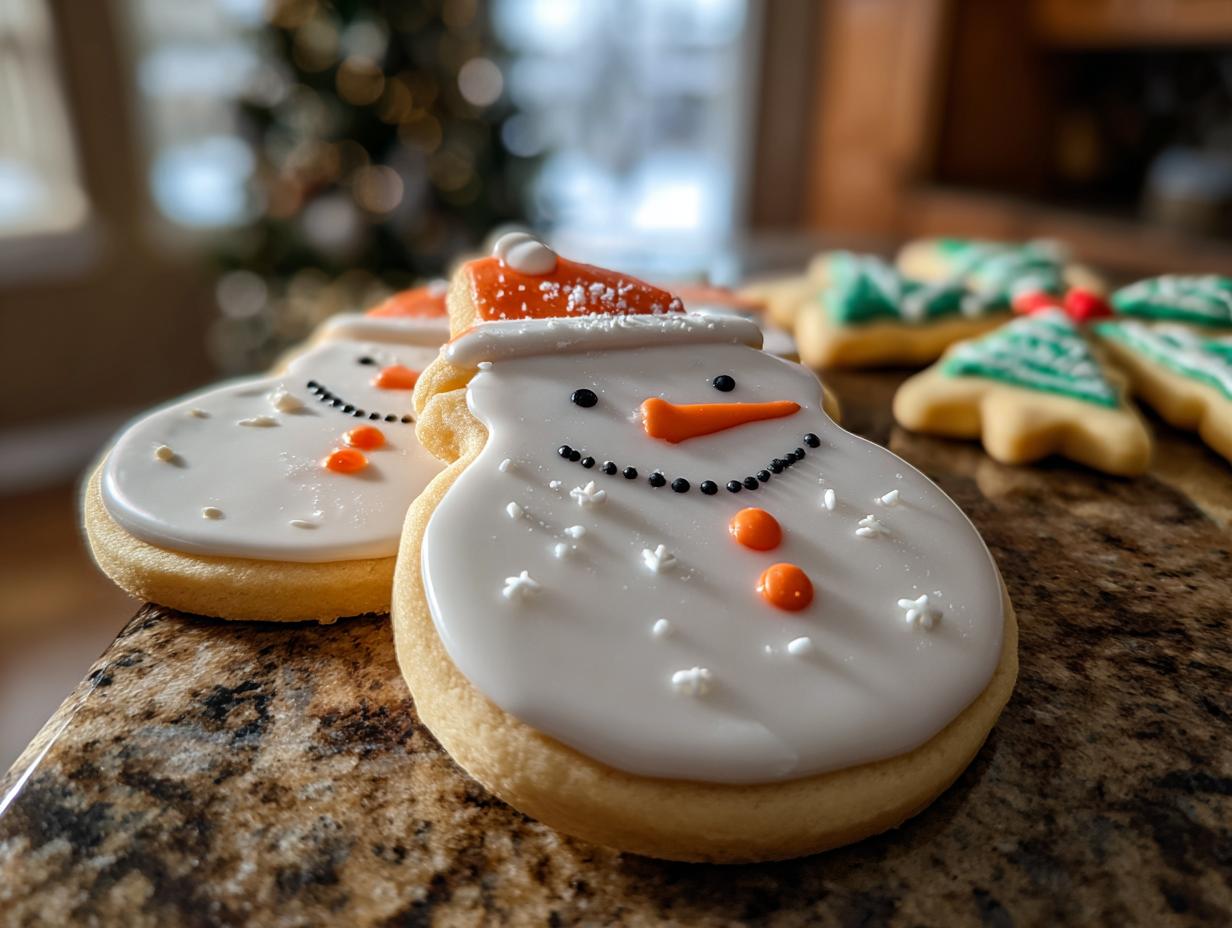
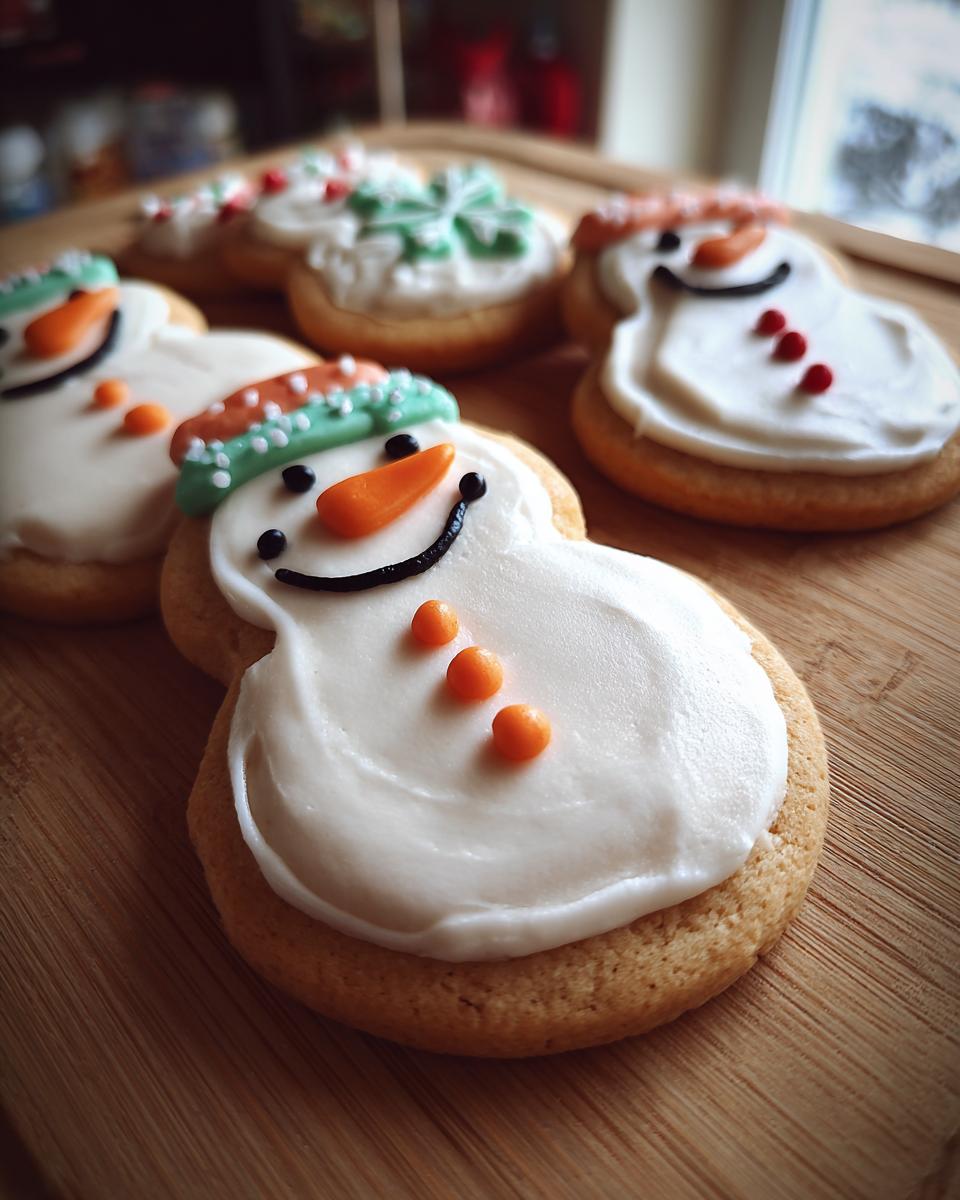
Oh, the holiday season! It just wouldn’t be the same without the smell of cinnamon and sugar wafting through the kitchen, right? There’s something so incredibly magical about baking festive treats when the snow is falling (or at least, when it feels like it should be!). And if you’re looking for a cookie that’s guaranteed to bring smiles, you absolutely *have* to try these Melted Snowman Sugar Cookies! I remember the first time I made them with my little niece; her giggles as she stuck M&Ms on for buttons were just the sweetest. They look so whimsical and fun, like little snowmen who decided to take a cozy nap, but let me tell you, they taste just as amazing as they look. And the best part? They’re surprisingly simple to whip up, even with all the decorating fun. Trust me, these are going to be your new holiday go-to!
Why You’ll Love These Melted Snowman Sugar Cookies
Okay, so why are these Melted Snowman Sugar Cookies my absolute faves for the holidays? Well, for starters:
- They’re ridiculously cute! Look at them! They just scream festive fun and are guaranteed to be the star of your cookie plate.
- Super simple to whip up. Even with the decorating, the dough itself is a breeze to make. Trust me, you won’t be stressed out in the kitchen.
- They taste amazing. It’s a classic, buttery sugar cookie with just the right amount of sweetness. Perfect for dunking in hot cocoa!
- Party perfection. These are always a hit at holiday get-togethers, cookie exchanges, or just for making your family smile.
- Endless decorating fun! You can get so creative with different candies and sprinkles for each snowman.
Gather Your Ingredients for Melted Snowman Sugar Cookies
Alright, let’s get down to business! To make these adorable Melted Snowman Sugar Cookies, you’ll want to have all your goodies ready to go. It makes the whole process so much smoother, trust me. Here’s what you’ll need:
First up, for the cookies themselves:
- 3 cups all-purpose flour: This is your base for a nice, sturdy cookie.
- 1 teaspoon baking powder: Just a little lift so they aren’t too dense.
- 1/2 teaspoon salt: Balances out the sweetness and really makes the flavors pop!
- 1 cup (2 sticks) unsalted butter, softened: This is so important! Make sure it’s softened, not melted. It should give when you press it gently.
- 1 1/2 cups granulated sugar: For that classic sweet sugar cookie flavor.
- 2 large eggs: It’s best if these are at room temperature. Just pop them out of the fridge about 30 minutes before you start.
- 1 teaspoon vanilla extract: You can never go wrong with good vanilla!
And now for the fun part – decorating your little melting pals!
- 1/2 cup powdered sugar: This is for your simple icing base.
- 1/4 cup milk: Just enough to get the icing to a nice, drizzly consistency. You might need a tiny bit more or less.
- Assorted candies for decoration: This is where you get creative! Think M&Ms for eyes, noses, and buttons, maybe some colored sprinkles for scarves, and a little black licorice or candies for hats. Whatever makes your snowmen unique!
Essential Equipment for Baking Melted Snowman Sugar Cookies
To make these adorable snowmen, you’ll need a few basic kitchen tools. I always like to have everything ready before I even start mixing, so I don’t have to go hunting mid-recipe! You’ll want:
- A good set of mixing bowls (a big one for creaming, a medium one for dry ingredients).
- Measuring cups and spoons.
- A whisk for your dry ingredients and icing.
- An electric mixer (handheld or stand mixer) or a strong arm and a wooden spoon for creaming.
- A rolling pin.
- A trusty snowman-shaped cookie cutter – or any fun winter shape!
- Baking sheets.
- Parchment paper or silicone baking mats (these are lifesavers!).
- A wire rack for cooling your cookies completely.
Step-by-Step Guide to Making Melted Snowman Sugar Cookies
Alright, let’s get these adorable snowmen into existence! These steps are super straightforward, and honestly, the decorating part is where all the giggles happen. So grab your apron, and let’s bake up some holiday cheer! If you love sugar cookies for decorating, you should totally check out these soft sugar cookies too.
Preparing the Cookie Dough
First things first, gotta get that perfect sugar cookie dough ready. In a medium bowl, just give your flour, baking powder, and salt a quick whisk together. This makes sure everything is evenly distributed. Now, grab your biggest bowl and let’s cream that butter and sugar. You want it nice and fluffy, like a little cloud! This usually takes a couple of minutes with an electric mixer, or a bit longer with some good old-fashioned elbow grease. Next, beat in your eggs one at a time – don’t just plop them both in! Then, stir in that lovely vanilla extract. Now, slowly add your dry ingredients to the wet. Mix it only until it’s *just* combined. Seriously, stop when you don’t see streaks of flour anymore. Overmixing is the enemy of tender sugar cookies, trust me on this one!
Chilling and Rolling the Dough
This next step is super important for getting clean shapes and cookies that don’t spread all over the place in the oven. Divide your dough in half, wrap each piece up nice and tight in plastic wrap, and pop them into the fridge for at least 30 minutes. While they’re chilling, you can preheat your oven to 350°F (175°C) and get your baking sheets lined with parchment paper – it makes cleanup a breeze! Once the dough is firm, lightly flour your surface and roll out one half to about a quarter-inch thick. If it feels too sticky, add a tiny bit more flour, but don’t go crazy. Use your snowman cookie cutter to cut out shapes and carefully place them on your prepared baking sheets. Leave a little space between them so they have room to be themselves!
Baking the Snowman Cookies
Time for the magic to happen in the oven! Pop those baking sheets in and bake for about 8 to 10 minutes. You’ll know they’re ready when the edges are just starting to look lightly golden. Don’t overbake them, or they’ll get too crisp! Let them hang out on the baking sheets for a few minutes after they come out – they’re delicate when they’re hot. Then, gently transfer them to a wire rack to cool completely. Trust me, they need to be totally cool before you even think about decorating, otherwise, your icing will just melt right off!
Decorating Your Melted Snowman Sugar Cookies
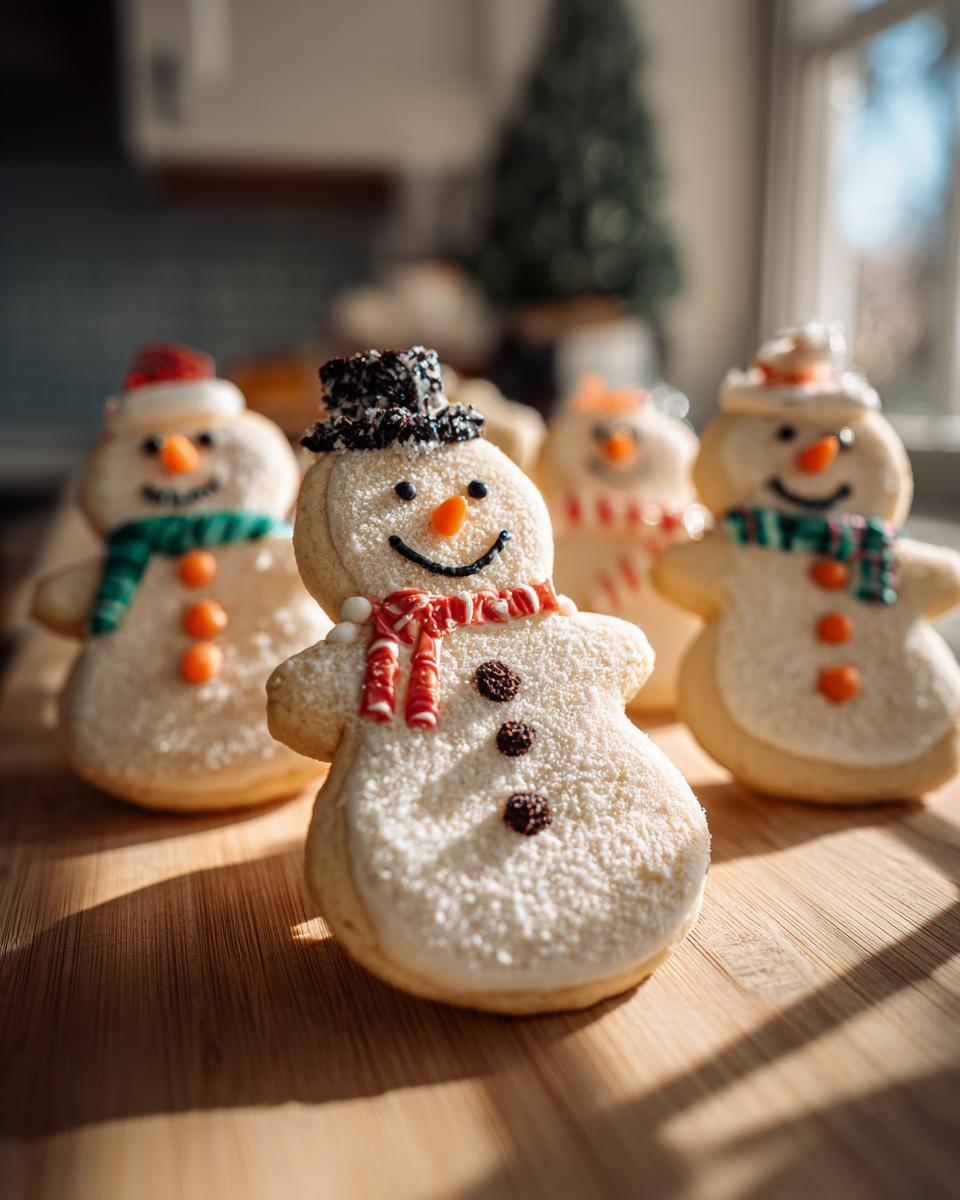
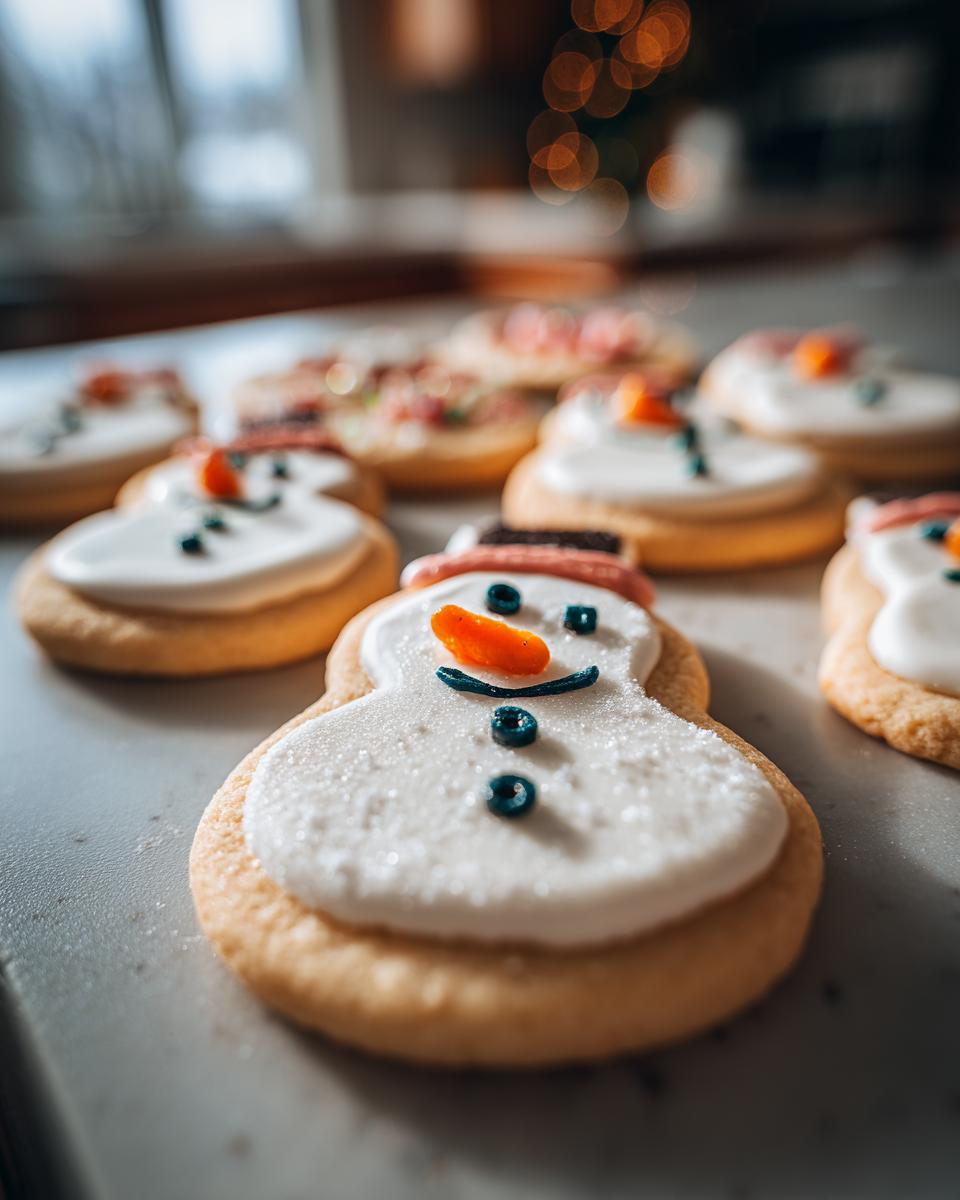
This is the best part! While your cookies are cooling, whip up the icing. Just whisk together that powdered sugar and milk in a small bowl. You want it to be smooth and pourable, kind of like thick paint. If it’s too thick, add milk a tiny drop at a time; if it’s too thin, add a little more powdered sugar. Now for the fun: grab your candies! Use a dab of icing to stick on M&Ms for eyes, a little orange candy or sprinkle for the nose, and black candies for buttons. You can even use bits of licorice or candies to make a hat or a scarf. Get creative! It’s all about having fun and making each snowman unique and adorable. Don’t worry if they’re not perfect; that’s part of their charm!
Tips for Perfect Melted Snowman Sugar Cookies
Want to make sure your Melted Snowman Sugar Cookies turn out absolutely perfect every single time? I’ve picked up a few tricks over the years that really make a difference. For really crisp edges, make sure your dough is well-chilled before rolling and don’t overbake – just a touch of golden brown is all you need! And if your cookies tend to spread too much, try adding a tiny bit more flour to the dough next time, or even an extra 10 minutes in the fridge. Also, remember that parchment paper is your best friend for easy cleanup and preventing sticking! If you adore a good sugar cookie base, you should totally check out my chocolate chip cookie recipe; it’s a classic for a reason!
Ingredient Substitutions and Notes
Let’s chat about ingredients for a sec. Using softened, *not* melted, butter is a game-changer for sugar cookies; it helps create that lovely texture and prevents spreading. And room temperature eggs? They just blend so much better into the batter. If you ever need to swap things around, you *could* use a good quality vegan butter substitute, but it might change the texture just a bit. For the icing, if you don’t have milk handy, a little bit of water or even a dairy-free milk alternative will work in a pinch. Just be sure to adjust the consistency as needed – you want that nice, smooth drizzle!
Storing and Reheating Your Festive Cookies
Alright, you’ve made these gorgeous Melted Snowman Sugar Cookies, and now you want them to stay perfectly fresh, right? Easy peasy! Once they’re completely cool, just pop them into an airtight container. Seriously, that’s the key. If you stack them, put a piece of wax paper or parchment paper between the layers so the decorations don’t stick. They’ll stay wonderfully soft and delicious at room temperature for about 3 days. If you happen to have a few leftover after that (unlikely, I know!), you can pop them in the freezer for up to a month. Just let them thaw at room temperature before you dig in!
Frequently Asked Questions About Melted Snowman Sugar Cookies
Got questions about these cute little guys? I’ve got answers! Making these Melted Snowman Sugar Cookies is usually a breeze, but there are a few things people often ask about.
Can I make these cookies ahead of time?
Absolutely! These cookies are perfect for making ahead, which is a lifesaver during the busy holiday season. You can make the dough, wrap it well, and keep it in the fridge for up to 2-3 days before you plan to bake them. Or, bake them completely and store them in an airtight container at room temperature for up to 3 days. They’re still delicious after a few days!
What’s the best way to get nice, defined snowman shapes?
The secret is well-chilled dough! Make sure you chill the dough for at least 30 minutes, or even a bit longer if your kitchen is warm. This makes it firmer and easier to cut clean shapes without them spreading too much. Also, don’t skimp on the flour when rolling, but brush off any extra before cutting. You can also pop the cut-out cookies in the freezer for about 10 minutes *before* baking. It really helps them hold their shape!
Can I use different candies for decoration?
Oh, you totally can! That’s the fun part about these Melted Snowman Sugar Cookies. While M&Ms and black licorice are classic, feel free to get creative! You could use mini chocolate chips for eyes and buttons, a candy corn for a nose, or even red and green sprinkles for a scarf effect. Little round candies work great for hats too. Use whatever festive bits and bobs you have on hand – it’s your snowman, make it unique!
My cookies spread a lot, what did I do wrong?
It happens! Usually, cookie spread comes down to a couple of things. Make sure your butter wasn’t too soft or melted when you creamed it – it should be softened, not greasy. Also, chilling the dough is crucial. If it’s too warm, it’ll spread. And remember not to overmix the dough once you add the flour; a gentle hand goes a long way here! If you’re still having trouble, you might want to check out these easy 3-ingredient Christmas cookies; they’re super forgiving!
Nutritional Information (Estimated)
Just a heads-up, the nutritional info below is an estimate per cookie, and it can totally change depending on the size of your cookies, how much icing you use, and the specific brands of candies you pick for decorating your Melted Snowman Sugar Cookies. It’s always good to use it as a general guide!
Print
Melted Snowman Sugar Cookies
- Total Time: 40 min
- Yield: 24 cookies 1x
- Diet: Vegetarian
Description
Fun and festive sugar cookies shaped like melting snowmen, perfect for holiday baking.
Ingredients
- 3 cups all-purpose flour
- 1 teaspoon baking powder
- 1/2 teaspoon salt
- 1 cup (2 sticks) unsalted butter, softened
- 1 1/2 cups granulated sugar
- 2 large eggs
- 1 teaspoon vanilla extract
- 1/2 cup powdered sugar
- 1/4 cup milk
- Assorted candies for decoration (e.g., M&Ms, sprinkles, black licorice)
Instructions
- Preheat your oven to 350°F (175°C). Line baking sheets with parchment paper.
- In a medium bowl, whisk together the flour, baking powder, and salt.
- In a large bowl, cream together the softened butter and granulated sugar until light and fluffy.
- Beat in the eggs one at a time, then stir in the vanilla extract.
- Gradually add the dry ingredients to the wet ingredients, mixing until just combined.
- Divide the dough in half, wrap each half in plastic wrap, and chill for at least 30 minutes.
- On a lightly floured surface, roll out one half of the dough to about 1/4-inch thickness. Cut out snowman shapes using a cookie cutter. Place the cutouts on the prepared baking sheets.
- Bake for 8-10 minutes, or until the edges are lightly golden. Let the cookies cool on the baking sheets for a few minutes before transferring them to a wire rack to cool completely.
- While the cookies are cooling, prepare the icing. In a small bowl, whisk together the powdered sugar and milk until smooth and pourable. Add more milk or powdered sugar as needed to reach your desired consistency.
- Once the cookies are completely cool, use the icing to attach candies for the snowman’s features (eyes, nose, buttons, hat, scarf).
Notes
- You can use store-bought icing if you prefer.
- Get creative with your candy decorations!
- These cookies can be stored in an airtight container at room temperature for up to 3 days.
- Prep Time: 30 min
- Cook Time: 10 min
- Category: Dessert
- Method: Baking
- Cuisine: American
Nutrition
- Serving Size: 1 cookie
- Calories: 150
- Sugar: 15g
- Sodium: 50mg
- Fat: 7g
- Saturated Fat: 4g
- Unsaturated Fat: 3g
- Trans Fat: 0g
- Carbohydrates: 20g
- Fiber: 1g
- Protein: 2g
- Cholesterol: 25mg
Keywords: sugar cookies, snowman cookies, holiday cookies, Christmas cookies, festive baking, decorated cookies, simple cookies