

Oh, finding treats for our finicky feline friends can be a real puzzle, right? Especially when your sweet kitty has a sensitive tummy or skin issues. You roam the pet store aisles, hoping for something that won’t cause an upset stomach or itchy ears. That’s exactly why I started making these super simple, homemade Hypoallergenic Cat Treats! My little guy, Jasper, used to get the worst digestive woes from store-bought treats, and after a lot of trial and error, I landed on this recipe. It’s a lifesaver!
Why Your Cat Needs Hypoallergenic Cat Treats
So, why bother with special hypoallergenic cat treats? Well, lots of cats are actually sensitive to common ingredients like chicken, beef, or even grains like wheat and corn. It’s a bummer, I know! You might notice your kitty getting itchy ears, excessive grooming, tummy troubles like vomiting or diarrhea, or even skin rashes. It’s their body telling you something isn’t sitting right! Using a limited-ingredient diet with hypoallergenic foods means you’re giving them ingredients that are less likely to trigger these yucky reactions. It’s all about finding what makes your furry friend feel their best and happiest, inside and out!
Simple Ingredients for Hypoallergenic Cat Treats
Okay, so let’s talk ingredients! The beauty of these hypoallergenic cat treats is how straightforward they are. You probably have most of this stuff already! We’re keeping it super clean for sensitive tummies. My Jasper just goes *bonkers* for these, and his stomach has been so much happier since I swapped out those mystery-meat store-bought ones.
Ingredient Spotlight: Chicken Breast
Chicken is a fantastic option for kitties with sensitivities. It’s a lean protein, super digestible, and most cats just love it! Plus, it’s a great source of essential nutrients. Just make sure it’s plain cooked chicken breast – no added salt, spices, or anything weird!
Ingredient Spotlight: Pumpkin Puree
Now, pumpkin might sound strange for cats, but trust me, it’s a superhero for their digestion! Plain, 100% pumpkin puree (not pie filling, that’s a big no-no!) is packed with fiber. It helps things move along smoothly and can really calm down an upset tummy. It also adds a bit of moisture, which is lovely.
Ingredient Spotlight: The Binder (Egg)
We need something to hold all these goodies together, and a simple egg does the trick perfectly! It’s a great source of protein and healthy fats. Most cats tolerate eggs just fine. If your cat has a *very* specific allergy and can’t have eggs, you might need to find a different binder, but for most sensitive kitties, it’s a safe bet.
Crafting Your Hypoallergenic Cat Treats: Step-by-Step
Alright, let’s get down to business! Making these little gems is ridiculously easy. Seriously, you’ll be done before you know it. My biggest tip? Put on some good music and just enjoy the process. It’s way more fun than wrestling with a fussy cat at the pet store, right? We’re going to whip up some tasty, healthy treats that your kitty will absolutely adore. You can even find some other fun chicken recipes over at drinkmixrecipes.com for inspiration!
Preheating and Prep for Perfect Hypoallergenic Cat Treats
First things first, let’s get that oven nice and hot! You’ll want to preheat it to 350°F (that’s 175°C for those of you who use the metric system). While the oven is doing its thing, grab a baking sheet. I like to line mine with parchment paper – it makes clean-up an absolute breeze. Trust me on this one; sticky chicken bits are no fun to scrub!
Mixing the Hypoallergenic Cat Treat Dough
Now for the fun part: mixing! Grab a medium-sized bowl. Toss in your shredded cooked chicken, that lovely pumpkin puree, and the egg. Give it all a good stir. You want to make sure everything is super well combined. I usually use a fork to really mash things together until it’s a nice, consistent paste. No one wants a bite that’s all pumpkin or all chicken!
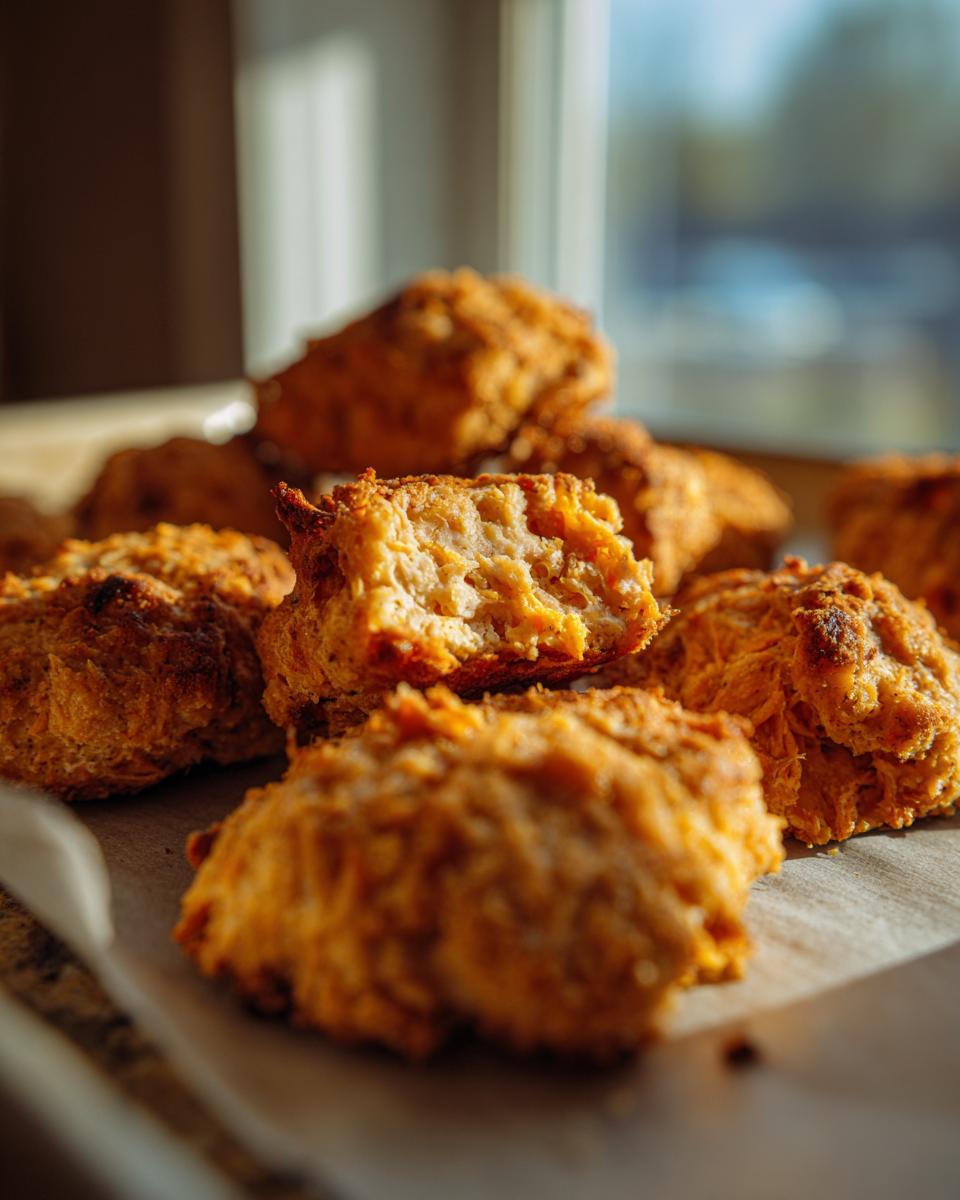
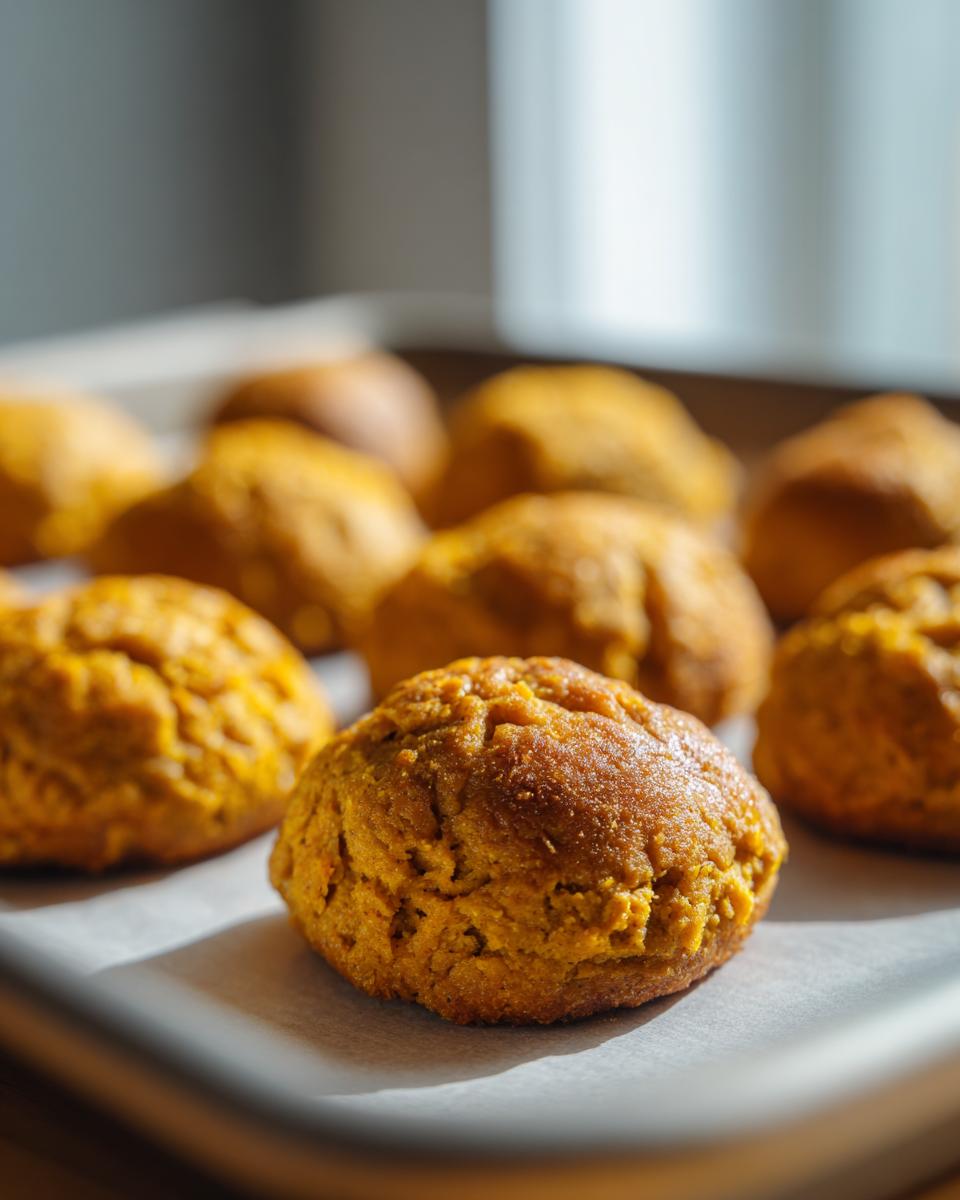
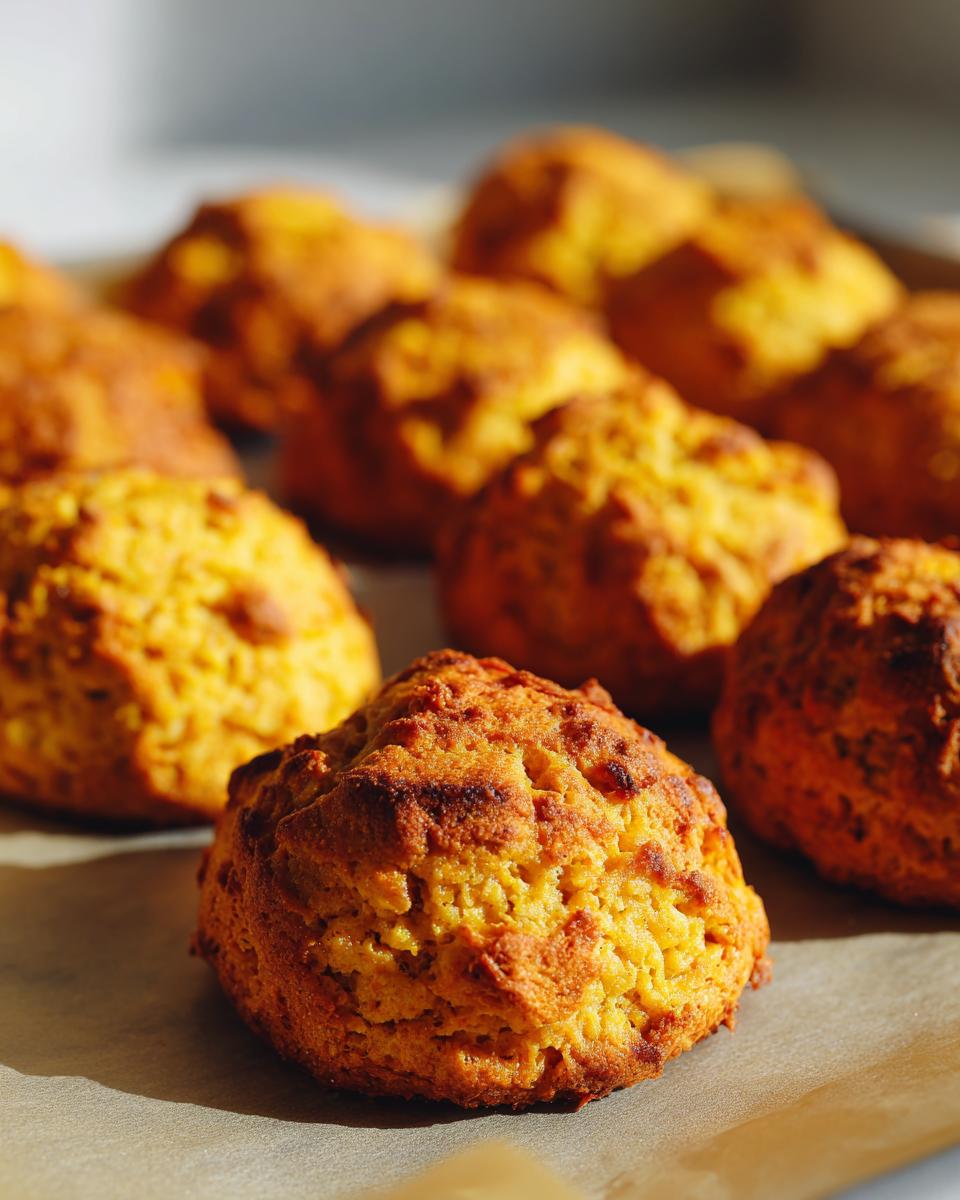
Shaping and Baking Your Hypoallergenic Cat Treats
Once it’s all mixed up, it’s time to make some treats! I usually use a small spoon, like a teaspoon, to drop little dollops of the mixture onto our prepared baking sheet. They don’t need to be perfectly round or anything fancy – your cat isn’t judging your piping skills! Just aim for bite-sized portions. Pop that baking sheet into the preheated oven and bake them for about 15 minutes. You’ll know they’re ready when they look firm to the touch and have held their shape.
Cooling and Serving Hypoallergenic Cat Treats
Super important step here: let them cool completely! Those little treats are going to be hot, and you don’t want to burn your cat’s precious mouth. Just leave them on the baking sheet or transfer them to a wire rack for about 10-15 minutes. Once they’re cool, you can offer one to your furry friend and watch them go wild!

Tips for Success with Hypoallergenic Cat Treats
Making these hypoallergenic cat treats is pretty fool-proof, but here are a few little tricks I’ve picked up that really make them shine! It’s all about making them just right for your picky pal. If you’re ever looking for more creative recipe ideas, you can check out drinkmixrecipes.com for all sorts of yummy stuff!
Customizing Your Hypoallergenic Cat Treats
If your kitty is super sensitive to chicken or just bored with it (can you believe it?!), you can totally swap it out! Just make sure you use another cooked, *plain* lean meat like turkey or white fish. Cook it thoroughly and shred it up the same way. Always introduce any new ingredient slowly!
Troubleshooting Common Hypoallergenic Cat Treat Issues
Now, what if your treats are a bit crumbly? That usually means they needed a splash more pumpkin or egg. If they’re too soft and gooey after baking, just pop them back in the oven for a few extra minutes. I learned that the hard way – nobody wants a treat that falls apart before it even makes it to their little kitty mouth!
Storing Your Homemade Hypoallergenic Cat Treats
Alright, you’ve made these amazing hypoallergenic cat treats, and now you want to keep them fresh, right? Easy peasy! Once they’re totally cool – and I mean *completely* cool, you don’t want any steam trapped inside – pop them into an airtight container. I usually use an old plastic takeaway container or a pretty glass jar for mine. They’ll stay good at room temperature for about 4 or 5 days. Honestly, in my house they don’t last that long because Jasper inhales them, but the recipe is good for that long! If you make a huge batch and want them to last longer, you can totally pop them in the fridge for about a week, or even freeze them for up to a couple of months. Just thaw them out before you serve! For more great ideas on storing homemade goodies, you can check out drinkmixrecipes.com for tips!
Frequently Asked Questions About Hypoallergenic Cat Treats
Got questions about these yummy hypoallergenic cat treats? I get it! It’s always good to be sure, especially when our kitties have sensitive tummies. Here are a few things people often ask me.
Can I use other proteins besides chicken for these treats?
Yes, you absolutely can! If your cat can’t have chicken or just gets tired of it, try using plain, cooked, shredded turkey or even a mild white fish like cod or haddock. Just make sure it’s cooked thoroughly and has no added seasonings. Always watch your kitty closely when you introduce a new protein!
How often can I give my cat these homemade treats?
These are special treats, not a meal replacement. Think of them like a little reward! A good rule of thumb is to give just one or two a day. It’s always best to chat with your veterinarian about the right amount for your specific cat’s diet and health needs, especially if they have a sensitive stomach.
Are these hypoallergenic treats suitable for kittens?
Kittens have even more delicate systems, so it’s always best to check with your vet before giving them any new treats, including these homemade ones. If your vet gives the okay, start with a tiny piece to see how they handle it. They’re generally gentle, but caution is key with little ones!
My cat has really bad allergies, are these safe?
These treats are made with simple, common hypoallergenic ingredients, which is a great start! However, every cat is different. If your cat has severe allergies, it might be wise to do a patch test or run them by your vet first. We’re aiming for happy kitties, so no risks!
Nutritional Information for Hypoallergenic Cat Treats
Now, I’m not a nutritionist or anything, but I’ve done my best to break down what’s in these little bite-sized wonders! These are just estimates, of course, since every cat, chicken breast, and pumpkin puree is a little different. But generally, you’re looking at about 15 calories per treat, with a good boost of protein (around 2g) and just a tiny bit of fat and carbs. Perfect for a guilt-free reward!
Print
Hypoallergenic Cat Treats
- Total Time: 25 min
- Yield: 20 treats 1x
- Diet: Low Lactose
Description
Simple homemade treats for cats with food sensitivities.
Ingredients
- 1 cup cooked chicken breast, shredded
- 1/4 cup pumpkin puree
- 1 egg
Instructions
- Preheat oven to 350°F (175°C).
- Mix chicken, pumpkin, and egg in a bowl.
- Drop small spoonfuls onto a baking sheet.
- Bake for 15 minutes or until firm.
- Cool completely before serving.
Notes
- Store in an airtight container for up to 5 days.
- Check with your vet before introducing new foods.
- Prep Time: 10 min
- Cook Time: 15 min
- Category: Pet Food
- Method: Baking
- Cuisine: N/A
Nutrition
- Serving Size: 1 treat
- Calories: 15
- Sugar: 0.1
- Sodium: 8
- Fat: 0.5
- Saturated Fat: 0.1
- Unsaturated Fat: 0.3
- Trans Fat: 0
- Carbohydrates: 0.5
- Fiber: 0.1
- Protein: 2
- Cholesterol: 10
Keywords: hypoallergenic cat treats, homemade cat food, sensitive stomach cat treats