
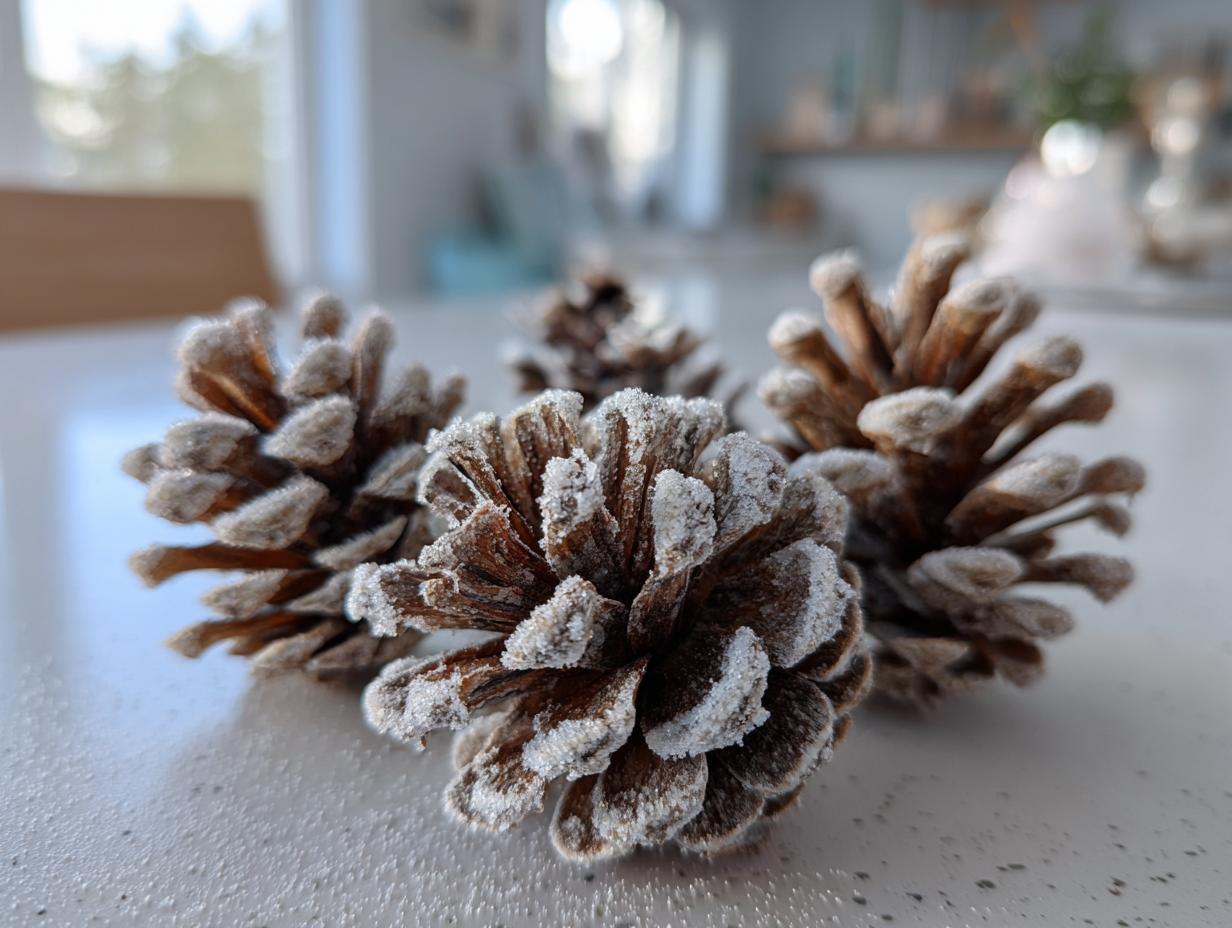
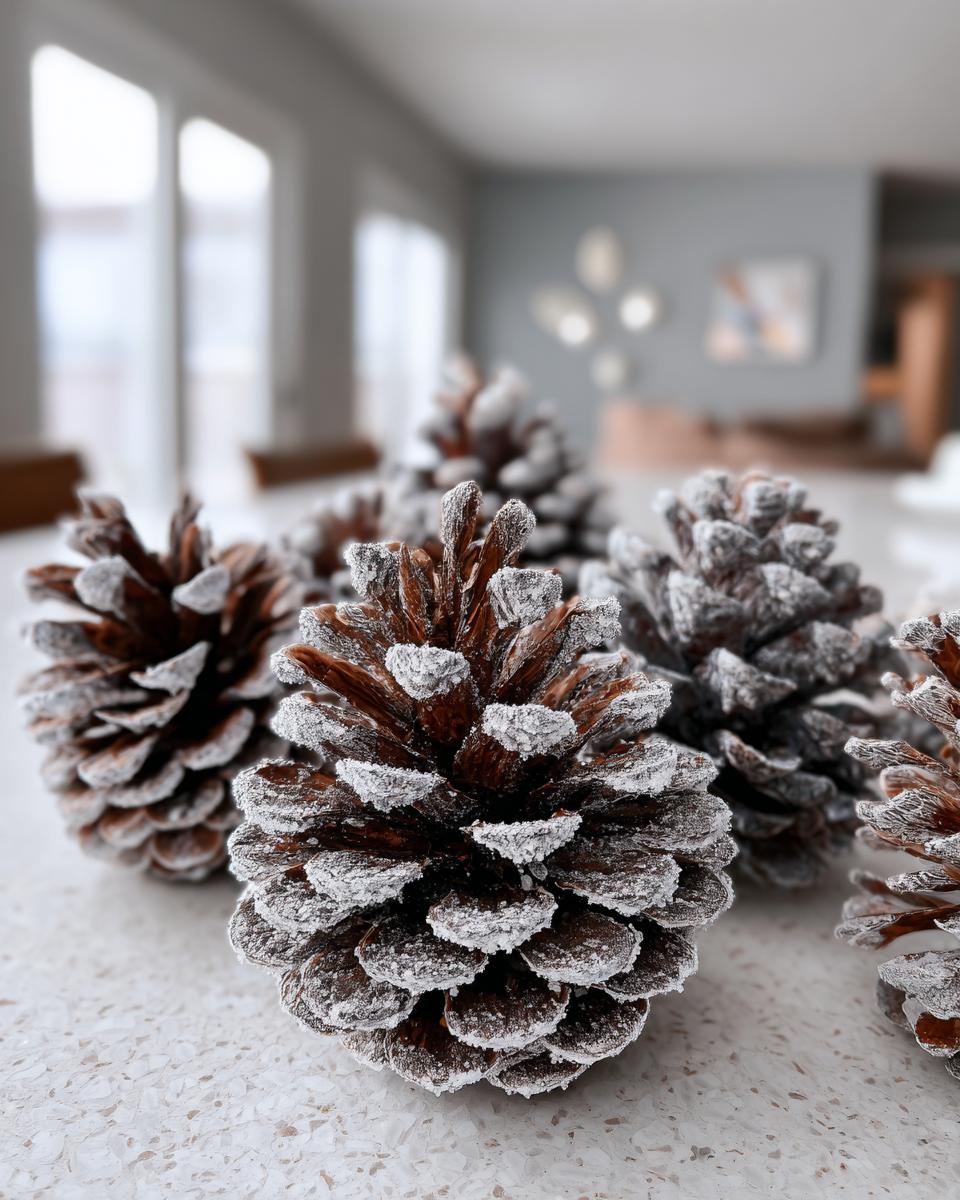
Oh, winter decor! There’s just something magical about bringing the beauty of the outdoors in during the colder months, isn’t there? And what’s more natural and charming than pinecones? I absolutely adore using them, but my *favorite* way to deck the halls is with pinecones that look like they’ve just been kissed by a fresh snowfall. Seriously, learning how to make snow-flocked pinecones is ridiculously easy and it transforms them into something so festive. I always scatter a few of these along my mantelpiece, and they get so many compliments every year!
Why You’ll Love This How to Make Snow-Flocked Pinecones Tutorial
Honestly, you’re going to adore this little project! It’s:
- Super Easy: Seriously, even if you think you’re not crafty, you can totally do this!
- Budget-Friendly: You probably have most of the stuff already, or it’s super cheap to grab.
- Gorgeous Results: Who knew something so simple could look so elegant and festive?
- Fun for Everyone: Kids and adults alike will have a blast creating their own winter wonderland pieces.
Learning how to make snow-flocked pinecones is just the best little winter hack!
Gather Your Supplies for How to Make Snow-Flocked Pinecones
Okay, gathering up our bits and bobs is the first super simple step in learning how to make snow-flocked pinecones. It’s good to have everything ready before you dive in, so you don’t have to go hunting around mid-craft! Trust me, I learned that the hard way once and ended up with Epsom salt all over my kitchen floor! To get that lovely frosted look, you’ll need just a few things.
Essential Ingredients
- 1 cup Epsom salt
- 1/2 cup water (just plain old tap water is perfectly fine!)
- Pinecones! (Make sure they’re clean and totally dry. I usually give mine a quick brush to get any dirt or little bugs off.)
Don’t stress too much about the Epsom salt; any kind will work, but sometimes the coarser grain gives a bit more of a crystalline look, which I just love!
Tools You’ll Need
- A mixing bowl (I like to use one I don’t use for food, just in case!)
- A spoon for mixing
- Newspaper or a drop cloth to protect your surface (this stuff can get a little messy!)
- Wire or twine if you want to hang your frosted beauties (optional, but handy!)
Step-by-Step Guide: How to Make Snow-Flocked Pinecones
Alright, let’s get down to the really fun part: actually making these beauties! It’s not tricky at all, and once you do it, you’ll be wondering why you haven’t done it every year. Following these steps for how to make snow-flocked pinecones will give you that perfect wintery look. It’s almost as satisfying as making a perfect batch of homemade donuts, you know?
Preparing Your Workspace
First things first, let’s protect your surfaces! I always spread out a big layer of old newspaper or a cheap drop cloth. This Epsom salt mixture can get a little messy, and you don’t want it sticking to your table. It’s a lifesaver for easy cleanup, trust me!
Creating the ‘Snow’ Mixture
Now, grab your mixing bowl. We’re going to make our ‘snow.’ Just toss in the Epsom salt and then slowly add the half-cup of water. Stir it all up with your spoon until you get a nice, slushy consistency. It should look like a watery snowbank. If it feels too dry and crumbly, add just a tiny splash more water. If it seems too soupy, throw in a little more salt. You want it thick enough to coat well but not so thick that it won’t stick properly.
Coating the Pinecones
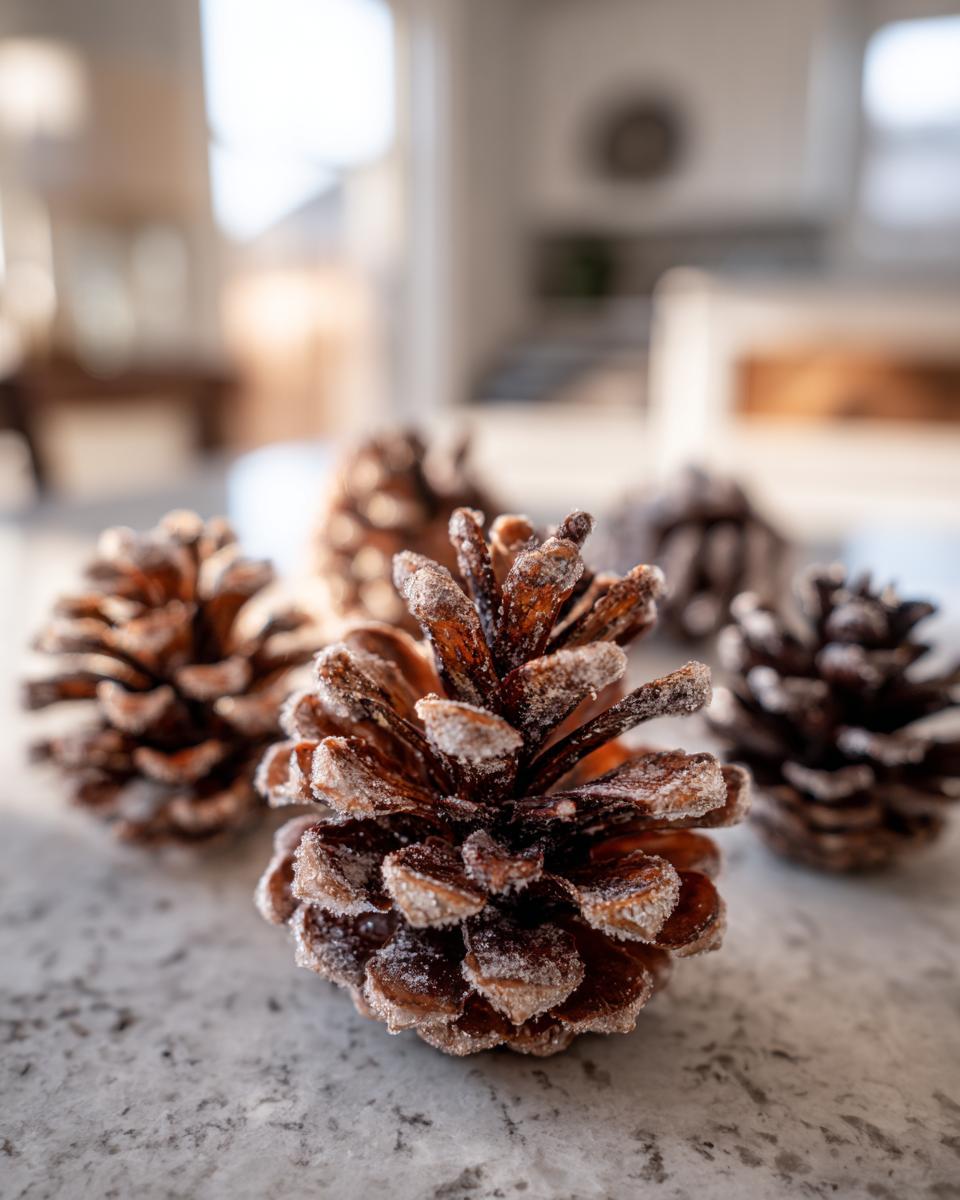
This is where the magic really starts! Take one of your clean, dry pinecones and dip it right into that slushy Epsom salt mixture. Make sure you get it all coated, swirling it around with your fingers to push the mixture into all those little nooks and crannies – that’s where the most realistic snow effect happens! Then, just lift it out and let any extra drip back into the bowl. Don’t shake it too much, or you’ll shake off all that lovely ‘snow’ you just put on!
Drying Your Snow-Flocked Pinecones
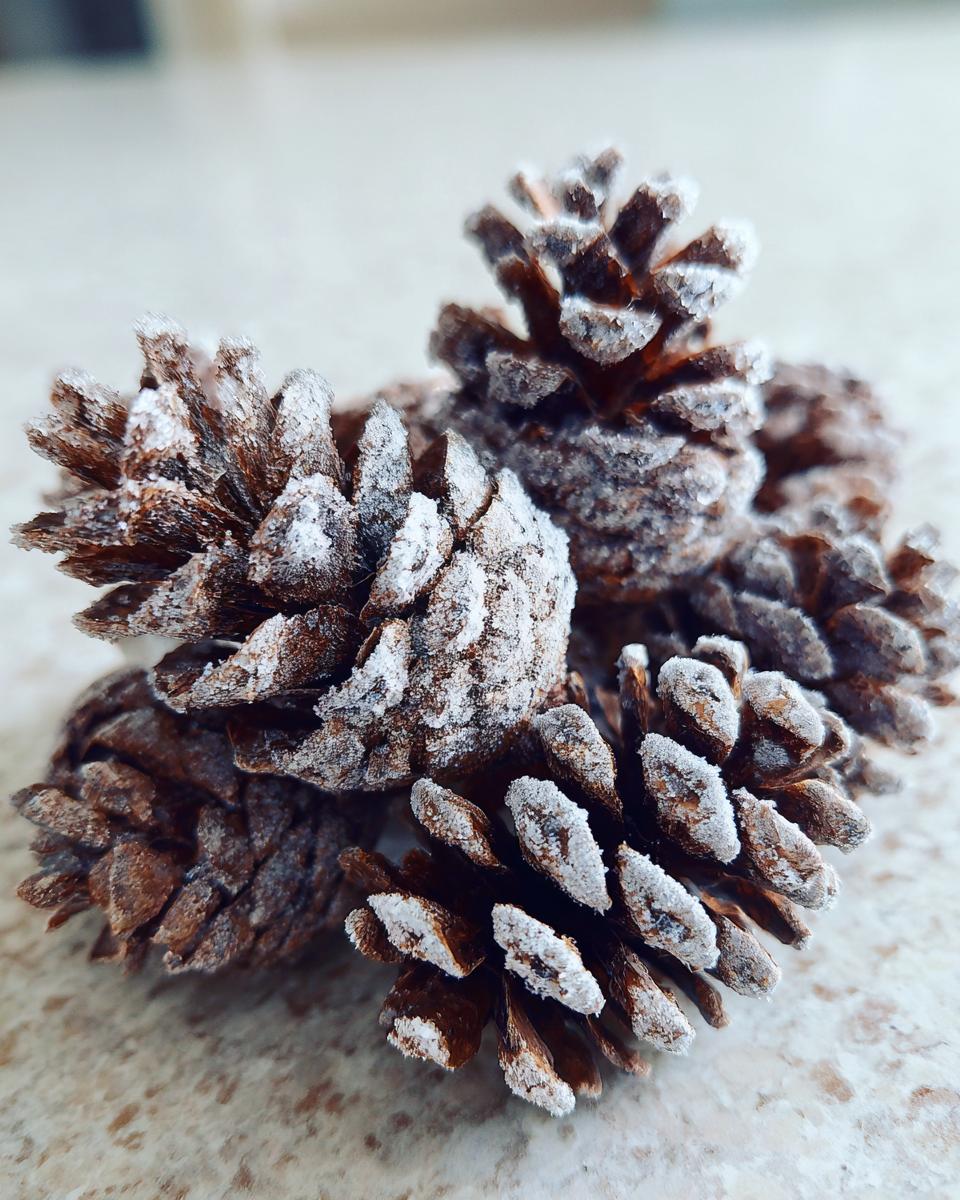
Now for the waiting game! Carefully place your coated pinecones on the newspaper you laid out. Find a spot where they can dry undisturbed. This part is super important: they need to dry *completely*. Depending on how humid it is where you live, this could take anywhere from 24 to 48 hours. Patience is key here! If you try to move them too soon, the coating can flake off. If you’re in a rush, you can try placing a fan nearby on a low setting – just don’t blast them with heat, as that can sometimes make them crack or lose their shape. They’re ready when they feel totally dry to the touch and the ‘snow’ coating is firm; I often give mine a gentle prod with my finger to check!

Tips for Perfect Snow-Flocked Pinecones
Okay, so you’ve got the basics of how to make snow-flocked pinecones down, but let’s talk about taking them from *good* to absolutely *stunning*. Little tweaks make a huge difference, and believe me, I’ve experimented with pretty much all of them! These tips will help you get that perfectly dreamy winter look every single time. It’s like knowing how to get the perfect cheesy pull on sloppy joe melts – a little trick makes all the difference!
Enhancing the Frosty Effect
Want an *extra* frosty look? Try spraying your pinecones lightly with hairspray *before* you dip them. It gives them a little tackiness that helps the Epsom salt stick even better, making that “snow” look super vibrant. It’s like a secret weapon for extra sparkle!
Pinecone Selection and Preparation
Picking the right pinecone is half the battle! Look for ones that are nicely open and have lots of little nooks. Before you do anything, make sure they’re nice and clean – give them a good brush to get rid of any dirt, dust, or little critters that might be hiding. Also, ensure they are completely dry after cleaning. Different pinecone shapes will give you different looks, so have fun experimenting!
Working Safely
Just a quick reminder, everyone! Always work in an area with good airflow. While Epsom salt is generally safe, mixing it with water does create a bit of a mist, so getting some fresh air in your workspace is always a good idea.
Creative Ways to Use Your Snow-Flocked Pinecones
So you’ve learned how to make snow-flocked pinecones and now you’ve got a beautiful collection! What next? Don’t just hide them away in a bowl, as tempting as that is! I love scattering mine along the edge of my fireplace mantel, tucking them into greenery arrangements on my dining table, or even using them as charming place-card holders at holiday dinners. They look absolutely stunning draped around a mirror or woven into a DIY wreath. You can even tie a little twine loop on them and hang them from your Christmas tree for an extra touch of winter magic. Honestly, these little wonders add a touch of natural elegance to just about any space! They’re almost as fun to decorate with as pull-apart Christmas bread looks on a holiday table!
Frequently Asked Questions About How to Make Snow-Flocked Pinecones
Got a few nagging questions before you dive into this fun craft? I totally get it! Here are some common ones I hear when folks learn how to make snow-flocked pinecones. Hopefully, this clears everything up!
Can I use something other than Epsom salt?
While Epsom salt is my go-to because it crystals up so nicely, you could try a coarse sea salt or even a mix of flour and glue if you’re in a pinch! Just know the texture might be a little different than that classic frosted look.
How long will the ‘snow’ last on the pinecones?
Oh, these little beauties are pretty durable! As long as they’re kept indoors and dry, the Epsom salt coating can last for ages – really, through many holiday seasons. Just handle them gently to avoid knocking off any of that lovely ‘snow’!
Are these pinecones safe for outdoor winter decor?
Honestly, I’d recommend keeping these frosted beauties indoors. Moisture and the elements can really break down the Epsom salt coating pretty quickly. They’re best for bringing that snowy charm inside your home!
Can I add glitter to my snow-flocked pinecones?
Yes, absolutely! This is where you can really get creative. A light dusting of iridescent glitter *after* the Epsom salt is dry can add a gorgeous sparkle, making them look even more magical, almost like they’ve caught the moonlight!
Estimated Nutritional Information
Now, before you go thinking you’re going to fuel up on these pretty pinecones, let’s be clear: these are for decoration, not for eating! Since we’re using Epsom salt and natural pine, the nutritional info is pretty much zilch. For about one snow-flocked pinecone, you’re looking at 0 calories, 0g fat, 0g protein, and 0g carbohydrates. Basically, they’re purely for visual charm and won’t impact your diet at all!
Share Your Creations!
I absolutely LOVE seeing your crafty triumphs! If you made your own snow-flocked pinecones, tell me all about it in the comments below! Did you try any fun variations? I’d also love to hear how you’re using them in your decor. Your projects inspire me so much! You can also share your creations and feedback via my contact page!
Print
How to Make Snow-Flocked Pinecones
- Total Time: 15 min + drying time
- Yield: Varies based on pinecones used
- Diet: Vegetarian
Description
A simple guide to creating decorative snow-flocked pinecones for holiday and winter decor.
Ingredients
- 1 cup Epsom salt
- 1/2 cup water
- Pinecones
- Newspaper or drop cloth
- Bowl
- Spoon
- Wire or twine for hanging (optional)
Instructions
- Spread newspaper or a drop cloth on your work surface.
- In a bowl, mix the Epsom salt and water until the salt is mostly dissolved, creating a slushy mixture.
- Dip each pinecone into the Epsom salt mixture, ensuring it is well coated.
- Lift the pinecone and allow excess mixture to drip back into the bowl.
- Place the coated pinecone on the newspaper to dry.
- Allow pinecones to dry completely, which may take 24-48 hours depending on humidity.
- Once dry, you can attach wire or twine for hanging if desired.
Notes
- For a more frosted look, you can lightly spray pinecones with hairspray before dipping them in the Epsom salt mixture.
- Ensure pinecones are clean and dry before starting.
- Work in a well-ventilated area.
- Prep Time: 15 min
- Cook Time: 0 min
- Category: Crafts
- Method: Dipping
- Cuisine: N/A
Nutrition
- Serving Size: 1 pinecone
- Calories: 0
- Sugar: 0g
- Sodium: 0mg
- Fat: 0g
- Saturated Fat: 0g
- Unsaturated Fat: 0g
- Trans Fat: 0g
- Carbohydrates: 0g
- Fiber: 0g
- Protein: 0g
- Cholesterol: 0mg
Keywords: snow-flocked pinecones, DIY pinecones, winter decor, holiday crafts, Epsom salt crafts, natural decor