
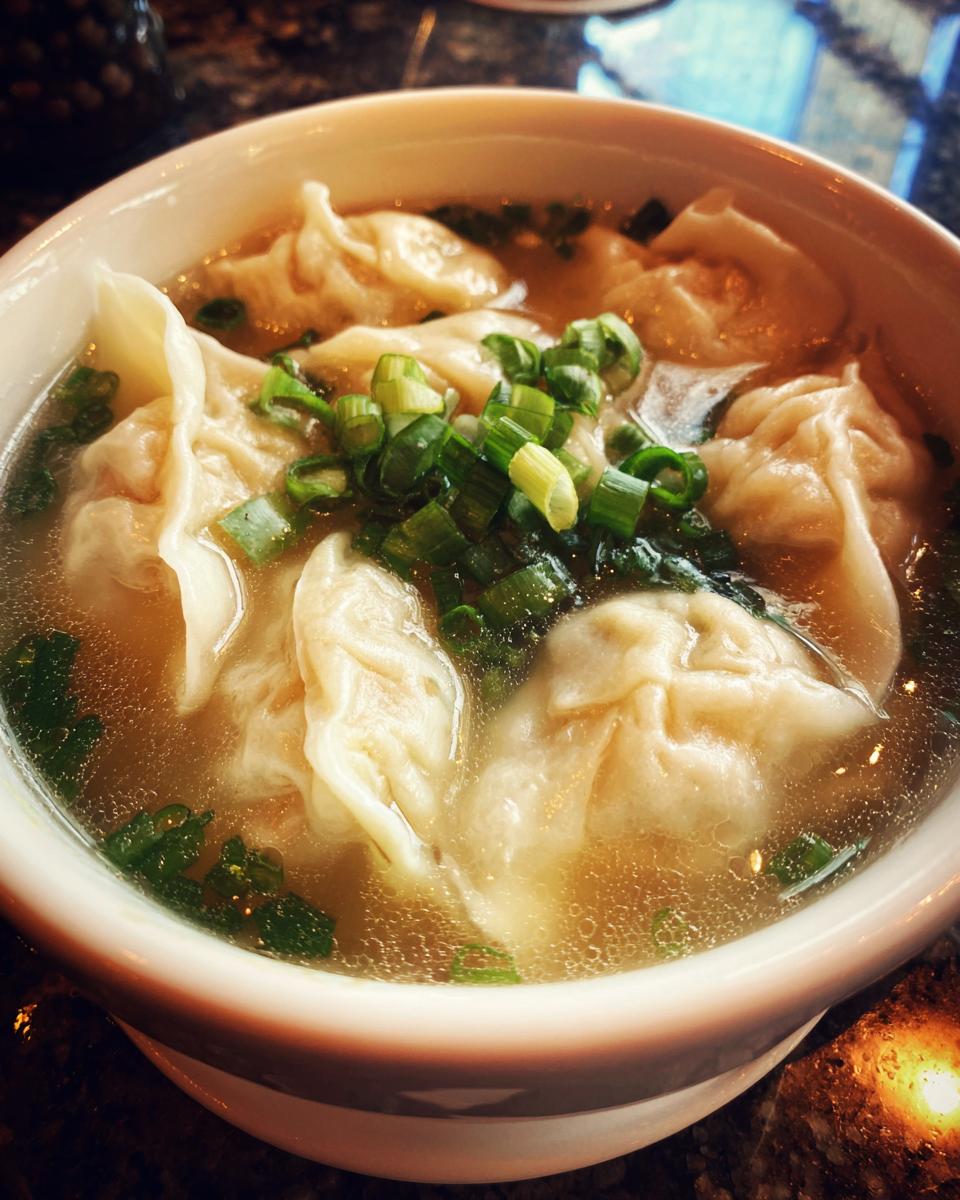
Okay, so let me tell you about one of my all-time favorite comfort foods: *Gyoza Soup (Japanese Dumpling Soup)*! I first stumbled upon it at a tiny izakaya (that’s a Japanese pub, for those not in the know!) in a little town during my college study abroad. It was a cold, rainy night, and one slurp of that warm, savory broth and I was hooked! I’m telling you, it’s so quick and easy to make at home, you’ll be wondering why you didn’t try it sooner. Plus, it’s super versatile – you can really make it your own!
Why You’ll Love This Easy *Gyoza Soup (Japanese Dumpling Soup)* Recipe
Honestly? This *Gyoza Soup* is a total winner. It’s become a weeknight staple in my house, and I bet it will in yours, too! Here’s why you’re gonna fall head over heels for this recipe:
- Seriously Quick: From fridge to table in under 30 minutes. Perfect for those busy nights!
- Super Simple Ingredients: If you cook even a little, you’ll probably have most of the stuff already!
- Flavor Chameleon: Want more veggies? Done! Spicy kick? You got it!
- Ultimate Comfort Food: Seriously, it’s like a warm hug in a bowl. Pure bliss!
Essential Ingredients for Delicious *Gyoza Soup (Japanese Dumpling Soup)*
Alright, so here’s what you’ll need to make this magic happen. Don’t worry, the ingredient list is pretty basic, I promise! You probably have most of it already. This *Gyoza Soup* doesn’t require a whole grocery run, which is always a bonus, right?
- Sesame oil: Just a tablespoon, and trust me, it’s key for that authentic flavor.
- Onion: One medium onion, chopped.
- Garlic: Two cloves, minced – gotta have that garlicky goodness!
- Chicken broth: About 4 cups – or veggie broth if you’re keeping it meat-free.
- Water: One cup.
- Soy sauce: About a tablespoon, to taste.
- Grated ginger: A teaspoon of freshly grated ginger, yum!
- Salt & pepper: To taste!
- Frozen gyoza: One package (about 20 dumplings).
- Green onions: A few, sliced, for the perfect finish.
Step-by-Step Instructions: How to Make *Gyoza Soup (Japanese Dumpling Soup)*
Okay, now for the fun part! This *Gyoza Soup* is so simple, even if you’re a beginner cook, you’re gonna nail it. Just follow these easy steps and you’ll be slurping up deliciousness in no time. I promise, the hardest part is waiting for it to cool down enough to eat!
Preparing the Soup Base
First things first! Grab that pot, and put it over medium heat. Pour in your sesame oil – be careful, it splatters! Next, toss in the chopped onion, and cook it until it softens, usually about 3-4 minutes. Then, add the minced garlic and grated ginger, and cook that for about a minute, until the smells start to make your mouth water. Next, pour in the chicken broth and water, and add the soy sauce, salt, and pepper.
Cooking the Gyoza Dumplings
Time for the main event: the dumplings! Bring that soup base up to a boil, then carefully add those frozen gyoza. Don’t worry if they sink at first, that’s normal. Now, just let them cook until they float to the surface and are heated all the way through – usually about 5-7 minutes. You’ll see the magic happen right before your eyes, and it gives the broth a beautiful, rich flavor.
Finishing Touches and Serving
Almost there, friends! Once the dumplings are cooked, it’s time to make it pretty! Right before serving, sprinkle those sliced green onions on top – it adds a nice fresh pop! And that’s it! Ladle the *Gyoza Soup* into bowls and serve it right away. You can totally add a squeeze of lemon juice for a bit of extra brightness. Don’t forget your chopsticks, and get ready for a truly amazing meal.

Tips for Perfecting Your *Gyoza Soup (Japanese Dumpling Soup)*
Want to make your *Gyoza Soup* absolutely stellar? Here are a few tricks I’ve learned over the years. First off, get yourself some decent quality chicken broth – it makes a HUGE difference in the flavor! Also, don’t be shy with the ginger! Freshly grated is best, trust me. If you’re feeling it, a dash of chili oil adds a nice little kick. And finally, when you add the gyoza, try not to overcrowd the pot; otherwise, they might stick together. Be gentle, and your soup will be perfect.
Ingredient Notes and Substitutions for *Gyoza Soup (Japanese Dumpling Soup)*
Okay, let’s talk about the stars of the show and what you can do if you’re missing something! For sesame oil, I like the toasted kind – it gives the most amazing, nutty flavor. But if you only have regular sesame oil, don’t worry, it’ll still be delicious! As for the gyoza, any brand of frozen dumplings will work. I’m partial to these (but I can’t provide a URL, so… use whatever you like!), but really, use what you can find. Need a soy-free option? Tamari works perfectly! It’s a lifesaver.
Variations to Spice Up Your *Gyoza Soup (Japanese Dumpling Soup)*
Okay, so you think you’re ready to get crazy with your *Gyoza Soup*? Excellent! This recipe is super adaptable, and you can really make it your own. Want some veggies? Throw in some sliced mushrooms, spinach, or even some shredded carrots when you add the broth. Looking for more protein? Cook up some thinly sliced chicken or tofu and toss it in. Spicy food fan? Add some chili garlic sauce, sriracha, or a pinch of red pepper flakes to really get things hot and flavorful. Make it rain flavor!
Make-Ahead and Storage Tips for *Gyoza Soup (Japanese Dumpling Soup)*
Listen, life gets busy, and I totally get it. Thankfully, you can totally prep parts of this *Gyoza Soup* ahead of time. You can chop all your veggies the night before and store them in the fridge. Also, feel free to make the soup base (the broth with the onions, garlic, and ginger) a day or two in advance – just store it separately in the fridge. That way, all you have to do is heat it up and add the dumplings when you’re ready to eat!
As for leftovers? Great news! This soup keeps surprisingly well. Just store it in an airtight container in the fridge for up to three days. Keep in mind that the gyoza can get a little soft as they sit in the broth, but it still tastes amazing! Reheat gently on the stovetop or in the microwave. Easy peasy!

Frequently Asked Questions About *Gyoza Soup (Japanese Dumpling Soup)*
Got questions about this amazing *Gyoza Soup*? I figured you might! It’s so good, and sometimes, simple things can seem tricky. Don’t worry, I’ve got you covered. Here are some of the most common questions I get asked, so you can make your *Gyoza Soup* perfect, every single time. And trust me, once you make it the first time, you’ll be making it again and again.
Can I use fresh gyoza instead of frozen?
Absolutely! You totally can use fresh gyoza. Just be aware that cooking times might vary a little. Fresh gyoza will probably cook a bit faster than frozen, so keep an eye on them. The important thing is that those beautiful little *gyoza* are cooked all the way through before you start slurping down your *soup*! You can’t go wrong.
What vegetables can I add to gyoza soup?
Oh, the possibilities! You can add so many veggies to your *Gyoza Soup*! I love adding mushrooms, like shiitake or cremini, when I cook the onions. Spinach or bok choy are also fantastic additions – just toss them in towards the end to wilt them. Carrots, green beans, edamame…basically, anything you like! Get creative!
How do I make the soup spicier?
Spice it up! If you like things with a kick, you have many options! Add a dash of chili oil, some sriracha, or a pinch of red pepper flakes to the broth. You can also add a finely chopped fresh chili pepper when you’re sautéing the onions and garlic, just be careful how much you use. A little goes a long way. More heat, more fun!

Estimated Nutritional Information for *Gyoza Soup (Japanese Dumpling Soup)*
Alright, so here’s a rough estimate of what you’re looking at nutritionally. Keep in mind, this is just a quick guide, of course! Per serving (one yummy bowl), you’re probably looking at around 250 calories, 10g of fat, and about 15g of protein. But hey, don’t quote me on it, okay? It’s all approximate!
Print
Peppermint Bark Stuffed Oreo Balls
- Total Time: 25 min
- Yield: 24 servings 1x
- Diet: Vegetarian
Description
A festive and easy no-bake treat combining the flavors of peppermint and chocolate.
Ingredients
- 1 package (14.3 ounces) Oreo cookies
- 1 package (8 ounces) cream cheese, softened
- 1 cup semi-sweet chocolate chips
- 1/2 cup peppermint baking chips
- 1/4 cup crushed candy canes (optional)
Instructions
- Crush Oreo cookies into fine crumbs using a food processor or by placing them in a zip-top bag and crushing with a rolling pin.
- In a large bowl, mix the Oreo crumbs and softened cream cheese until well combined.
- Roll the mixture into 1-inch balls and place them on a baking sheet lined with parchment paper.
- Chill the balls in the refrigerator for at least 30 minutes.
- Melt the semi-sweet chocolate chips and peppermint baking chips together in a microwave-safe bowl, stirring every 30 seconds until smooth.
- Dip each chilled Oreo ball into the melted chocolate mixture, ensuring it is fully coated.
- Place the coated balls back on the parchment-lined baking sheet.
- Sprinkle with crushed candy canes, if desired, before the chocolate sets.
- Refrigerate until the chocolate is firm.
Notes
- For a smoother coating, you can add a teaspoon of vegetable oil to the melted chocolate.
- Store the finished treats in an airtight container in the refrigerator.
- Prep Time: 25 min
- Cook Time: 0 min
- Category: Dessert
- Method: No-Bake
- Cuisine: American
Nutrition
- Serving Size: 1 ball
- Calories: 150
- Sugar: 15g
- Sodium: 50mg
- Fat: 9g
- Saturated Fat: 5g
- Unsaturated Fat: 4g
- Trans Fat: 0g
- Carbohydrates: 17g
- Fiber: 1g
- Protein: 2g
- Cholesterol: 10mg
Keywords: Peppermint Bark Stuffed Oreo Balls, no-bake cookies, chocolate treats, holiday desserts, easy recipes, Oreo desserts, peppermint chocolate