
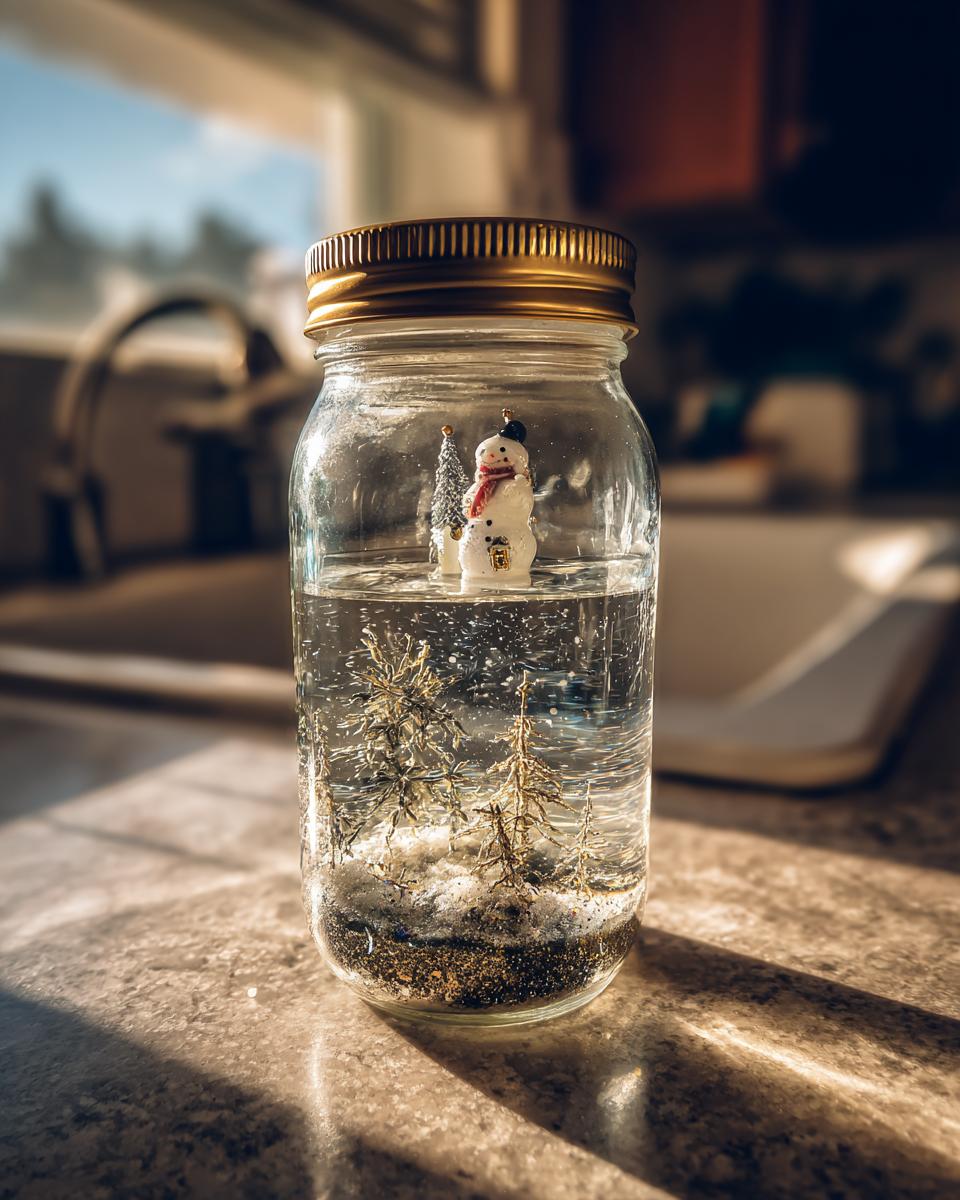
There’s just something magical about shaking up a snow globe, right? Watching that perfect flurry of glitter dance around a tiny scene always brings a smile to my face. And guess what? You can totally capture that magic yourself with these super simple DIY Snow Globe Jars! Seriously, these are such a fun little project, perfect for getting everyone involved, from the littlest hands to us grown-ups who still love a good bit of sparkle. Forget those store-bought ones; creating your own personalized, festive decor with just a few bits and bobs from around the house is unbelievably satisfying. I remember making these with my niece one rainy afternoon, and her face lit up like a Christmas tree when her little unicorn started to “snow.” It’s that pure joy I want you to feel!
Why You’ll Love Making DIY Snow Globe Jars
Honestly, why wouldn’t you want to make these? They’re ridiculously easy, which is a huge win in my book!
- So simple to make: Seriously, the steps are a breeze.
- Totally personal: You get to pick *exactly* what goes inside.
- Festive fun: They add such a cute, magical touch to any space!
- Super affordable: Uses stuff you probably already have lying around!
Gather Your Supplies for DIY Snow Globe Jars
Okay, ready to make some magic? You don’t need much for these adorable DIY Snow Globe Jars! Grab these simple things:
- A super clean glass jar with a lid that screws on TIGHTLY. Seriously, no leaks allowed!
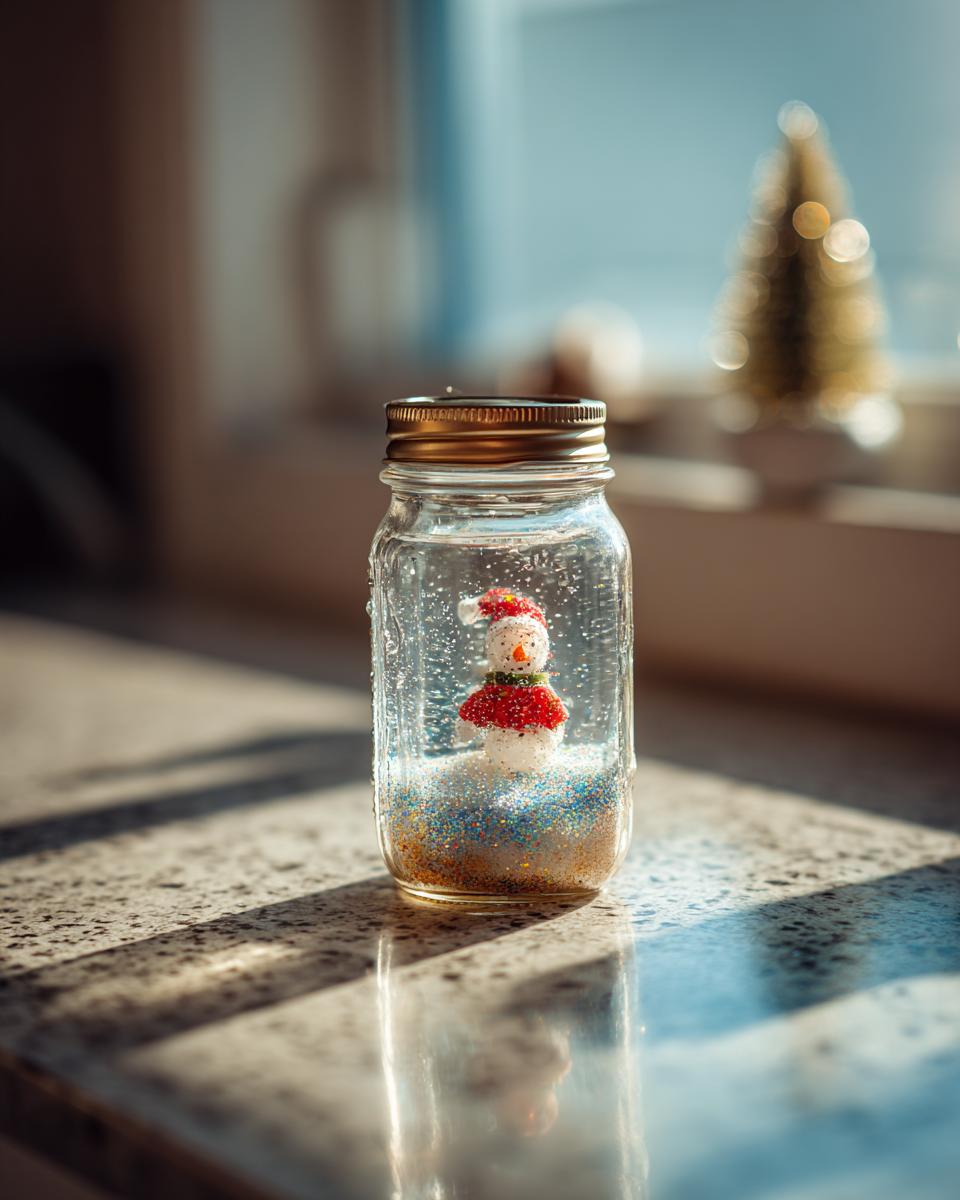
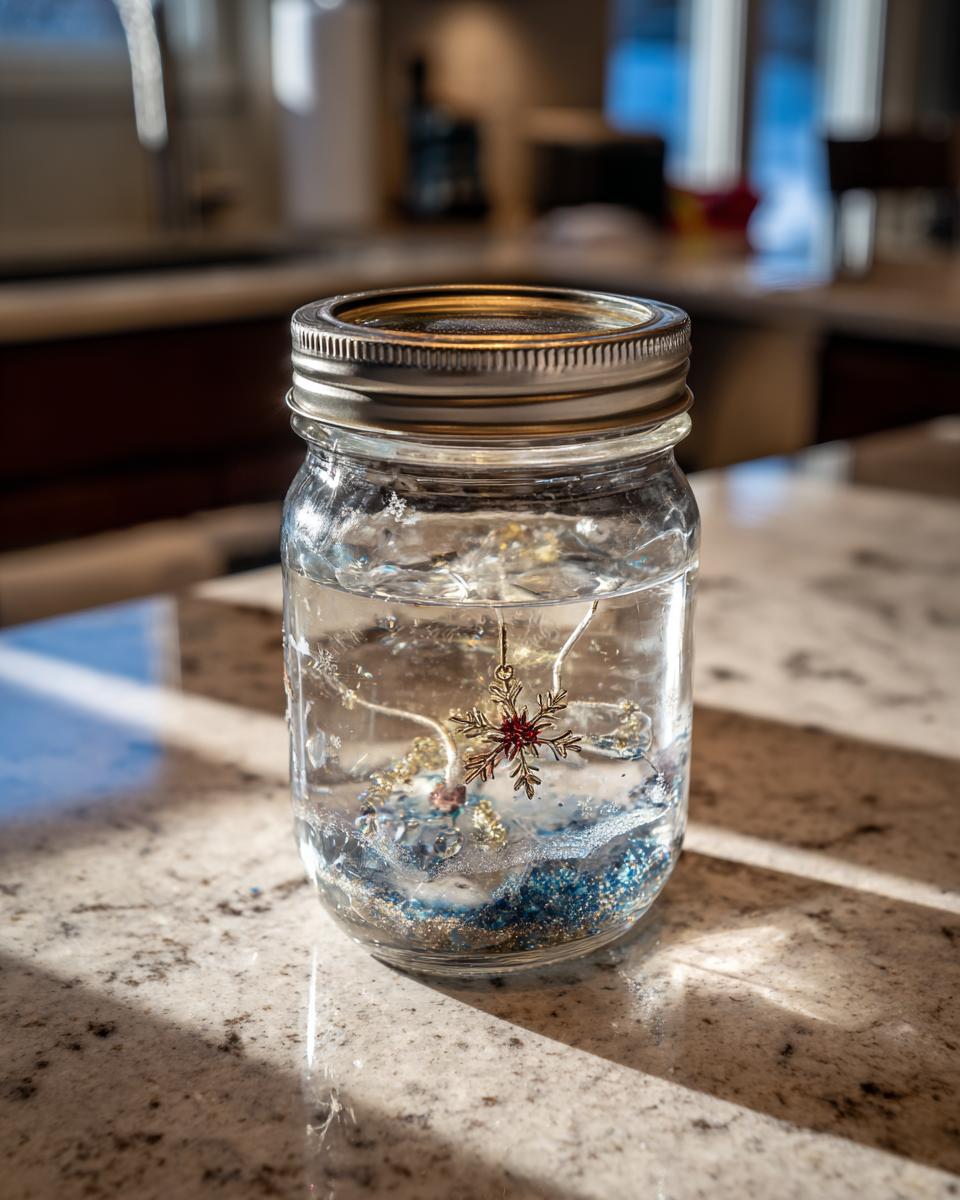
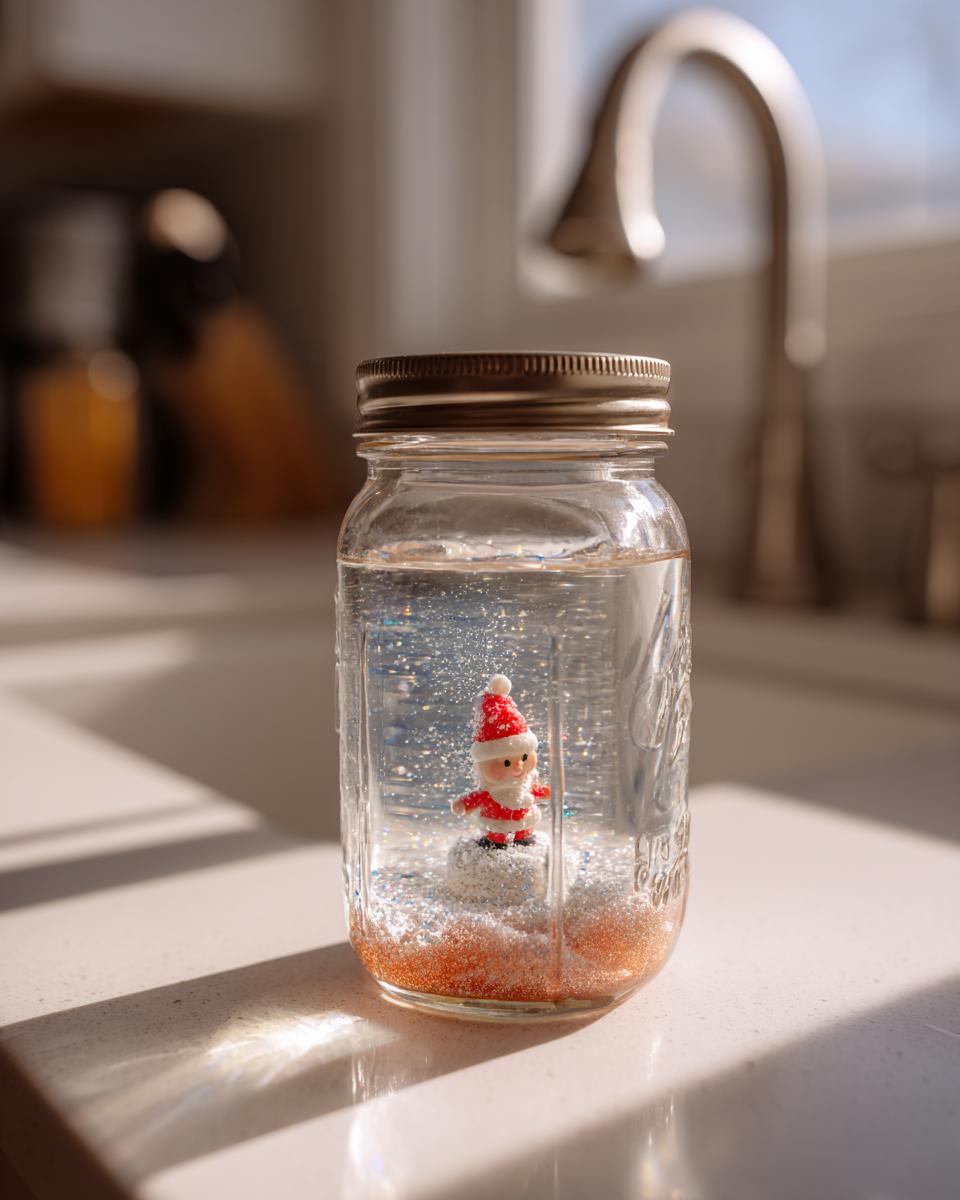
- Your chosen tiny figurine or object. Think little plastic animals, mini Christmas ornaments, or even a cute button!
- Glitter! You’ll want a bit of fine glitter for that snow effect and some chunky glitter for extra flair.
- Glycerin (optional but nice!). This little trick makes the glitter fall slower, like real snow. You can find it at most craft or drug stores.
- Water. Just regular tap water is fine.
- A hot glue gun and plenty of glue sticks! This is what holds your little world together.
See? Easy peasy! You probably have most of this already.
Step-by-Step Guide to Creating Your DIY Snow Globe Jars
Alright, let’s get down to the fun part – making your very own magical snow globe! It’s like a little craft party for your hands. Don’t worry, it’s way easier than it looks, and you’ll be shaking your creation before you know it.
Securing Your Figurine
First things first, grab that jar lid and your cute little figurine. Pop a generous blob of hot glue right onto the inside of the lid where you want your object to sit. Press your figurine firmly into the glue and hold it for a good minute. You want it stuck fast! Let it dry for a good 10-15 minutes, just to be sure it’s not going anywhere. Give it a gentle wiggle to check!
Adding the Sparkle and Fall
Now, it’s time for the sparkle! Sprinkle in a pinch of your fine glitter – this is your falling snow. Then, toss in a bit of chunky glitter for that extra pizzazz. If you’ve got glycerin, add about a teaspoon now. Trust me, the glycerin makes the glitter float and fall so much more gracefully, looking way more authentic. You can always add more glitter if you’re feeling extra festive!
Filling and Sealing Your DIY Snow Globe Jar
Carefully fill your jar almost to the very top with water. Leave just a little bit of space – maybe a centimeter or so – so the water doesn’t all gush out when you put the lid on. Now, this is super important: screw that lid on as TIGHTLY as you possibly can. You don’t want any little drips escaping, do you? For extra security, especially if you’re giving it as a gift, you can run some hot glue around the outside edge of the jar rim *before* you screw the lid on. It’s a great way to ensure a really solid seal.
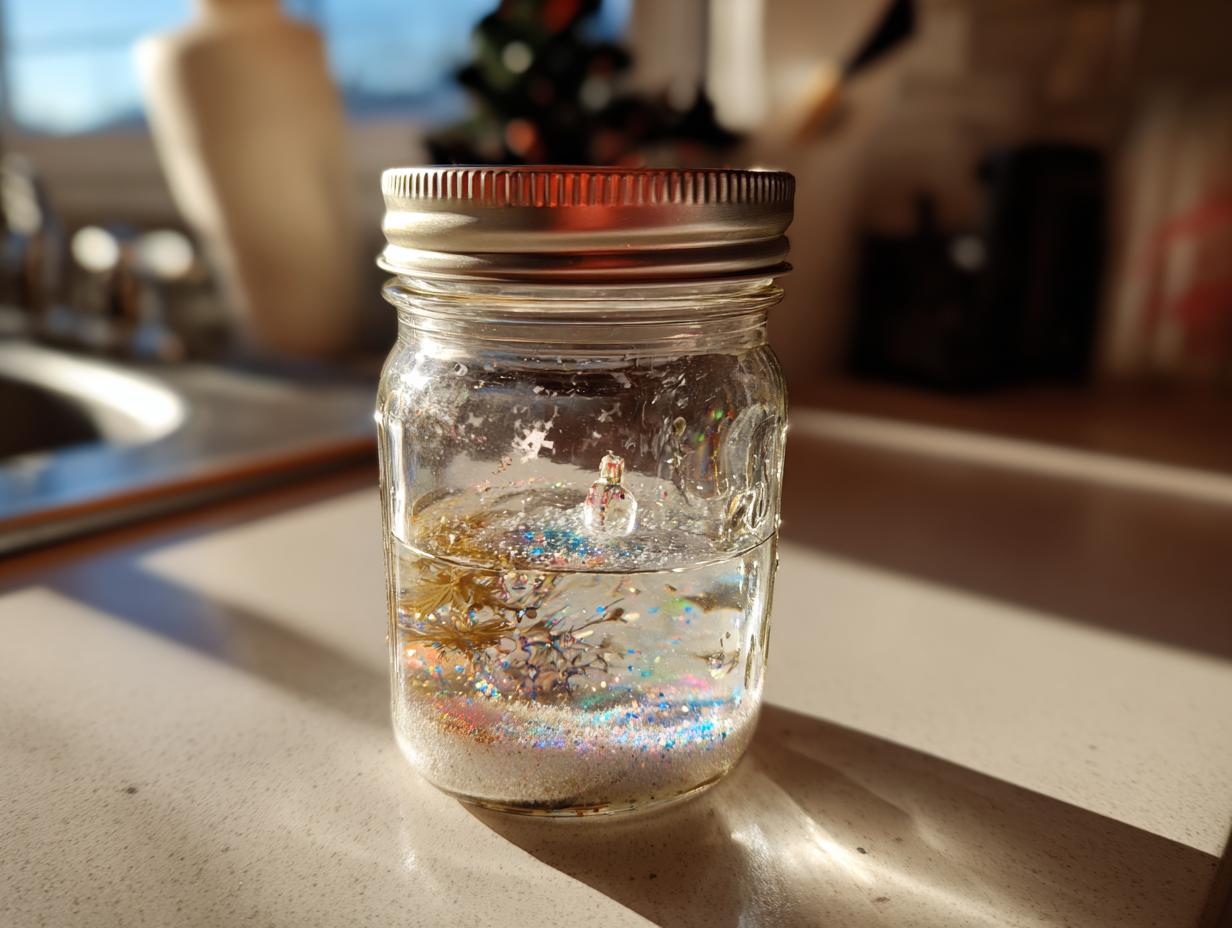
Bringing Your DIY Snow Globe Jars to Life
And here it is – the grand finale! Turn your jar upside down. Give it a gentle shake and watch all that lovely glitter swirl around your tiny scene. How cool is that?! It’s like a miniature winter wonderland right in your hands. You’ve officially made your own DIY Snow Globe Jars, and they look amazing! Just keep shaking and enjoying.
Tips for Perfect DIY Snow Globe Jars
Making these DIY Snow Globe Jars is pretty fool-proof, but a few little tricks up my sleeve can make yours extra special and totally leak-free. First off, that lid! I can’t stress enough how important it is to have a lid that seals super tight. If you’re worried about leaks, my go-to move is a little extra hot glue around the rim before screwing it on – it’s like a little insurance policy! Also, think about your figurine. Anything too heavy might not stay put, and watch out for figurines with delicate painted bits that might smudge in the water. For more awesome holiday crafting ideas, check out some of my spooky recipes like Brimstone Bread or make your place spooktacular with my Black Velvet Cake!
When it comes to glitter, don’t be shy! A mix of fine and chunky always looks best. And that glycerin? Oh yeah, it’s worth grabbing if you can. It makes the glitter fall like a dreamy snowfall instead of just plunking straight down. My personal tip? Always test the lid seal by filling it with just water first and letting it sit upside down for a bit before you commit to all the fiddly bits. It saves so much heartache later! And hey, if you’re looking for more ways to add a festive touch to your table, my Halloween Pasta Salad is always a hit!
Creative Variations for Your DIY Snow Globe Jars
Honestly, the possibilities for these DIY Snow Globe Jars are practically endless! It’s not just for Christmas, oh no. Think about building a whole little world! You could go all out with a spooky Halloween theme using mini plastic ghosts or pumpkins, maybe even some creepy spiders I’ve seen online. Or how about a sweet little fairy garden with tiny mushrooms and sparkly flowers? I even saw someone make one with little beach toys for a summer vibe. And don’t limit yourself to just figurines; a few colorful buttons or even some tiny shells could be super cute. If you’re feeling inspired by a particular season, you could use fall colors with pumpkin-themed bits, or go for a summery feel with bright colors and berry-inspired glitter. My niece even wants to make one with some of the little toy bugs from that funky potato recipe we made!
Frequently Asked Questions About DIY Snow Globe Jars
Got questions about making these little sparkle-fests? I’ve got answers! It’s always good to chat through any worries before you dive in.
Can I use plastic figurines in my DIY Snow Globe Jars?
Oh, absolutely! Plastic figurines are actually the best kind to use for your homemade snow globe. They hold up really well in the water and are super easy to find in all sorts of shapes and sizes. Just make sure they’re not too heavy, and that any paint isn’t likely to smudge off easily. Test it with a little dip in water first!
How long will the water in my glitter jar stay clear?
That’s a great question! If you use clean water and seal your jar super tight, the water should stay clear for quite a while. If you notice it starting to look a bit murky after a few weeks or months, you can always try unscrewing the lid (carefully!), dumping out the cloudy water, giving it a rinse if needed, and refilling with fresh water. For a real treat, using distilled water can sometimes help it stay clearer for longer. These glitter jars are pretty forgiving!
What if the lid on my DIY Snow Globe Jar leaks?
Ugh, leaks are the worst! The most important thing is to use a jar with a really good, tight-fitting lid. If your lid is a bit questionable, or you just want extra peace of mind, here’s my best tip: before you screw the lid on permanently, run a bead of hot glue all around the edge of the jar’s mouth. It creates a super strong seal and usually does the trick! You can also try a thicker glycerin, which can sometimes help keep things from sloshing out as easily.
Can I put anything other than figurines in my snow globe?
You bet! I’ve seen people put all sorts of fun things in their DIY snow globes. Little plastic flowers, tiny toy cars, even little DIY paper cutouts or small sealed plastic charms can look amazing. You can get really creative with it! My friend made a super cute one with little LEGO bits for her son. Just make sure whatever you choose is water-safe and won’t break down over time.
Can I make these for gifts?
Yes, yes, and YES! These DIY Snow Globe Jars make the most adorable, personalized gifts. Just remember to really secure that lid – maybe even glue it shut if you’re confident you won’t need to change the water. They’re perfect for birthdays, holidays, or just because! Pair them with some yummy cookies or a decadent lava cake for an extra special treat!
Estimated Nutritional Information
Okay, so when we talk about the nutrition for these adorable things, it’s a bit of a funny one! Since your fantastic DIY Snow Globe Jars are purely decorative and not something we’re actually eating (thank goodness, right?), the nutritional info is pretty much zilch. Think of it as a little craft project with zero calories, zero sugar, and zero fat. These numbers below are just a reminder that this is for visual enjoyment, not for munching!
- Serving Size: 1 Snow Globe
- Calories: 0
- Sugar: 0g
- Sodium: 0mg
- Fat: 0g
- Carbohydrates: 0g
So go ahead and enjoy the sparkle without a worry in the world! If you’re craving something delicious to snack on after your crafting session, my blueberry muffins are always a fantastic choice!
Share Your Creations!
Alright, now that you’ve made your sparkling DIY Snow Globe Jars, I absolutely NEED to see them! Did you go whimsical with unicorns? Or maybe spooky with little ghosts? Hop onto social media and tag me – I can’t wait to see your amazing creations! You can also drop a comment below and tell me all about your crafting adventure. And if you loved this project, please consider leaving a star rating – it really helps other folks find these fun crafts! For more great ideas, check out my Buddha Bowl recipe, my easy shrimp pasta, or my comforting tomato basil soup!
Print
DIY Snow Globe Jars
- Total Time: 15 min
- Yield: 1 snow globe 1x
- Diet: Vegetarian
Description
Create your own festive snow globe jars with this simple guide.
Ingredients
- 1 clean glass jar with a tight-fitting lid
- 1 small figurine or object
- Glitter (fine and chunky)
- Glycerin (optional, for slower glitter fall)
- Water
- Hot glue gun and glue sticks
Instructions
- Secure your figurine to the inside of the jar lid using hot glue. Let it dry completely.
- Add a pinch of fine glitter and a pinch of chunky glitter to the jar. If using, add a teaspoon of glycerin.
- Fill the jar almost to the top with water.
- Carefully screw the lid onto the jar, ensuring it is tight.
- Turn the jar upside down and shake gently to see your snow globe in action.
Notes
- Test the lid’s seal before adding water to prevent leaks.
- Experiment with different figurines and glitter combinations.
- For a more permanent seal, you can apply hot glue around the rim of the jar before screwing on the lid.
- Prep Time: 15 min
- Cook Time: 0 min
- Category: Crafts
- Method: Assembly
- Cuisine: N/A
Nutrition
- Serving Size: 1 snow globe
- Calories: 0
- Sugar: 0g
- Sodium: 0mg
- Fat: 0g
- Saturated Fat: 0g
- Unsaturated Fat: 0g
- Trans Fat: 0g
- Carbohydrates: 0g
- Fiber: 0g
- Protein: 0g
- Cholesterol: 0mg
Keywords: DIY snow globe, jar craft, holiday craft, glitter jar, homemade snow globe