

Oh, the smell of Christmas! It just fills my heart, doesn’t it? For me, it’s never truly the holidays until I’ve whipped up a batch of these amazing Candy Cane Cookies – Festive and Fun Christmas Treats. They’re like little edible decorations that taste as good as they look, with that perfect hint of peppermint. Every year, sitting around the kitchen table, my kids and I twist these doughs together, giggling when they don’t quite look like candy canes, which is part of the fun! They’re just so cheerful and always disappear faster than Santa’s sleigh on Christmas Eve.
Why You’ll Love This Candy Cane Cookie Recipe
Honestly, why wouldn’t you love these? They’re ridiculously fun to make, especially if you’ve got little helpers around. Plus, they look absolutely stunning on a Christmas cookie platter, bringing that pop of festive color. The flavor is just spot on – that perfect sweet sugar cookie with a bright whisper of peppermint. They’re always a huge hit at holiday parties and make amazing gifts for neighbors and friends. Trust me, these cookies are a total crowd-pleaser!
Gather Your Ingredients for the Candy Cane Cookie Recipe
Okay, so to get these magic candy canes made, you’ll need these bits and bobs:
- 1 cup unsalted butter, make sure it’s softened up nicely
- 1 cup granulated sugar
- 1 large egg
- 1 teaspoon vanilla extract
- 2 1/2 cups all-purpose flour
- 1 teaspoon baking powder
- 1/2 teaspoon salt
- 1/4 teaspoon peppermint extract (this is key for that candy cane zing!)
- Red food coloring (gel works best for vibrant color!)
- A handful of crushed candy canes for that extra sparkle and crunch
Essential Equipment for Making Festive Candy Cane Cookies
To get these beauties perfectly shaped and baked, you’ll want to have a few things ready. An electric mixer, either a stand mixer or a hand mixer, really makes creaming the butter and sugar a breeze. You’ll also need a couple of sturdy baking sheets – I like to use at least two so I can get a second batch baking while the first one cools. Don’t forget parchment paper; it’s a lifesaver for keeping cookies from sticking and makes clean-up so much easier! And finally, a wire cooling rack is essential so your cookies don’t get soggy bottoms.
Step-by-Step Guide to Your Festive Candy Cane Cookie Recipe
Alright, let’s get down to making these adorable candy cane cookies! This is where the magic really happens. It’s not too complicated, but a few little tricks make all the difference. Follow these steps and you’ll have a whole batch of these festive beauties ready in no time. Baking these is almost as fun as eating them, I promise! If you’re looking for more fun cookie ideas, check out my soft sugar cookies too!
First things first, grab your softened butter and sugar. You want the butter to be nice and soft, not melted, so it creams up properly. Beat them together really well in your mixer until it’s all light and fluffy – kind of like pale yellow clouds. Then, you’ll add in that egg and the vanilla extract, mixing again until everything is nicely combined. In a different bowl, just quickly whisk together your flour, baking powder, and salt. This makes sure the leavening is all distributed evenly.
Preparing the Cookie Dough Base
First things first, grab your softened butter and sugar. You want the butter to be nice and soft, not melted, so it creams up properly. Beat them together really well in your mixer until it’s all light and fluffy – kind of like pale yellow clouds. Then, you’ll add in that egg and the vanilla extract, mixing again until everything is nicely combined. In a different bowl, just quickly whisk together your flour, baking powder, and salt. This makes sure the leavening is all distributed evenly.
Coloring and Chilling the Dough
Now for the fun part! Take your dough and divide it right down the middle. To one half, mix in that yummy peppermint extract – it’s going to give us that quintessential candy cane flavor! To the other half, we’re going to add our red food coloring. If you’re using gel coloring, start with a little dollop and mix it in until you get a nice, vibrant red. Wrap both dough balls up and pop them in the fridge for at least 30 minutes. This chilling is super important; it makes it so much easier to handle the dough later on!

Shaping Your Festive Candy Cane Cookies
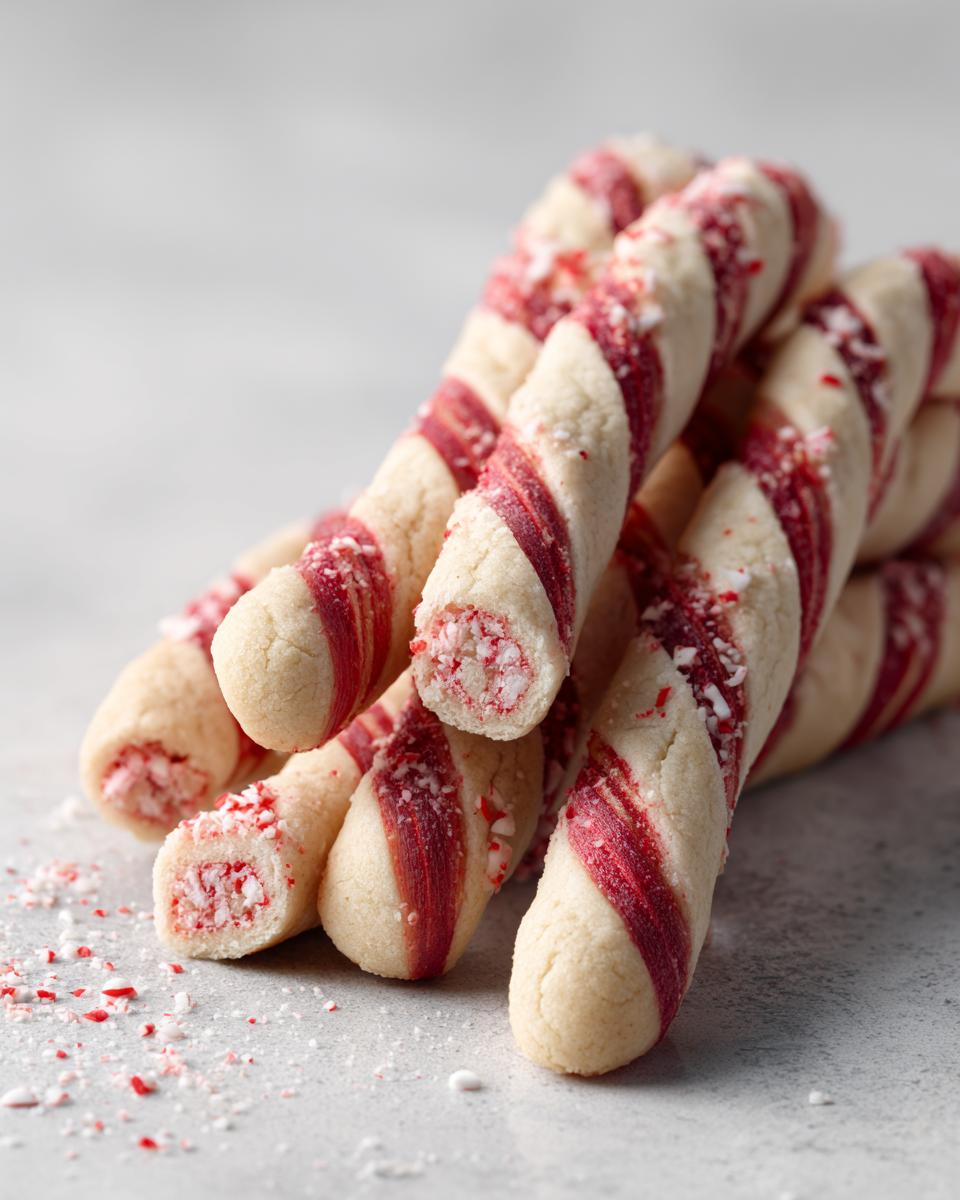
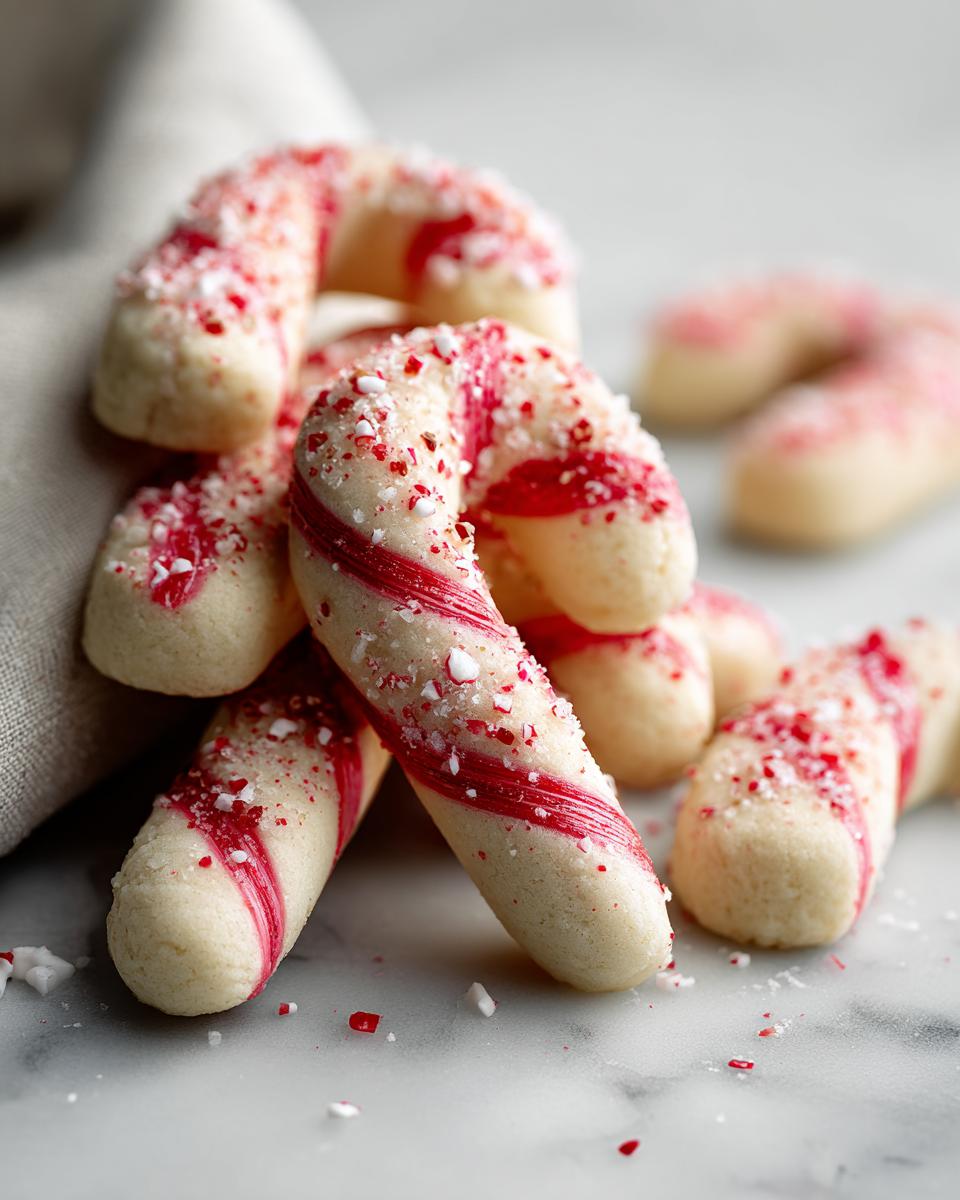
Once your doughs are chilled and firm, it’s time to get creative! Lightly flour your surface and roll out each color into a long rope, about 1/4 inch thick. Try to make them roughly the same length. Now, gently lay the red rope right next to the white one. Carefully pinch them together along the seam, then twist them together like you’re braiding! It’s okay if they aren’t perfectly even – that’s part of their charm. Then, just bend the twisted rope into a classic candy cane shape!
Baking and Cooling Your Christmas Cookies
Get your oven preheated to 350°F (175°C). Place your shaped candy canes on a baking sheet lined with parchment paper, leaving a little space between them. Bake for about 8 to 10 minutes. You’re looking for the edges to be just lightly golden. Don’t overbake them, or they’ll lose that soft, chewy texture! Let them cool on the baking sheet for a few minutes – this helps them firm up a bit – before carefully transferring them to a wire rack to cool completely.
Decorating Your Candy Cane Cookies
This is the grand finale and where your cookies get that perfect finishing touch! While the cookies are still just slightly warm from the oven, sprinkle them with your crushed candy canes. The warmth helps the candy cane bits stick perfectly. You can crush them yourself in a bag with a rolling pin, or even buy them pre-crushed. It adds a lovely sparkle and an extra punch of peppermint flavor that just screams Christmas! You can find more peppermint ideas here!

Tips for Perfect Candy Cane Cookie Recipe Results
Alright, home bakers, let’s talk about making sure these candy cane cookies turn out absolutely perfect every single time! I’ve learned a few things over the years, and a little bit of know-how goes a long way. Here are my top tips to make your festive treats shine:
- Butter Temperature is Key: Seriously, make sure your butter is *softened*, not melted. If it’s too cold, it won’t cream properly, and if it’s too warm, your dough will be greasy. Aim for that perfect just-soft-enough-to-press-with-your-finger stage.
- Don’t Overmix: Once you add the flour, mix *just* until it’s combined. Overmixing develops the gluten too much, which can make your cookies tough instead of tender and chewy. A few streaks of flour are okay; they’ll disappear when you shape the dough.
- Chill Out (Your Dough!): That chilling step? Super important! It firms up the dough, making it way easier to roll and twist without getting sticky and messy. Trust me, it’s worth the wait.
- Uniformity for Even Baking: Try to make your red and white dough ropes as close in thickness as possible. This helps them bake evenly, so one half doesn’t get burnt while the other is still pale.
- Watch Them Closely: Ovens can be quirky! Keep an eye on your cookies during the last few minutes of baking. They should be just lightly golden around the edges. Pulling them out a *tiny* bit early is better than overbaking for that perfect chewy texture.
- Experiment if You Like! If you don’t have peppermint extract, you can try a little almond extract or even a touch of cinnamon. And if red food coloring is a no-go, green is totally fun too! Check out my easy 3-ingredient cookies for other fun holiday ideas, or my gingerbread cookies for another festive favorite!
Ingredient Spotlight: Peppermint Extract
You know, that little zing in these candy cane cookies? That’s all thanks to the peppermint extract! It’s what gives them that classic, refreshing flavor that just screams Christmas. I always try to get a good quality one – it really makes a difference. It’s not a huge amount, just a little bit, but wow, does it transform the cookie from a simple sugar cookie to a full-on holiday treat!
Serving and Storage for Your Festive Treats
These candy cane cookies are just adorable served on a pretty holiday platter. They look amazing all by themselves, or you can tuck them in with a mix of other Christmas cookies for a real showstopper! Since they’ve got that peppermint kick and are a good sugar cookie base, they pair wonderfully with a tall glass of cold milk or even a warm cup of cocoa. For more festive morning ideas, you might want to check out these Christmas morning traditions.
Now, for keeping them fresh? Store them in an airtight container at room temperature. They’ll stay delightfully chewy and delicious for about 3-4 days. If you stack them, put a bit of parchment paper or wax paper between the layers to keep those pretty shapes from sticking to each other. They’re really quite forgiving and hold up well!
Frequently Asked Questions about Candy Cane Cookies
Got some burning questions about whipping up these festive beauties? I totally get it! Baking should be fun, not frustrating. Here are a few things folks often ask about my Candy Cane Cookie Recipe:
Can I make these without peppermint extract?
Absolutely! If peppermint isn’t your jam, or you’re out of it, you can totally skip it. The cookie will still be a delicious sugar cookie. You could also swap it for 1/4 teaspoon of almond extract for a different, but still lovely, flavor. Or, if you’re feeling adventurous, a tiny bit of lemon or orange zest could be fun!
How do I get the red color to be extra vibrant?
This is a super common question! For the brightest red, I always recommend using a gel food coloring instead of the liquid kind you get in little bottles. Gel colors are much more concentrated, so you need less to get a really intense hue. Just start with a small amount, mix it in really well, and add a tiny bit more until you get that perfect, festive red!
Can the dough be made ahead of time?
Yes, you can totally make the dough ahead of time! Once you’ve divided and colored the dough, wrap each half tightly in plastic wrap. You can store it in the refrigerator for up to 2-3 days. Just let it sit at room temperature for about 15-20 minutes before you plan to roll and twist it, so it’s a bit more pliable. It actually makes the shaping step easier!
My candy canes aren’t holding their shape well. What am I doing wrong?
Oh, the struggle is real sometimes! Usually, this happens if the dough isn’t chilled enough or if the ropes were rolled too thick. Make sure you chilled the dough for at least 30 minutes (longer is often better!). When you roll the ropes, try to keep them about 1/4-inch thick and uniform. Also, when you twist them, pinch the seam firmly. If they’re still a bit wiggly, baking them on parchment paper helps them keep their shape as they bake.
Can I use different cookie cutters or shapes?
Of course! While the candy cane shape is iconic, this dough is super versatile. You could totally roll out the red and white doughs separately, layer them, and then use any Christmas cookie cutters you love – little trees, stars, or even gingerbread people! You could also just roll thin logs and make swirls instead of candy canes. It’s all about having fun! If you’re looking for other fun Christmas shapes, you might enjoy my Christmas tree cupcakes for kids!
Nutritional Information for This Candy Cane Cookie Recipe
Just so you know, the nutrition info is always an estimate, especially since we all use slightly different ingredients and brands. But for one of these delightful candy cane cookies, you’re generally looking at around 150 calories. You’ll get about 8g of fat, 15g of sugar, and 18g of carbs, with a little bit of protein too. They’re a sweet treat, for sure, perfect for enjoying during the festive season!
Print
Candy Cane Cookie Recipe
- Total Time: 40 min
- Yield: 24 cookies 1x
- Diet: Vegetarian
Description
A fun and festive cookie recipe perfect for Christmas treats.
Ingredients
- 1 cup unsalted butter, softened
- 1 cup granulated sugar
- 1 large egg
- 1 teaspoon vanilla extract
- 2 1/2 cups all-purpose flour
- 1 teaspoon baking powder
- 1/2 teaspoon salt
- 1/4 teaspoon peppermint extract
- Red food coloring
- Crushed candy canes for decorating
Instructions
- Cream together the butter and sugar until light and fluffy.
- Beat in the egg and vanilla extract.
- In a separate bowl, whisk together the flour, baking powder, and salt.
- Gradually add the dry ingredients to the wet ingredients, mixing until just combined.
- Divide the dough in half. Add peppermint extract to one half. Add red food coloring to the other half.
- Chill both doughs for at least 30 minutes.
- Roll out each dough color separately into ropes. Twist the red and white ropes together.
- Shape the twisted dough into a candy cane.
- Place on a baking sheet lined with parchment paper.
- Bake at 350°F (175°C) for 8-10 minutes, or until the edges are lightly golden.
- Let cool on the baking sheet for a few minutes before transferring to a wire rack to cool completely.
- Decorate with crushed candy canes while the cookies are still slightly warm.
Notes
- Ensure butter is at room temperature for best creaming results.
- Do not overmix the dough once the flour is added.
- Chill the dough sufficiently to make it easier to handle.
- Adjust baking time based on your oven.
- Prep Time: 30 min
- Cook Time: 10 min
- Category: Dessert
- Method: Baking
- Cuisine: American
Nutrition
- Serving Size: 1 cookie
- Calories: 150
- Sugar: 15g
- Sodium: 50mg
- Fat: 8g
- Saturated Fat: 5g
- Unsaturated Fat: 3g
- Trans Fat: 0g
- Carbohydrates: 18g
- Fiber: 0g
- Protein: 2g
- Cholesterol: 20mg
Keywords: candy cane cookies, Christmas cookies, holiday baking, festive treats, peppermint cookies, sugar cookies