
Oh, you are going to LOVE these! There’s something so utterly charming about baking cookies that look like little veggies, isn’t there? And when it comes to garden-inspired treats, my Cabbage-Shaped Sugar Cut-Outs are an absolute garden party favorite. They’re not just adorable, they’re delicious – a classic sugar cookie recipe that’s super easy to whip up, perfect for a rainy afternoon or a special tea party. I remember making a batch for my niece’s birthday last spring, and everyone, kids and adults alike, went nuts for them. They’re simple enough that even beginner bakers can nail them, but special enough to make any occasion feel a little more magical. Trust me, these little green wonders are a guaranteed smile-maker!
Why You’ll Love These Cabbage-Shaped Sugar Cut-Outs
There are so many reasons why you’ll fall head over heels for these little green gems! They’re just too cute to resist, aren’t they?
- Adorable Cabbage Shape: Who needs boring rounds when you can have adorable little cabbages? They bring such a unique and whimsical touch to any cookie plate.
- Classic Sugar Cookie Taste: Underneath that cute exterior is a delicious, buttery sugar cookie that’s perfectly sweet and satisfying. It’s a flavor that truly everyone enjoys.
- So Easy to Whip Up: Honestly, these are super simple. The dough comes together quickly, and cutting out the shapes is a breeze, even for beginners.
- Perfect for Parties & Gifts: Whether you’re hosting a garden party, a tea party, or just want to give a sweet homemade gift, these cookies are always a hit. They just have that special something!
- Super Fun to Make: Get the kids involved! Playing with the dough, adding different shades of green, and watching them bake makes for a really fun kitchen activity.
Gather Your Ingredients for Cabbage-Shaped Sugar Cut-Outs
Alright, let’s get our little green friends ready for the oven! You don’t need anything too fancy for these; it’s mostly pantry staples. Trust me, the magic really happens when you combine these simple things.
- 1 cup granulated sugar
- 1/2 cup unsalted butter, softened (Make sure it’s nice and soft, not melted!)
- 1 large egg
- 1 teaspoon vanilla extract
- 2 1/2 cups all-purpose flour
- 1 teaspoon baking powder
- 1/4 teaspoon salt
- Green gel food coloring (Gel is best here because it gives you that vibrant color without making the dough too watery. I like to have a couple of shades on hand if you can!)
Essential Equipment for Cabbage-Shaped Sugar Cut-Outs
Before we dive into making these adorable little cabbages, let’s make sure you’ve got all your ducks in a row – or rather, your gardening tools! Having the right equipment makes the whole process so much smoother, trust me. You don’t want to be searching for a rolling pin when the dough is perfectly chilled, right?
- Mixing Bowls: You’ll need at least two. One for creaming the butter and sugar, and another for whisking your dry ingredients together.
- Measuring Cups and Spoons: Precision is key with baking, so make sure you have a good set for both dry and liquid ingredients.
- Electric Mixer (Hand or Stand): While you *could* do this by hand, an electric mixer makes creaming the butter and sugar so much easier and faster.
- Rubber Spatula or Wooden Spoon: Handy for scraping down the sides of the bowl and folding in ingredients.
- Rolling Pin: Essential for getting that dough to the perfect thickness for cutting out shapes.
- Baking Sheets: You’ll need a couple of these to get your cookies ready for baking.
- Parchment Paper: This is your best friend for preventing sticking and making cleanup a breeze!
- Cookie Cutters: You’ll need a cabbage-shaped cutter, or you can get creative with another shape and just make sure it’s roundish and leafy-looking!
Step-by-Step Guide to Making Cabbage-Shaped Sugar Cut-Outs
Alright, let’s get down to business and make these adorable little cabbages! It’s really not complicated at all, and I promise, the results are so worth it. We’ll move through this together, step by step. If you’ve ever made sugar cookies before, you’ll find this pretty familiar, just with a fun little twist!
Preparing the Sugar Cookie Dough
First things first, let’s get our dough base ready. In a large bowl, cream together that softened butter and the granulated sugar until it’s nice and fluffy. Seriously, take your time here; this step is crucial for a good texture. Then, beat in the egg and the vanilla extract until everything is well combined. Don’t rush this part! Next, in a separate bowl, whisk together your flour, baking powder, and salt. Gradually add this dry mixture to the wet ingredients, mixing on a low speed or by hand just until it all comes together into a cohesive dough. You don’t want to overmix it, or your cookies might get tough. It should look like a lovely, pliable dough.
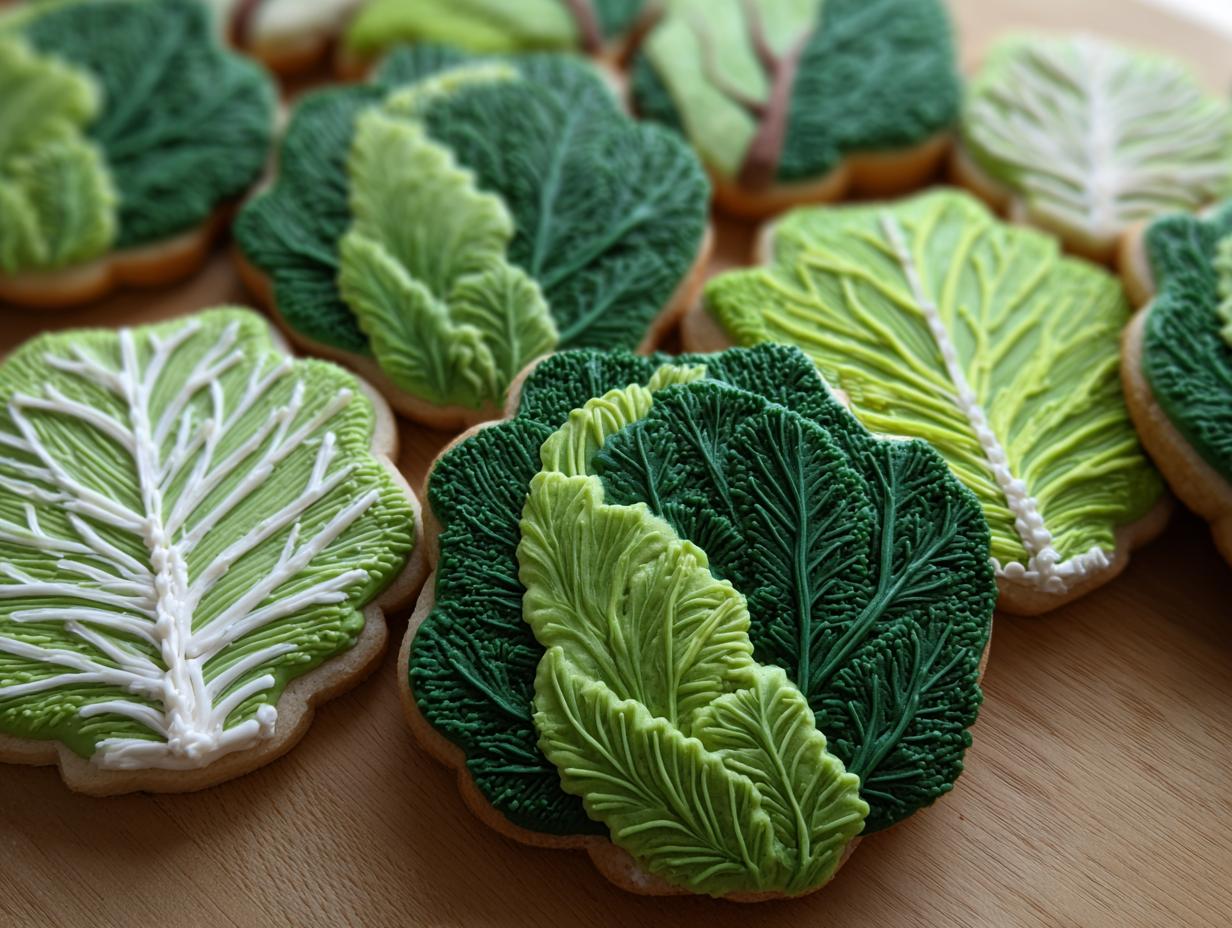
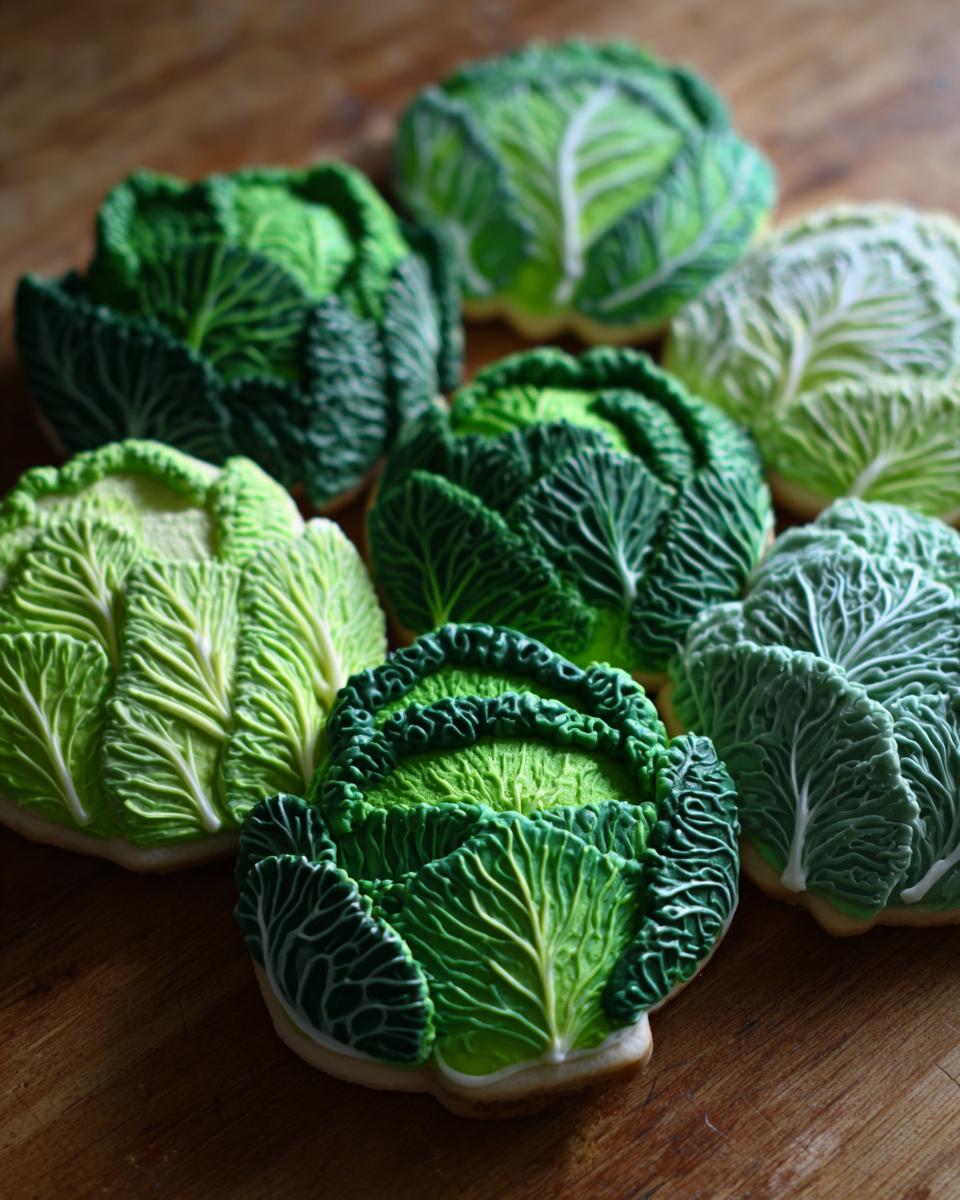
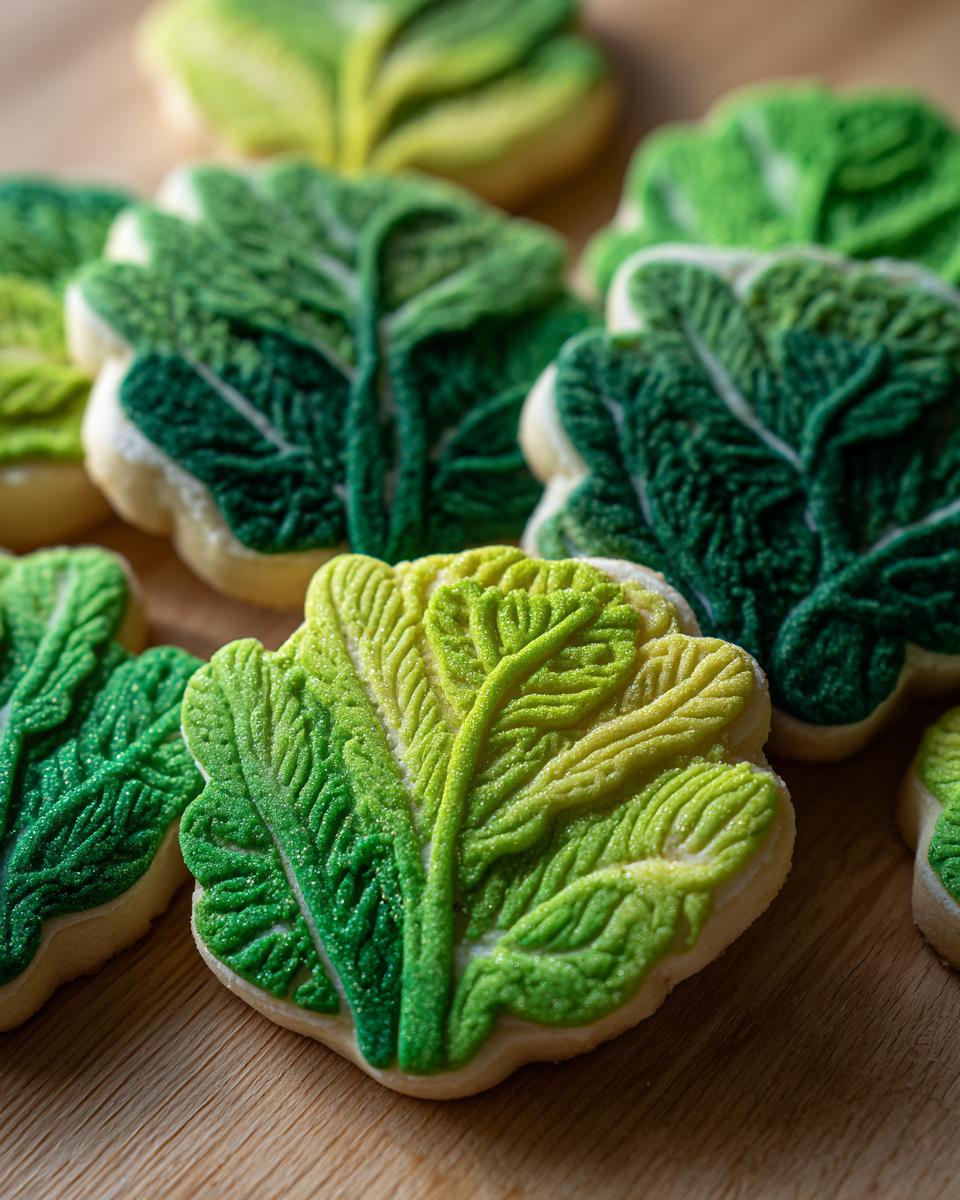
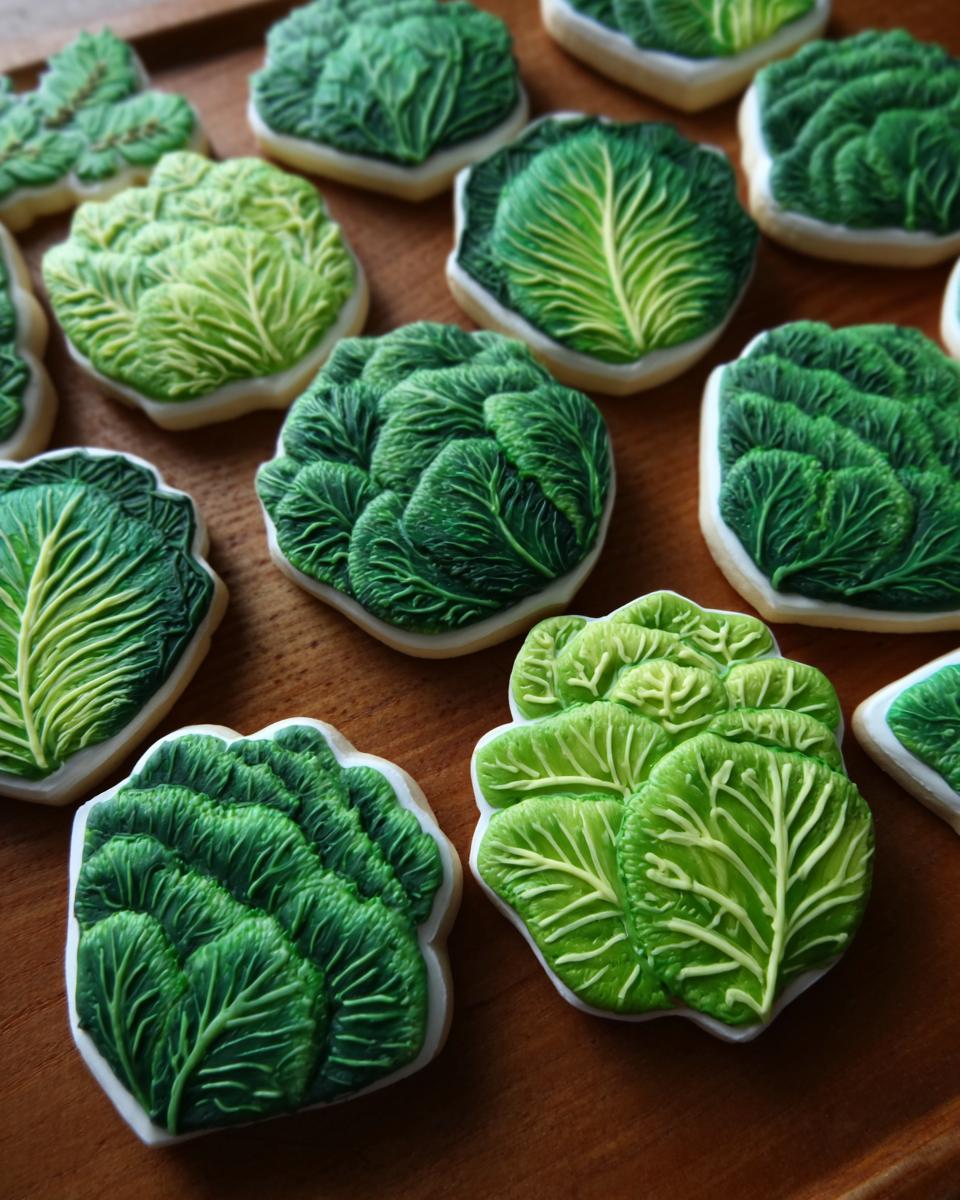
Adding the Cabbage Color
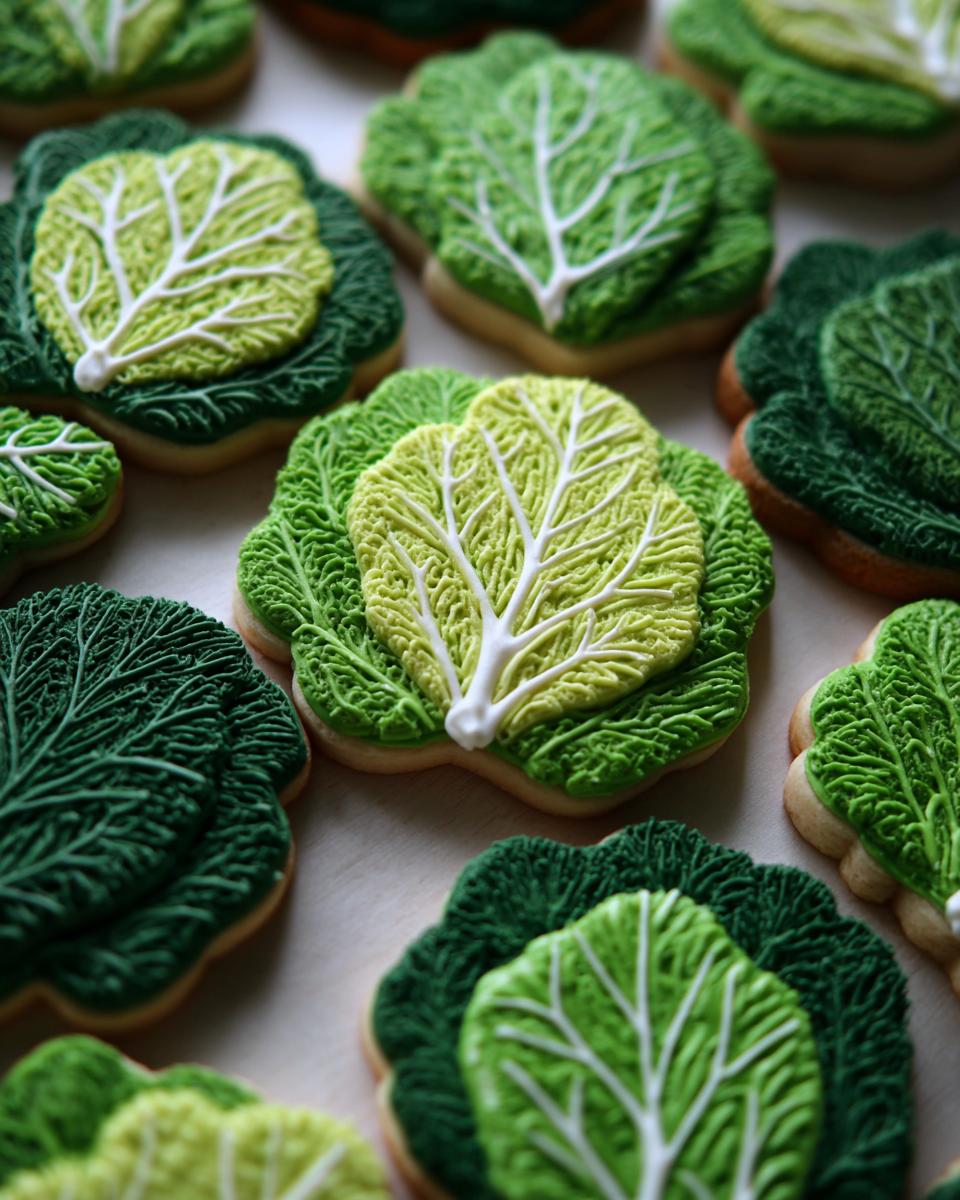
Now for the fun part – we get to make these cookies look like actual cabbages! Divide your dough into two or three portions. Take one portion (or two if you want variations of green) and add a few drops of your green gel food coloring. Start with a little and add more until you get the perfect shade of green you’re after. Gel coloring is amazing because it gives you super vibrant colors without making the dough sticky. If you want a more natural look, try using a lighter green for some and a slightly deeper, richer green for others. This is where you can really make your cabbages unique!
Shaping and Baking Your Cabbage Cookies
Once your dough is colored, it’s time for the magic to really happen. Wrap each portion of dough in plastic wrap and pop them into the fridge for at least 30 minutes. This chilling step is super important; it makes the dough much easier to handle and prevents the cookies from spreading too much while baking. Preheat your oven to 375°F (190°C) and line your baking sheets with that trusty parchment paper. On a lightly floured surface, roll out the chilled dough to about 1/4-inch thickness. Use your cabbage-shaped cookie cutter to make cute little cabbages, rerolling scraps as needed. Place them on your prepared baking sheets, giving them a little space. Bake for about 10-12 minutes, or until the edges are lightly golden and the centers look set. They’ll continue to firm up as they cool.
Tips for Perfect Cabbage-Shaped Sugar Cut-Outs Every Time
You know, even with a straightforward recipe like this, little things can make a world of difference. I’ve learned a few tricks over the years of making these cute cabbages that I just *have* to share, so you get perfect cookies every single time. Forget sad, spread-out blobs – we’re aiming for adorable, plump little cabbages!
First off, dough consistency is KEY. Make sure your butter isn’t melted; it should be soft, like for really good chocolate chip cookies. If your dough feels too sticky after mixing, don’t be afraid to add just a *tiny* bit more flour, a tablespoon at a time. And chilling? Don’t skimp on it! I usually let mine chill for at least an hour, sometimes even longer. It makes rolling and cutting so much easier, and it really helps prevent them from spreading out into sad pancakes in the oven. Think of it like letting dough have a little rest; it comes back stronger!
When you’re rolling, try to get an even thickness. That’s what makes them bake uniformly. I usually aim for about 1/4-inch. If you’re cutting out a bunch, and the dough starts to get too soft again, just pop it back in the fridge for 10-15 minutes. It’s a little extra step, but trust me, it’s worth it for those perfect shapes. And when you’re baking, keep an eye on them! They can go from perfectly baked to a little too golden really fast. You want the edges *just* starting to color, and the centers to look set, not wet. Like donuts, baking time can vary a tiny bit based on your oven. Happy baking!
Decorating Your Adorable Cabbage Cookies
Now that you’ve got these cute little cabbages baked, let’s make them pop! You can totally leave them just as they are, and they’re still super charming. But if you want to take their garden charm up a notch, here are a couple of super easy ideas. Remember how we talked about using different shades of green gel coloring? That already gives them a lovely, layered look! For a little extra flair, grab some edible markers. You can draw subtle lines on the ‘leaves’ to give them even more dimension. It’s so simple, but it makes them look extra special and realistic. Honestly, the less you do, the more they look like little natural cabbages, which is half the fun!
Frequently Asked Questions About Cabbage-Shaped Sugar Cut-Outs
Got questions about our cute little cabbage cookies? I’ve got you covered! Baking should be fun, not fussy, so let’s clear up any little doubts you might have.
Can I use liquid food coloring instead of gel?
You *can*, but I really recommend sticking with the gel kind for these cabbage cookies. Liquid food coloring has a lot more water in it, and adding too much can make your dough sticky and hard to work with. Plus, you won’t get that super vibrant, rich green color like you do with gel. If it’s all you have, use it very sparingly, and maybe add a tiny bit more flour if the dough gets too soft.
How should I store these Cabbage-Shaped Sugar Cut-Outs?
These cookies are pretty sturdy thanks to the sugar cookie base. Once they’re completely cooled, store them in an airtight container at room temperature. They should stay fresh and delicious for about a week. If you’ve decorated them with frosting, it’s still okay to keep them at room temp, but make sure the frosting is fully set before you stack them or put a lid on the container!
Can I make the dough ahead of time?
Oh, absolutely! Making the dough ahead of time is actually a great idea. You can prepare the dough (up to the point of dividing and coloring it) a day or two in advance. Just wrap it up well in plastic wrap and keep it in the refrigerator. When you’re ready to bake, just let it sit out for a few minutes to soften slightly before rolling and cutting. Chilling also makes the dough easier to handle, especially if you plan on doing lots of cutting!
Why did my cookies spread so much?
This is a common cookie issue! Usually, it happens if your butter was too soft or melted when you creamed it, or if you overmixed the dough after adding the flour. Also, make sure you chill the dough thoroughly – I can’t stress that enough! Chilling firms up the butter, which helps prevent excessive spreading. If you notice dough getting too soft while you’re cutting, just pop it back in the fridge for a bit before continuing.
Nutritional Information
Just a friendly heads-up, these numbers are approximate! Since every kitchen oven behaves a little differently, and we’re all cutting shapes with slightly different flair, the exact nutritional values can wobble a bit. But, this will give you a good idea of what you’re working with for each one of these adorable little cabbage cookies.
- Serving Size: 1 cookie
- Calories: Around 120
- Total Fat: About 5g
- Saturated Fat: Around 3g
- Trans Fat: 0g
- Cholesterol: Roughly 20mg
- Sodium: About 60mg
- Total Carbohydrates: Approximately 18g
- Dietary Fiber: 0g
- Total Sugars: Around 12g
- Protein: About 1g
So there you have it! A delicious and cute treat that’s pretty balanced for a cookie. Enjoy!